TaylorMade

DIY, Home Decor & Sewing

  • Home
  • SHOP
  • DIY & Sewing
    • For the Home
    • Sewing
    • Costumes and Holidays
    • Cricut Projects
    • Crafting
  • Parties
  • Recipes
  • Home Tour
  • Favorites
  • About

Spring Clutch

March 30, 2011 By Taylor 14 Comments

Have you ever bought something that came in a fabric bag that you liked and you couldn’t throw the bag away? Because this happens to me all the time. I have a little fabric bag collection going from shoes, sheets and even my Moby Wrap. If you have no clue what I’m talking about here is a picture…

My Mom bought an amazing duvet cover from Pottery Barn a few years ago and it came in this bag… I had to have it. I knew it would come in “craft-project-handy” one day and I was right. It only took me about 30 minutes to make because it was already halfway done for me.

Take out the drawstring and sew up the top.
Fold the bag into itself, take the top that you just sewed shut and make that new bottom. Make sure the two layers are completely touching.
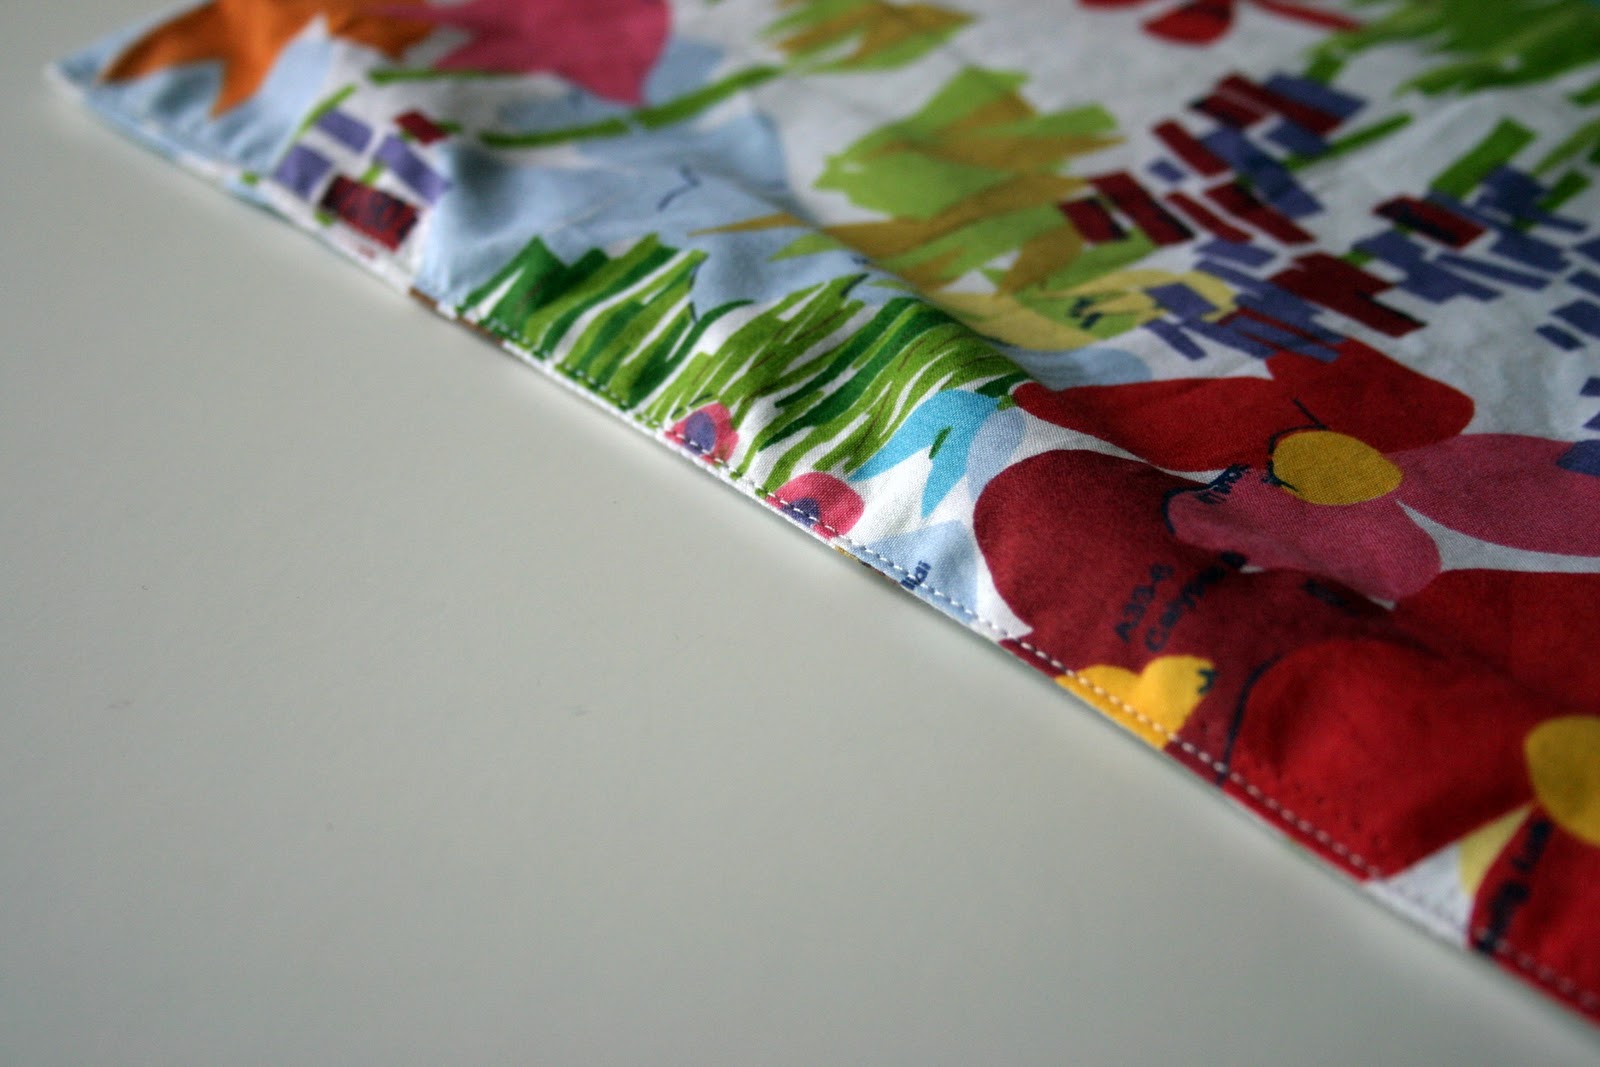
Now sew a line around what is now the top of the bag. This will make it easier to sew the zipper on. I added one of my fabric labels.
Now add the zipper. I bought these zippers from an Etsy shop last week and I love them! They were much cheaper than in a craft store and even came with a zipper pull, it was hard to choose a color with this fabric.
Start with one side of your bag. Now- I know making a traditional zipper pouch would hide your zipper, but first of all I don’t mind the exposed zipper and secondly this way is much quicker. I am big on free time these days so I dont waste it! Pin one side of your zipper to the inside of one side of the pouch.
(outside view)
My zipper was 14″ and my bag was about 12″ so I needed to make my zipper shorter. It is easy, just pick the place where you want your zipper to end and handstitch about 5-6 times around the zipper. You can actually cut the zipper after you do this, but I just tucked mine into the bag.
Sew this first side using your zipper foot if you have one. Tip: move the zipper around when you are sewing so that you dont have to sew around the actual zipper and your line will look uniform.
Do the same thing on the other side. Pin your zipper and sew. You will want the zipper to be open to sew this side.
There are you have it, it literally too me longer to write this post. Also, I feel good about actually crafting somthing out of this “free” fabric!

Filed Under: fabric, sewing Tagged With: accessories

Cobb Salad with Red Wine Vinaigrette

March 28, 2011 By Taylor 2 Comments

Spring has Sprung so you know what that means… It means it’s only March here in Houston and its in the high 80’s. Yes its true, its hot already! Which makes me want to eat cold things so if you live somewhere that is snowing right now, please excuse my Springy Salad post. You can bookmark this recipe for when you need it!
First of all can I say that I am a sucker for any Vinaigrette so my favorite part of this salad is the dressing. The Cobb Salad is pretty traditional, we used:
Green Leaf Lettuce
Grape Tomatoes
Radishes
Scallions
Grilled Chicken Breasts
Hard Boiled Eggs (which I can never get to look pretty, any tips?)
Avocado
Bacon
Goat Cheese
Carrots
Celery
Just line the ingredients up over the chopped lettuce…
Red Wine Vinaigrette:
1/4 c red wine vinegar
2 tbsp fresh lemon juice
2 tsp sugar
1/4 tsp dry mustard
1 tsp chopped garlic
1/2 c olive oil

Filed Under: dinner, recipe, salad Tagged With: food

Monogram Plate

March 24, 2011 By Taylor 42 Comments

Last night, after sulking all day about my crafting slump, I crawled in bed with my copy of Martha Stewart Encyclopedia of Crafts (best book ever). I think I am healed, I knew Martha would help!  I remembered something I have been thinking about – of a Chevron Striped Plate. Let me explain, I have a plate collection on the walls of my dining room, they all mean something and they all have a story. I even have two plates from two of my great-grandmothers, one of which is handmade. I thought a modern looking Monogrammed Chevron Plate would really give the wall a fresh “springy” look.
Plate Wall
Supplies:
-plate
-paper for the monogram
-vinyl
-Mod Podge
-Silhouette (Cricut or an exacto knife)
I wanted to do a Chevron Stripe on the background of my plate but any graphic pattern would work. I, of course used my trusty Silhouette! First of all you need to clean your plate so the vinyl will stick. Measure the center of your plate making sure to measue the curves of the plate too. Mine was a little over 10″ so I made my chevrons 10.5″ long. In my Silhouette software I used the chevron shape (which was the free shape of the week a few days ago) and loaded my premium vinyl into the machine.
About the Monogram… did you know that you can search “free fonts” in google and there are millions of  fonts that are way better than the stadard loaded on your compuer. All you do is downloard them to your computer, then install them and they will show up in all of your programs like Power Point, Word and your Silhouette Software! So, I searched for a free Monogram Font and found the perfect one. Here is the link. Make your last name inital larger than the other two initials because that will be the one in the middle. Load your bright colored cardstock and cut!
I have no scientific instuctions on how to place your vinyl, if you are a perfectionist I’m sure you could measure but that is just too hard for me. So I eye-balled it. Just make sure to get out all of the air bubbles.
Apply a thin layer of Mod Podge down on the plate. I didn’t Mod Podge the outer ring of the plate. I used the Matte finish because it’s my favorite.
Carefully place your letters down, make sure they are all pressed down well by using a pin or tweezers and get out the air bubbles.
Apply a top coat of Mode Podge to the inner curcle of the plate. Make sure to get in between all of spaces in the letters and again, pop the air bubbles with a pin because they will dry funky if you don’t.
Now just wait for your plate to dry, and hang that baby up, it looks so profesh!

Filed Under: craft, Mod Podge, monogram, Silhouette, tutorial, vinyl Tagged With: crafting, decor

It’s Rodeo Y’all – Texas Onesie

March 14, 2011 By Taylor 11 Comments

It’s spring break here in Houston and you know what that means…. Rodeo Time! Although Clyde has no idea what that means, I think it means I should break out the ole’ Silhouette for her first project! So I did!

I have seen shirts like this before with the capital as a heart in the state but Houston isn’t the capital of Texas so that wasn’t going to work. I also found a picture of Texas in the Silhouette Online Store, but again it had a star over Austin, not what I was looking for. So I had to get clever…
I googled “Texas Outline” under images and when I found one that look clear, I saved it to my computer. Then in the Silhouette Studio, I opened up the Texas picture. I played around and I found this awesome feature; The Tracing Tool. It allows you to trace around a picture that you already have on your computer. So I added the little heart and selected “Trace around Outer Edge”.
Here is what my picture looked like:
Next, I cut a piece of Freezer Paper and loaded it onto my carrier page.

Then I hit cut! It was so exciting… Now if you don’t have a Silhouette, you can just cut this shape out with scissors or an Exacto knife. Next, you need to iron down the shape’s outline to the onesie. Don’t hold the iron down too long, I have made that mistake and the freezer paper gets rumply. Make sure to iron around all of the detailed edges to form a nice seal. Don’t forget to iron down you little heart on the inside of your state.

Now its time for the fabric paint. I meant to buy “matte” red paint but as you can see I must have grabbed the “metallic” so it had kind of a shimmery look to it. Clyde it too little to be mad at me for that :)

(oops)
I did two coats and waited about 20 mins between. Don’t forget to put some newspaper or a paper bag inside the onesie so it wont bleed.

The next step is my favorite part, for some reason there is something SOOO satisfying about pulling the freezer paper off to me! Of course wait until it is completely dry.

Lastly, you have to heat set the fabric paint. There might be some instructions on your fabric paint about how to do this. I looked online and found some. You have to use something between the paint and the iron like a hand towel or something. I ironed mine for about a minute total moving the iron around the whole time. Some people said to do it for 4-5 minutes but that seemed really long to me.

I love my Silhouette! Now on another note, don’t try to stage a photo shoot with a hungry baby…. (I promise he likes his Texas Onesie, the boy just loves to eat!)

Related Posts Plugin for WordPress, Blogger...

Filed Under: baby stuff, clothes, paint, Silhouette, tutorial Tagged With: crafting

  • « Previous Page
  • 1
  • …
  • 57
  • 58
  • 59
  • 60
  • 61
  • …
  • 66
  • Next Page »

Welcome to Taylor Made

http://www.taylormadecreatesblog.com/about-me Hi Yall! I'm Taylor... an artsy mom of three from Houston, TX. I love sewing, collecting floral fabric, eating Mexican Food, photography, brights colors, rearranging, and rolling clay. Taylor Made Creates is all about creating a fun, colorful home, sewing cute things and eating good food. Check out my SHOP HERE HERE! Thanks for stopping by!

Search

Pin with me!

Like Me :)

Facebook Pagelike Widget

More Recent Posts

  • Kid's Animal Room
  • Kids Camping Shirts
  • Mermaid Birthday Party
  • Conversation Heart Cold Packs
  • Holiday Apple Tea Punch
  • Purple Princess Costume
  • Letterboard Costume
  • La Croix Costume

FAVORITES

  • Vintage Sheet Quilt
  • Siberian Husky Costume
  • Union Jack End Table
  • Winged Peasant Dress
  • DIY Leather Tote
  • Adorable Girl Clothing (found on Amazon)
  • Octopus Costume
  • How to Shorten a Shirt
  • Easy Light Switch Covers

Copyright © 2026 · Web Hosting By RFE Hosting