TaylorMade

DIY, Home Decor & Sewing

  • Home
  • SHOP
  • DIY & Sewing
    • For the Home
    • Sewing
    • Costumes and Holidays
    • Cricut Projects
    • Crafting
  • Parties
  • Recipes
  • Home Tour
  • Favorites
  • About

Silhouette Dust Cover

March 10, 2011 By Taylor 7 Comments

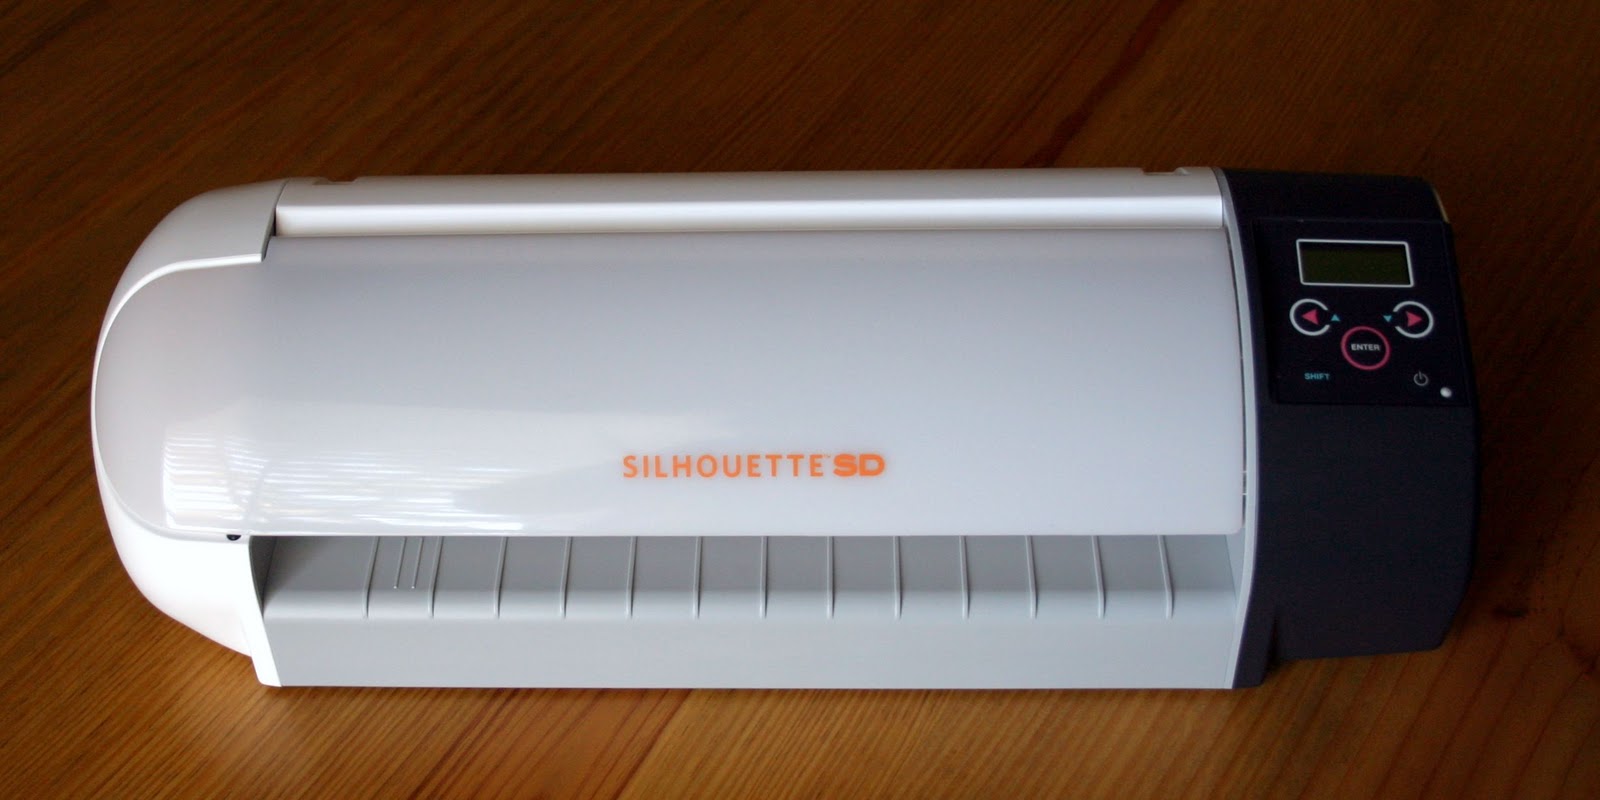
I got a new toy!!!!!!!!! And obviously, I’m really excited about it- the Silhouette SD!! So, because I love it so much, I clearly needed to make it pretty protect it from the dust. I was really excited when I saw that Char from “Crap I’ve Made” posted a tutorial for the Silhouette Dust Cover. I love her blog, thanks Char for the tutorial!

All you need is a fat quarter and Char’s template (and the amazing Silhouette, of course)
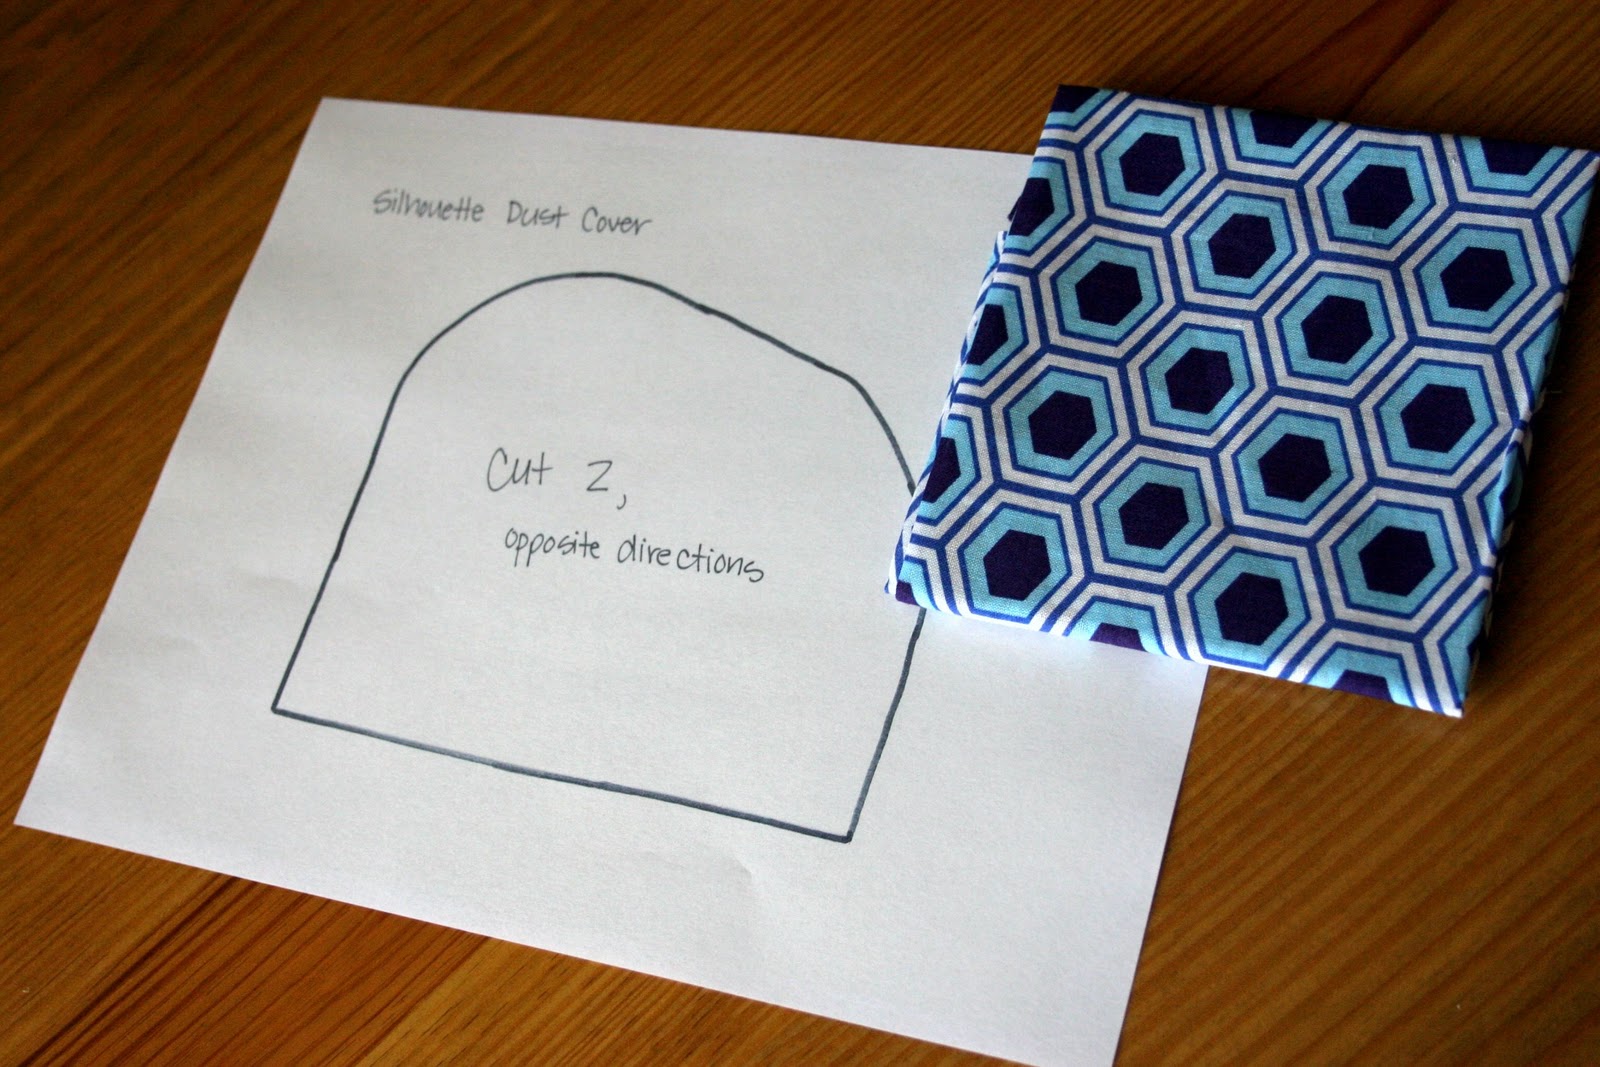
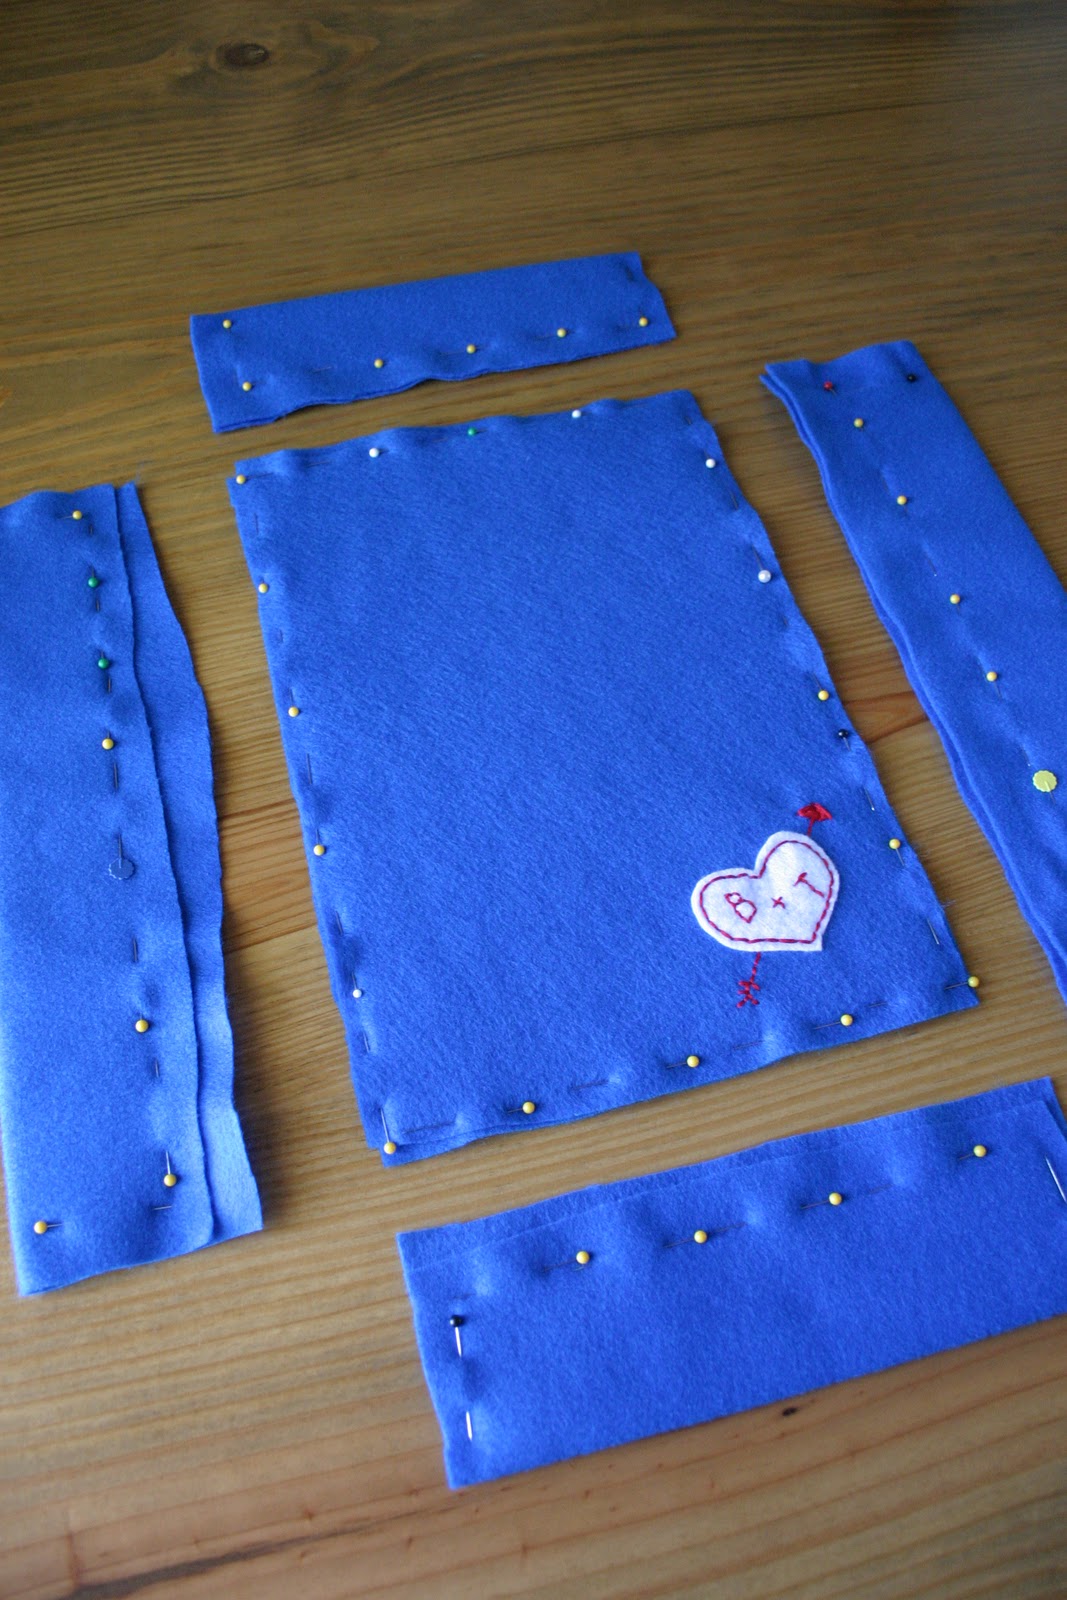
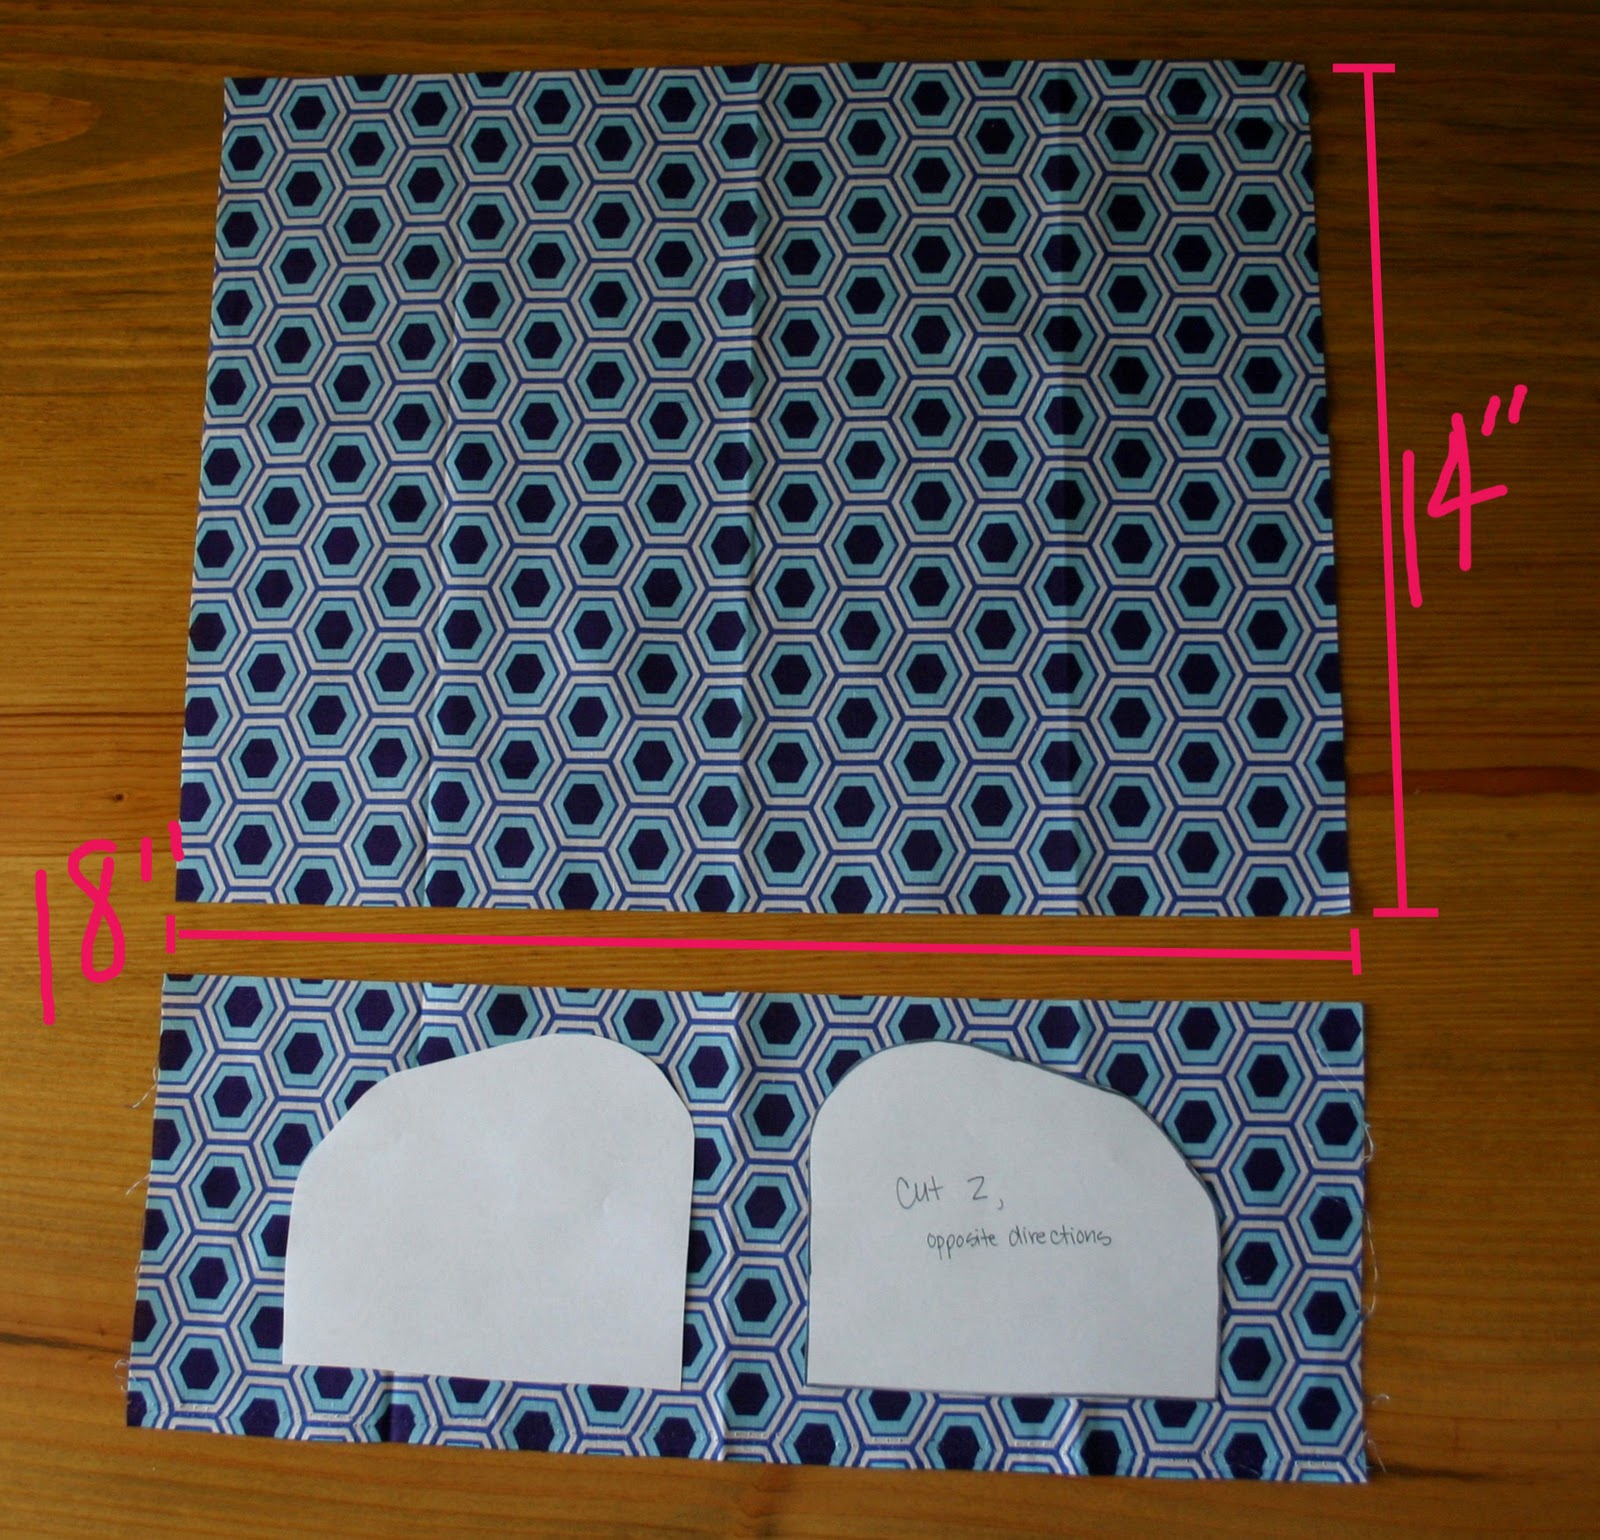
Cut your main piece to 18″ by 14″ with the 18″ side on the bottom. Then cut out the sides from the template, make sure to cut them in opposite directions.
Next place the small sides on the large piece with right sides together and the shorter side facing out.
Pin all the way around.
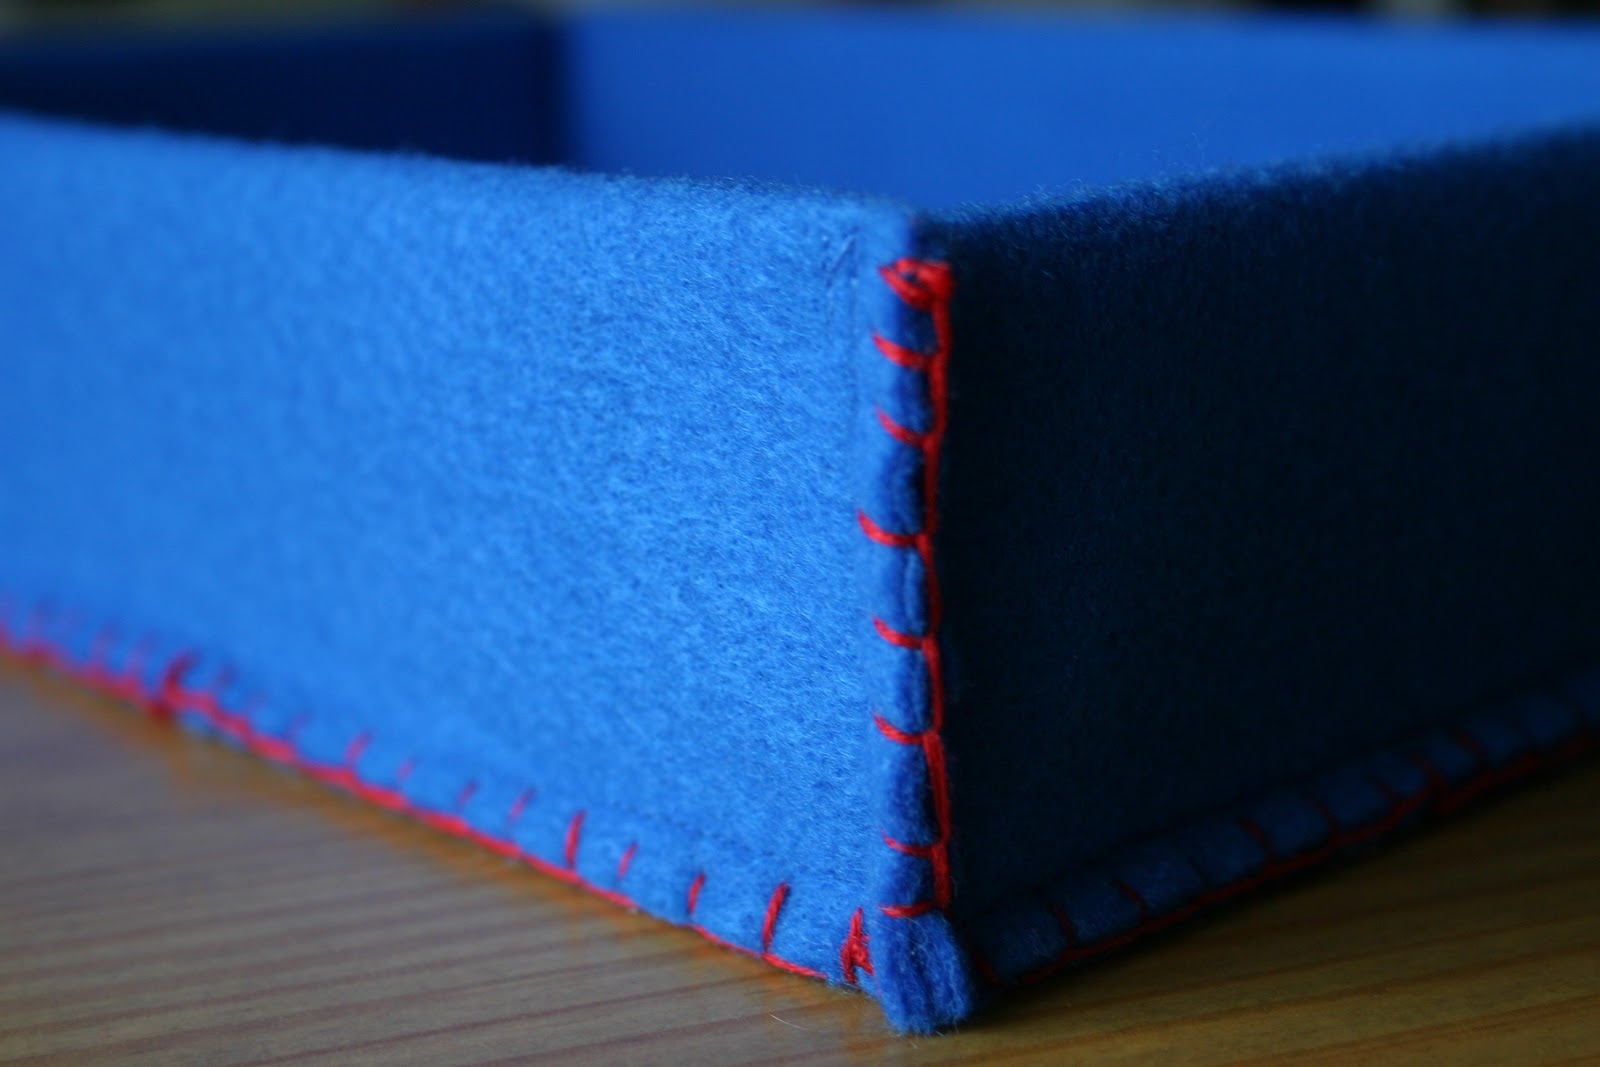
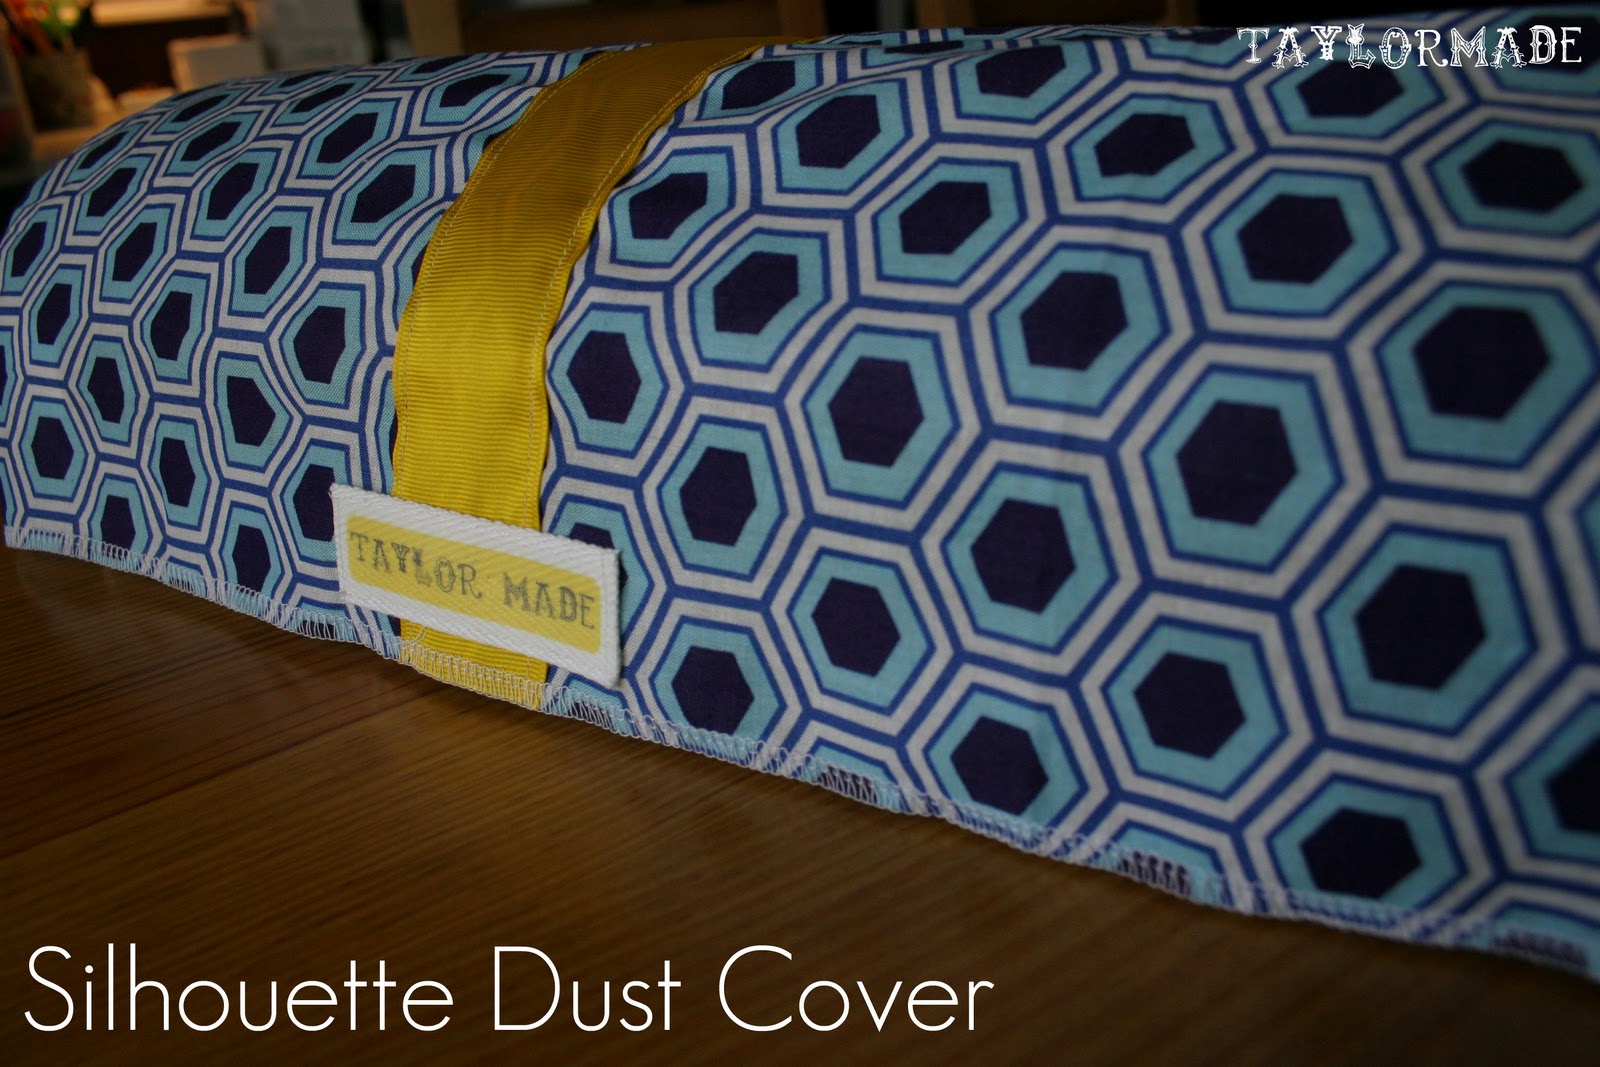
Next I added the yellow ribbon and my little fabric tag. Then I serged all the way around.
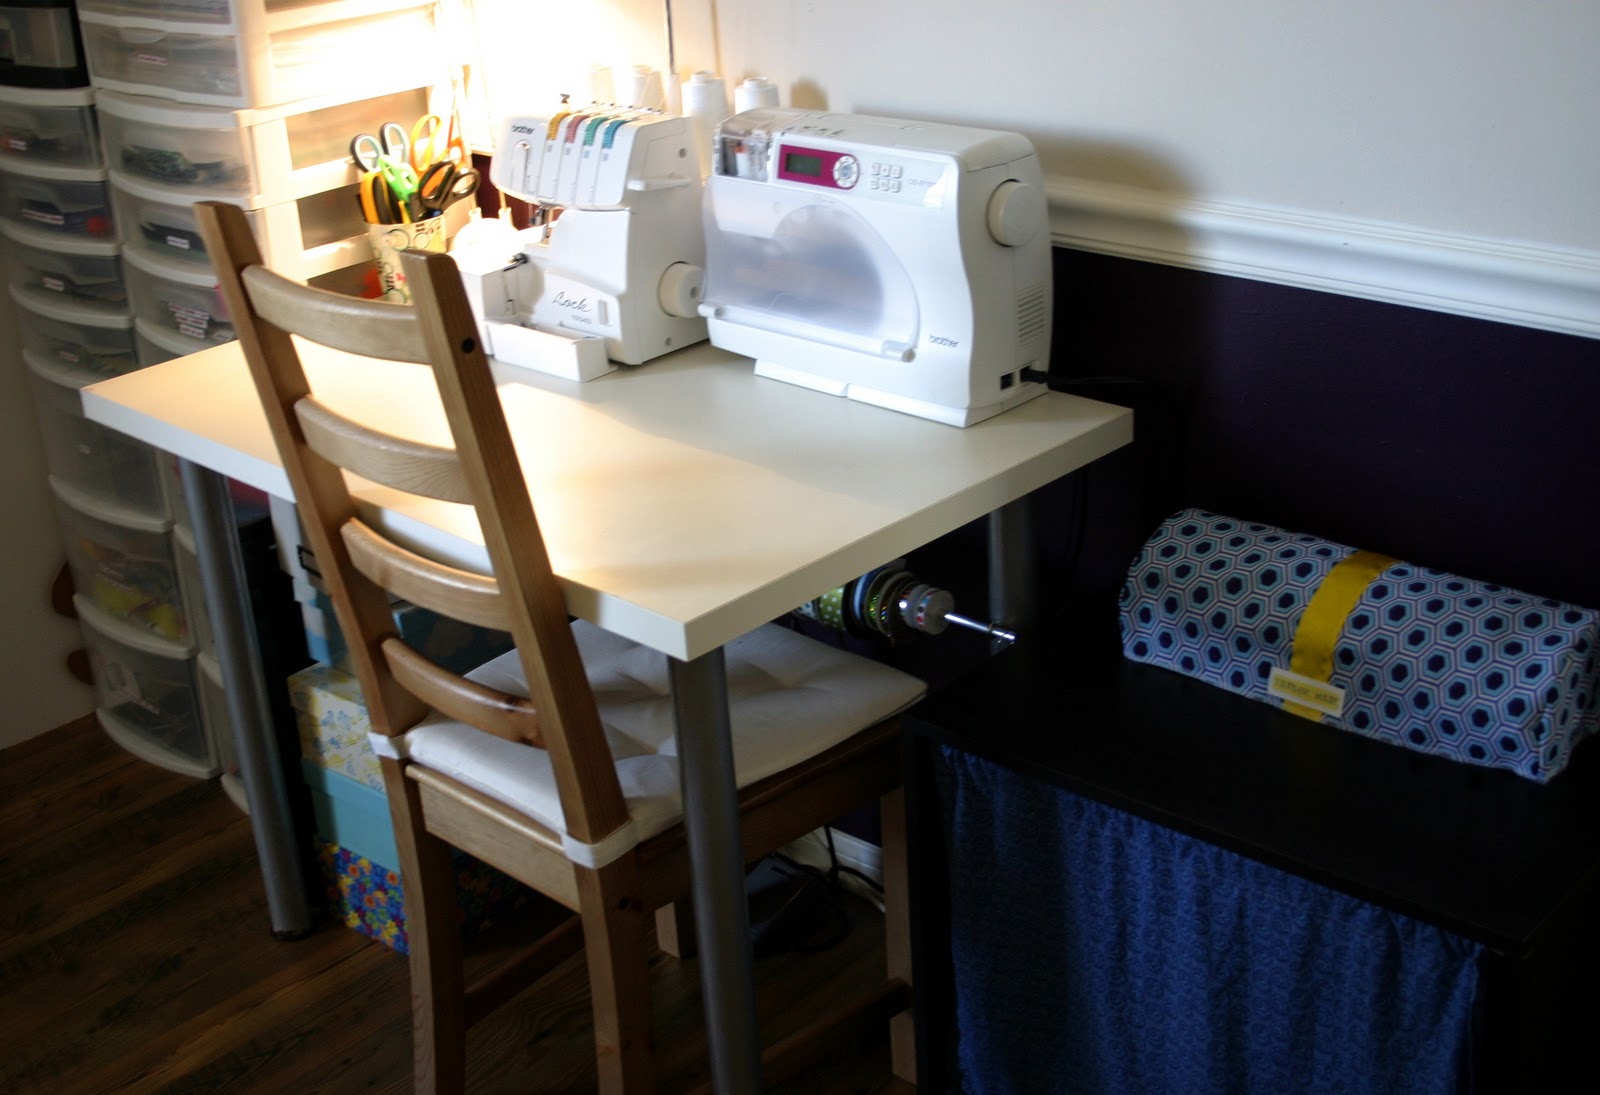
 I am excited that I won’t have smudgy little boy fingerprints on the beauty! Look at the happy home!

Filed Under: sewing, Silhouette, tutorial Tagged With: accessories

Banana Nut French Toast

March 6, 2011 By Taylor Leave a Comment

Happy Sunday! We aren’t big on breakfast during the week in our house. I kind of throw some cheerios down and hand Finn some yogurt. But, all bets are off on Sundays! We love a big breakfast on Sunday Morning. Bryan’s favorite is french toast (and who can blame him?) Finn’s favorite is “bana” or Bananas so why not both? I used Martha’s Perfect French Toast Recipe which is really good because she adds vanilla and fresh orange juice, yum!


Here is the recipe for the Perfect French Toast:


•6 large eggs
•1 1/2 cups milk
•Juice of 1 medium orange, (about 1/4 cup)
•2 tablespoons pure vanilla extract
•2 tablespoons cognac, (optional)
•1 tablespoon sugar
•Zest of 1 lemon, (about 1 tablespoon)
•1/2 teaspoon ground cinnamon
•Pinch of freshly grated nutmeg
•Pinch of salt
•6 slices bread, such as brioche, sliced 1-inch thick, preferably day-old
•4 tablespoons unsalted butter
•4 tablespoons vegetable oil


I added walnuts and bananas and Finn approved!

Filed Under: Martha Stewart, recipe Tagged With: food

Husband Valet

February 27, 2011 By Taylor 19 Comments

Ok I know I am a little late posting my husband’s Vday present but I have been busy. I did actually give it to him on Valentine’s Day,  just now posting it however. Better late than never and not only that but you could make this for any occasion. I had more exciting plans but as I have mentioned, little Clyde had plans of his own :) So we decided to just make each other something. I got a really sweet acrostic sign with my name, so cute! So here is what Bryan got; the Husband Valet. I wanted to give him a place to put all of his “stuff” (seriously guys should have to carry purses too!).

 
You need a 1/2 of felt, a piece of cross stitch plastic, some regular thread and embroidery thread


Start with the cross stitch plastic. Cut it into 5 pieces, the bottom of the valet, and the 4 sides. Here are my dimensions:


Next, you need to cut a piece of felt out for the top and bottom of each piece. Cut each with extra felt because you will be sewing around the plastic inside so you will need the extra fabric. I started with the bottom – for the sides I folded the felt over so it was less cutting for me. Also on the bottom piece, I personalized the inside with a little embroidered heart. That is optional but definitely do it before sewing because it will be too thick with the plastic inside.


Layer all of the pieces together (felt-plastic-felt) and pin them together to get ready to be sewn. Pin them as close to the piece of plastic as you can. You will sew right along the edge of the plastic.


It doesn’t matter if the edges aren’t straight on the fabric for this step because they will be trimmed later. Now sew the plastic sandwich together. Remember as close to the plastic as you can get your needle!


All of your pieces are done, now you have to hand sew them together with embroidery thread. Trim each piece so that there is only about 1/4″ of fabric on the edge. Use that 1/4″ to sew the valet together. I started with the long sides to the bottom then the short sides to the bottom. Then I sewed the sides together last.


There you have the husband valet, which my husband actually uses by the way!


Filed Under: craft, fabric, felt Tagged With: accessories

Tropical Fruit Salad

February 25, 2011 By Taylor Leave a Comment

Hello blog, how I have missed thee! I have had a crazy past few weeks, hopefully everything is back to “normal” or as normal as possible with my boys. So earlier this month, I was supposed to help host a little Baby Shower Brunch with some of my sorority sisters. I was in charge of the decorations and the fruit salad. Poor Baby Brunch. They were decor/fruit salad-less because I went into labor that morning. So needless to say, my balloons deflated and my husband and Finn ate the fruit salad. I thought I would share my Tropical Fruit Salad secret so it wasn’t a total waste. It is so simple and everyone always loves it.


My secret “sauce”: Fresh Lemon and Lime Juice with a teaspoon of honey


Cut up your fruit, I change it up depending on my mood but this time I added; strawberries, bananas, nectarines, blackberries, kiwi and pineapple. Then is a separate bowl, squeeze 1 lemon and 1 lime and add a little honey. Wish that together then pour onto your fruit. It also helps the fruit keep its color. So sad I didn’t even get to taste it…. but Clyde was worth it!

Related Posts Plugin for WordPress, Blogger...

Filed Under: recipe, salad Tagged With: desserts

  • « Previous Page
  • 1
  • …
  • 58
  • 59
  • 60
  • 61
  • 62
  • …
  • 66
  • Next Page »

Welcome to Taylor Made

http://www.taylormadecreatesblog.com/about-me Hi Yall! I'm Taylor... an artsy mom of three from Houston, TX. I love sewing, collecting floral fabric, eating Mexican Food, photography, brights colors, rearranging, and rolling clay. Taylor Made Creates is all about creating a fun, colorful home, sewing cute things and eating good food. Check out my SHOP HERE HERE! Thanks for stopping by!

Search

Pin with me!

Like Me :)

Facebook Pagelike Widget

More Recent Posts

  • Kid's Animal Room
  • Kids Camping Shirts
  • Mermaid Birthday Party
  • Conversation Heart Cold Packs
  • Holiday Apple Tea Punch
  • Purple Princess Costume
  • Letterboard Costume
  • La Croix Costume

FAVORITES

  • Union Jack End Table
  • DIY Leather Tote
  • Handmade Mother’s Day: Recipe Oven Mitt
  • Octopus Costume
  • A DIY Nap Mat
  • Mexican Cheesecake
  • a Happy Birthday Quilt Block
  • Morton Salt Girl Costume
  • Mini Fabric Lamps

Copyright © 2026 · Web Hosting By RFE Hosting