TaylorMade

DIY, Home Decor & Sewing

  • Home
  • SHOP
  • DIY & Sewing
    • For the Home
    • Sewing
    • Costumes and Holidays
    • Cricut Projects
    • Crafting
  • Parties
  • Recipes
  • Home Tour
  • Favorites
  • About

Fabric Labels

February 4, 2011 By Taylor 8 Comments

Fabric labels oh Fabric Labels…. I have been online researching these babies for months! Finally I found a good (cheap) solution, a tutorial to make my own. This idea is genius!


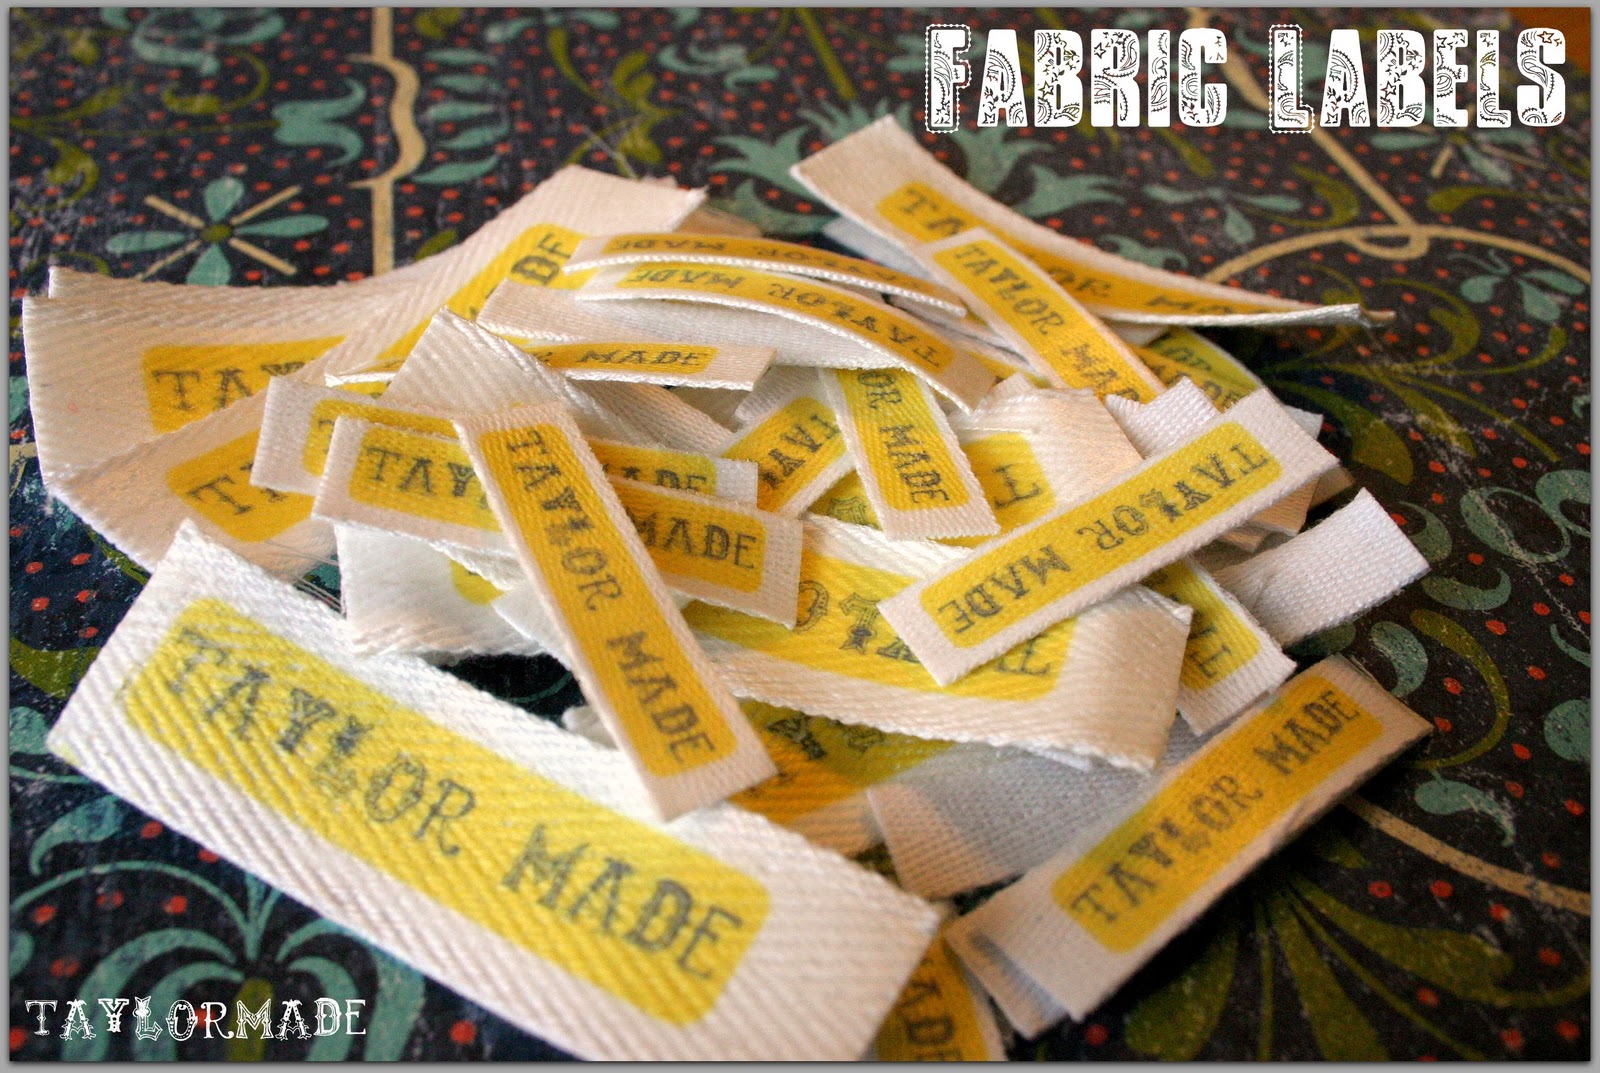
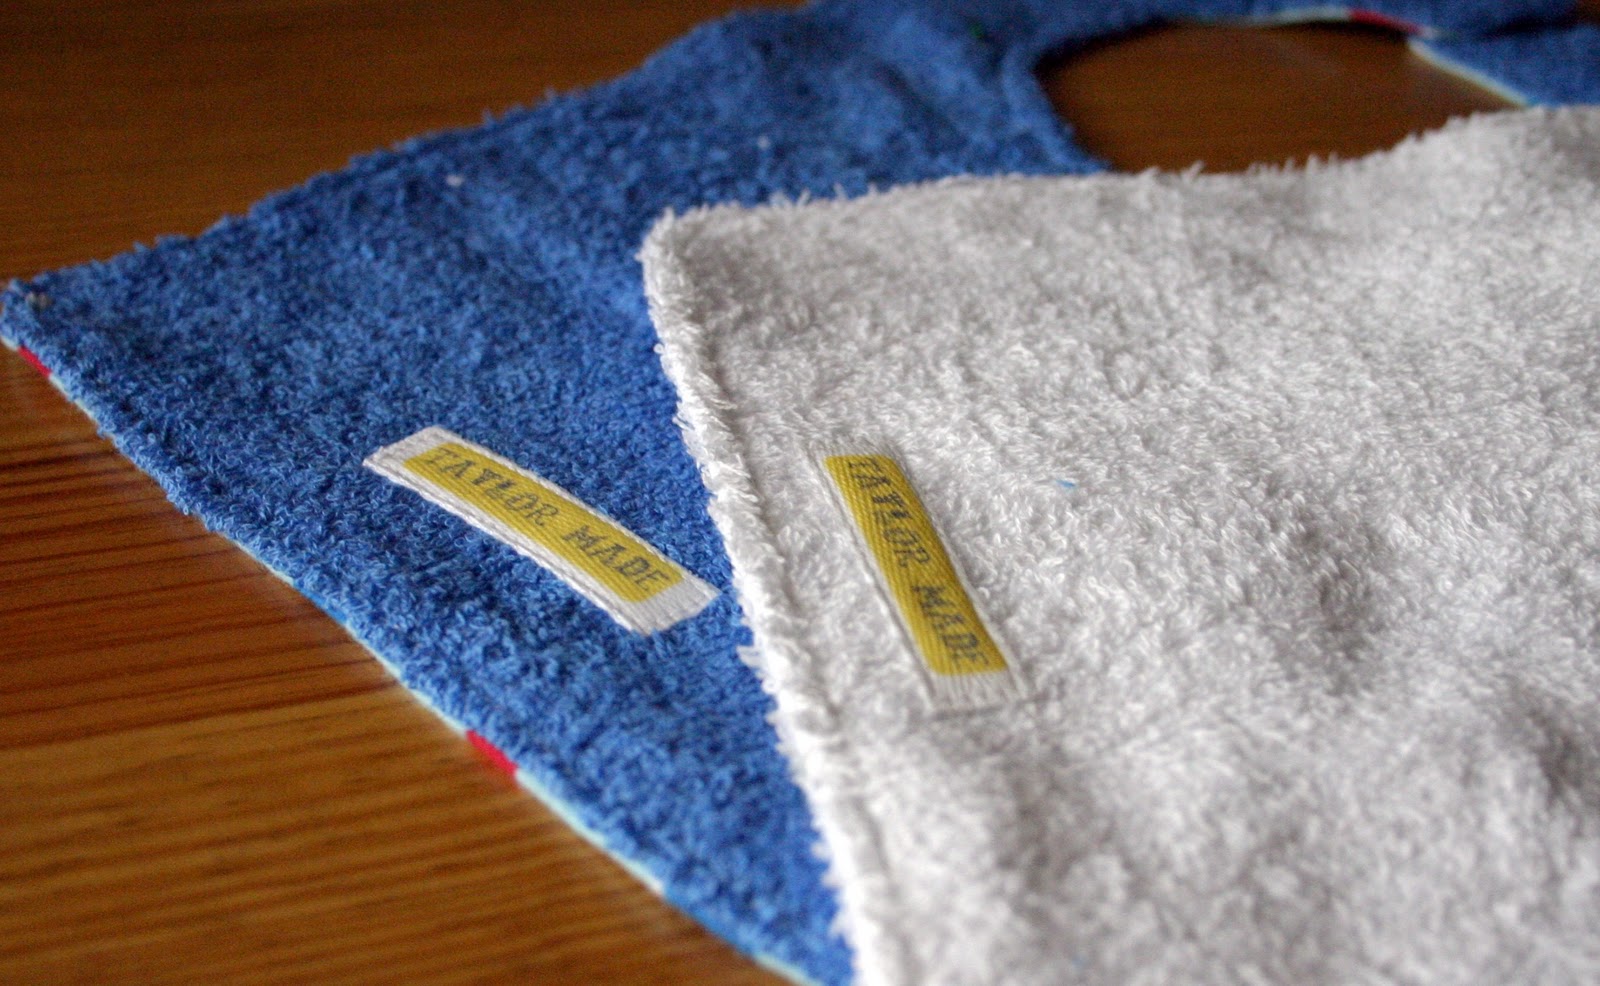
Laurraine from Patchwork Pottery has the whole tutorial on her blog here. She has a ton of other great stuff too, so you have to check it out. They were really simple to make and I love the way they look on the twill tape. Also, I didn’t spend a fortune which is always a plus! I made 1/2″ and 1″ labels. I have already made a few bibs and added labels to the back, I feel so professional now hehe :)

 
In other exciting news, I think I am going to buy a serger soon! I think I am going to get this one… any thoughts, opinions, reviews??

Filed Under: baby stuff, fabric, kid stuff, serger Tagged With: crafting

El Cid Chili

February 2, 2011 By Taylor 1 Comment

OK, so this past weekend in Houston it was in the 70’s and I wore capris. Apparently we could see snow flurries by the end of this week! So to celebrate the cold weather (because yes, I like cold weather in winter – call me crazy) I decided to make some warm Chili. I have this cookbook that I love called Celebrate! by Shelia Lukins, its awesome! It’s set up by occasion like Easter, Vday, Mother’s Day… so this recipe for Chili came from the “Superbowl” section. It’s called El Cid Chili and its Amazing! It doesn’t call for any beans or extras; just the meat, tomatoes and spices. Add some shredded cheese and green onion on top and you are ready for these “Houston Snow Flurries”.

Ingredients:


2 tablespoons olive oil
2 pounds sirloin steak, cut into 1-inch cubes
1/2 pound ground beef
12 ounces chorizo sausage, casing removed, cut into 1/2 cubes ( I used sausage not chorizo)
1 large yellow onion, coarsely chopped
1/4 cup chili powder
1 tablespoon garlic salt
2 teaspoons cumin
1 teaspoon dried basil
2 (14.5-ounce) cans beef broth
2 (14.5-ounce) cans whole tomatoes, drained
1 cup cilantro, chopped
1 cinnamon stick
3 bay leaves
2 green jalapenos, slit lengthwise 3 times each
1 tablespoon yellow cornmeal
Salt and pepper, to taste
Garnish with Cheddar and sour cream, if desired

Directions:

Place oil in a large, heavy pot over medium heat. Brown the sirloin in batches. Remove to a bowl with a slotted spoon.

Add ground beef, chorizo (or sausage- I’m not brave enough for chorizo) and onions to the pot and brown. Make sure to break up the meat. Return sirloin to the pot.

Stir in remaining ingredients, except for garnishes.

Bring to a boil, reduce heat, simmer for 2 hours. Stir occasionally, breaking up tomatoes. Before serving, discard cinnamon stick, bay leaves and jalapenos.

Garnish, if desired

Filed Under: dinner, kitchen, recipe Tagged With: food

Car Seat Strap Covers

January 30, 2011 By Taylor 3 Comments

Don’t you love an easy project that you can finish in just about an hour? I know I do, especially because I have problems a little trouble finishing projects in a timely fashion. I wanted to recover baby #2’s car seat and realized that was going to lead me to my previous problem, an unfinished project. I just don’t have enough time so I though I would spruce up his/her car seat straps! Not to mention, the old straps were looking a little rough. Does anyone have the Chicco Car seat? I LOVE it but the strap covers that came on it were sewn-on which made them super hard to wash. I decided to make my own with Velcro so I could wash them easier.

This project is really easy, all I did was use the existing strap covers as a template, a little quilt batting and used some existing fabric that I had. I did make my own bias tape (which is a little more time consuming) but you could just buy some for an even easier time.
Here are the original strap covers and the fabric I picked out, I wanted it to still match the carrier. I used the star fabric for the bias tape. I didn’t include how to make your own bias tape in the tutorial, you can find it online or like I said you can buy it from any craft store.
Lay out the original strap covers as a template. Trace onto your fabric and cut 4 new pieces. Front and back for both.
Don’t forget to cut the batting for the inside of the pieces like I almost did, oops!
Make (or buy) your bias tape, for the Chicco covers you need about 35″”. By the way… I have made my fair share of bias tape and I just found out that there is a cheap tool that folds the fabric for you and makes it so much easier! Where have I been? That is on the to-do list for this week.
Sew the “circles” of the strap covers with wrong sides together and the layer of batting in between. So it should be fabric facing down, batting and fabric facing up in your sewing machine.
Pin the bias tape all the say around on both covers and sew it on.

Lastly, I used a small strip of Velcro as the closure. Here is the before and after!

Not only will these be easier to take on and off, the original fabric was so scratchy and the new covers are soft fleece. I think baby 2 loves them already!

Filed Under: baby stuff, fabric, kid stuff, sewing Tagged With: kids

Cloffice

January 23, 2011 By Taylor 33 Comments

What is a cloffice you ask? Well… our entry-way closet and our office had a baby and my husband named him “Cloffice”. As I’ve mentioned, our office/craft room has been taken over by our soon to be baby #2 (only 5 wks, yay!) so, I had to have a place for my computer desk and office stuff. Bryan really helped out as usual and did a ton of work! There is actually a lot of storage for my pictures, computer programs and all of our office supplies. I love my little cloffice!


Features:
-Full desk
-2 storage shelves
-overhead lighting
-plug (Bryan had to add an electrical outlet)
– curtain (to hide the tower, printer and wires)
-blue walls
-hanging storage on left wall
 
How we did it:
-we painted the whole thing first
-Bryan took measurements for the desk and shelves
-desk is the total width and depth and shelves are half as deep
-we used oil based white for the shelves and desktop
-installed desk, shelves and hung light
-sewed a simple curtain and hung it with a tension rod and clips
 
Do you love it as much as I do?


Related Posts Plugin for WordPress, Blogger...

Filed Under: remodeling, wood Tagged With: room makeovers

  • « Previous Page
  • 1
  • …
  • 59
  • 60
  • 61
  • 62
  • 63
  • …
  • 66
  • Next Page »

Welcome to Taylor Made

http://www.taylormadecreatesblog.com/about-me Hi Yall! I'm Taylor... an artsy mom of three from Houston, TX. I love sewing, collecting floral fabric, eating Mexican Food, photography, brights colors, rearranging, and rolling clay. Taylor Made Creates is all about creating a fun, colorful home, sewing cute things and eating good food. Check out my SHOP HERE HERE! Thanks for stopping by!

Search

Pin with me!

Like Me :)

Facebook Pagelike Widget

More Recent Posts

  • Kid's Animal Room
  • Kids Camping Shirts
  • Mermaid Birthday Party
  • Conversation Heart Cold Packs
  • Holiday Apple Tea Punch
  • Purple Princess Costume
  • Letterboard Costume
  • La Croix Costume

FAVORITES

  • Vintage Sheet Quilt
  • Union Jack End Table
  • How to Glaze Furniture
  • Winged Peasant Dress
  • Siberian Husky Costume
  • Octopus Costume
  • DIY Leather Tote
  • Adorable Girl Clothing (found on Amazon)
  • Mini Casserole Carriers

Copyright © 2026 · Web Hosting By RFE Hosting