TaylorMade

DIY, Home Decor & Sewing

  • Home
  • SHOP
  • DIY & Sewing
    • For the Home
    • Sewing
    • Costumes and Holidays
    • Cricut Projects
    • Crafting
  • Parties
  • Recipes
  • Home Tour
  • Favorites
  • About

Tealight Flight

May 6, 2011 By Taylor 46 Comments

*New Update* Thank you all for your comments,  anytime that fire is involved, please be careful! Also, the tea-lights are in a metal container and I have never had a tea-light burn the metal. Also, this goes in my fireplace so even if it did, perfect place right :) If you are too worried then please don’t make this project
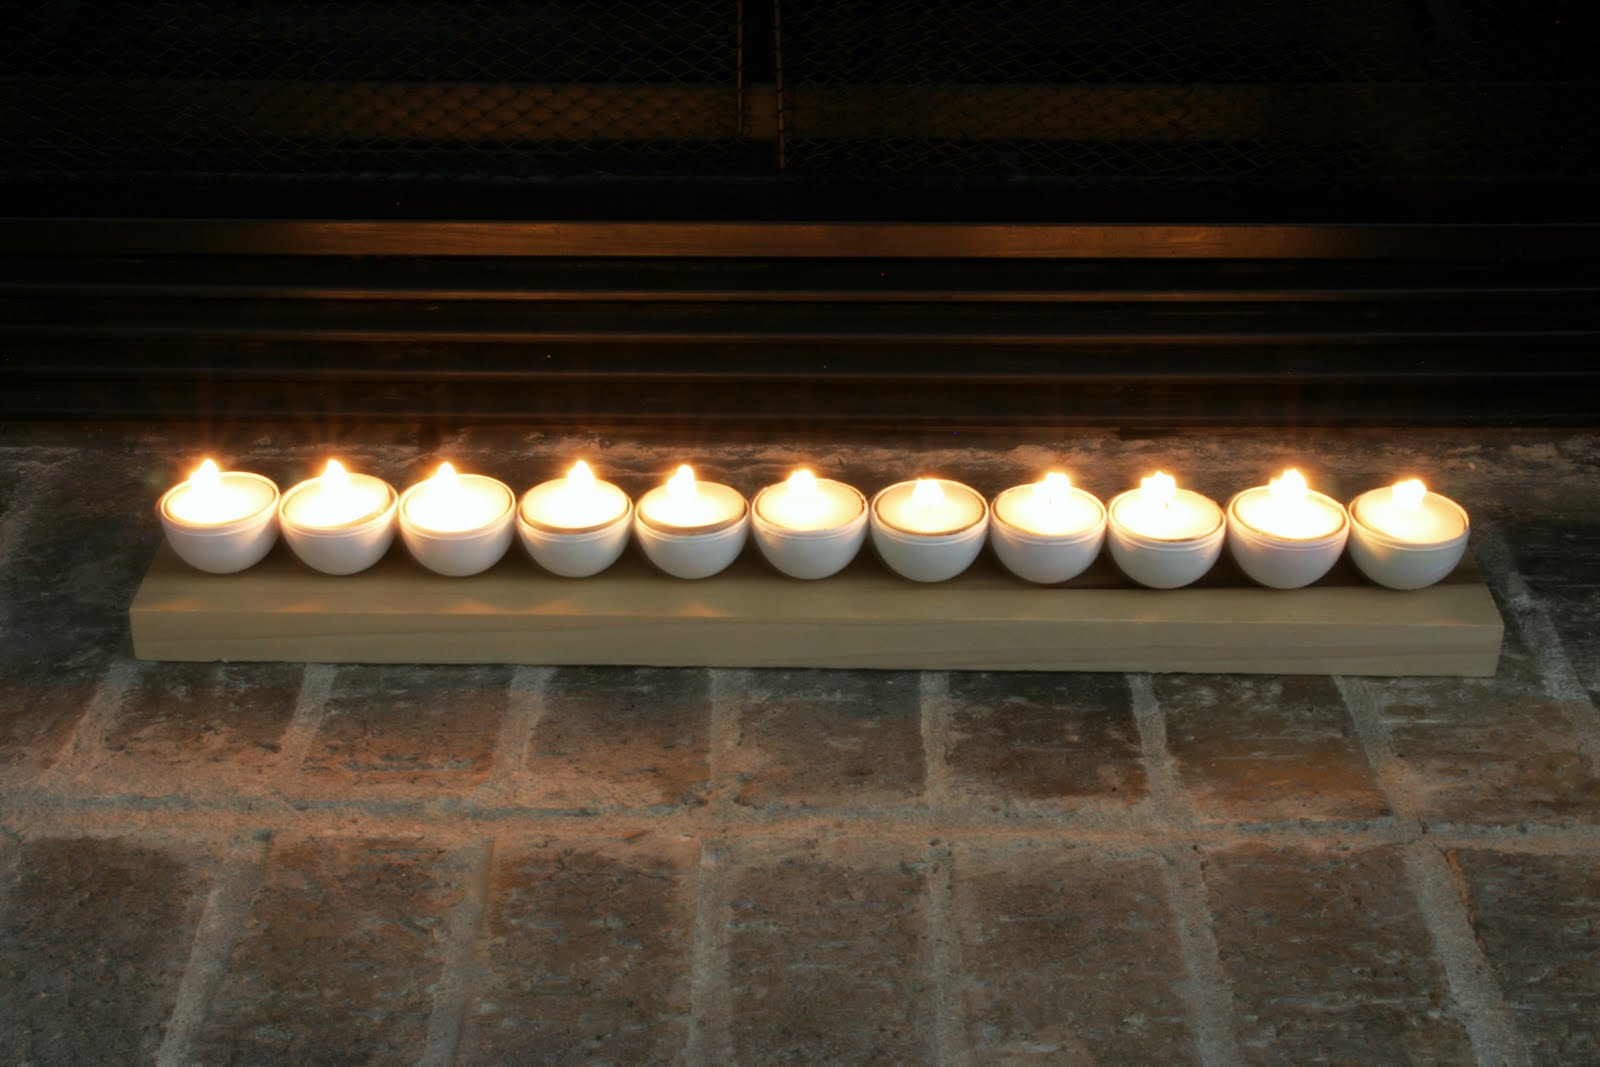
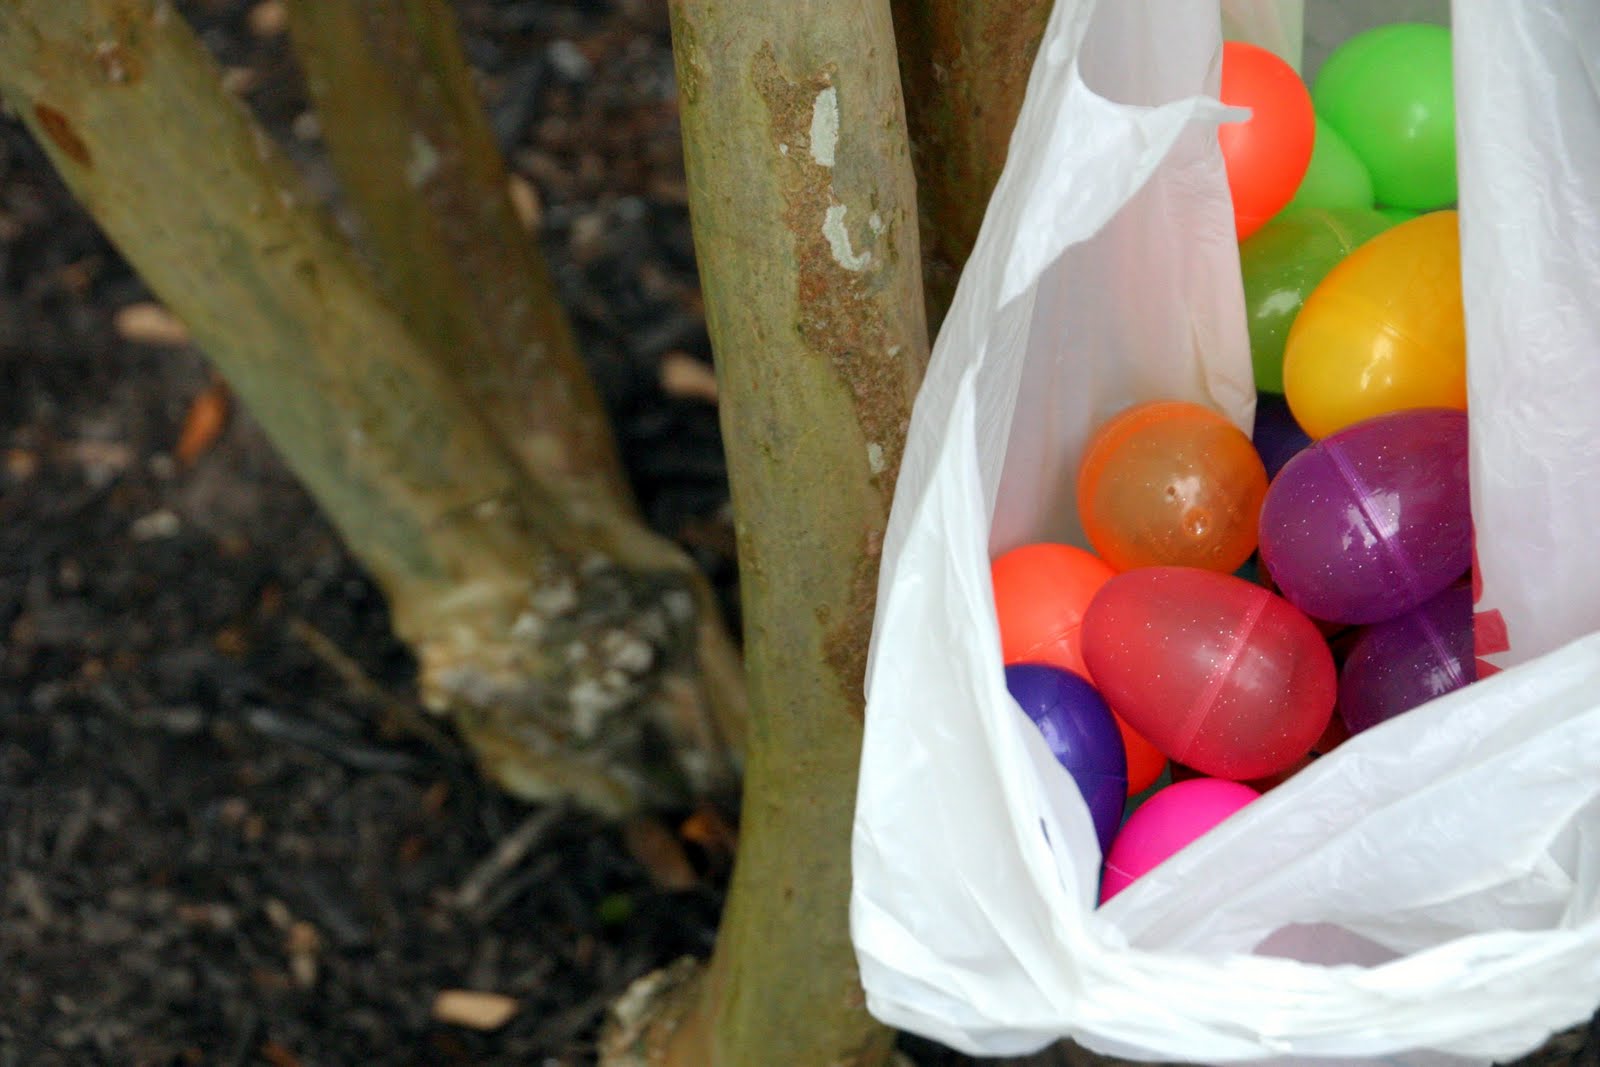
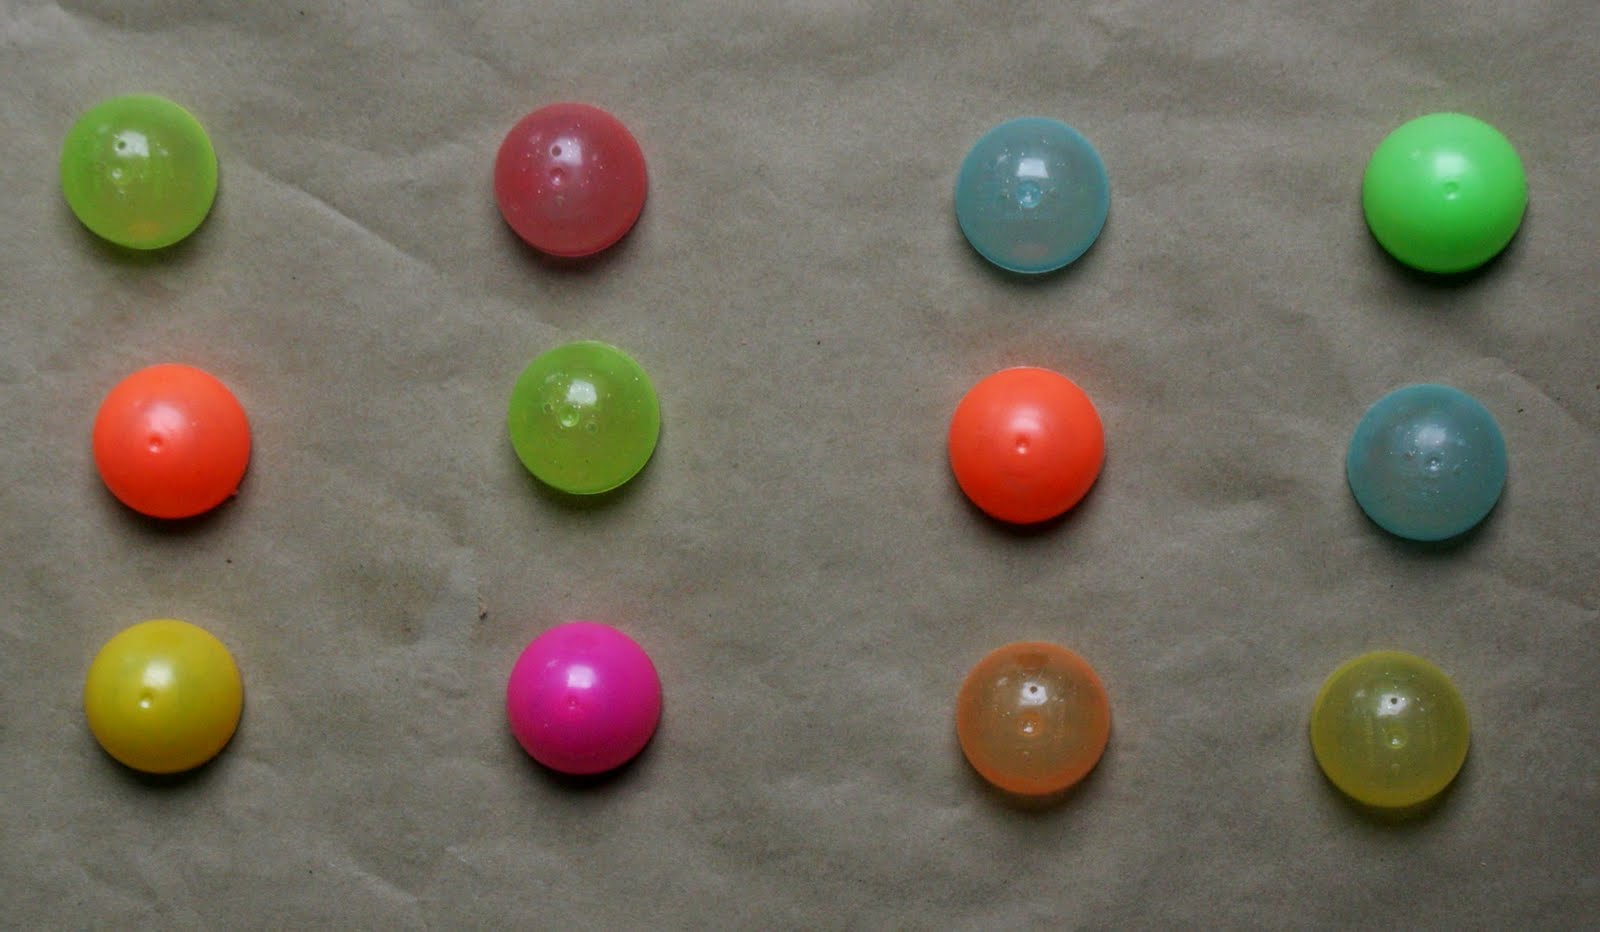
Taking junk and turning it into something beautiful, what’s not to like? The first thing that came to my mind was the huge bag of used plastic Easter Eggs taking up space in my pantry. It felt wrong to throw them away and I am glad I didn’t. After some brainstorming, I came up with…. The Tealight Flight. It was super simple and came out really modern and classic looking.
Here is how I did it:
I took 12 egg bottoms (which I only ended up using 11).
I spray painted the top side and waited for that to dry, then painted the bottom side. Make sure to use a spray paint that is specifically for plastic. It took me about 3-4 coats; waiting 20 minutes between coats.
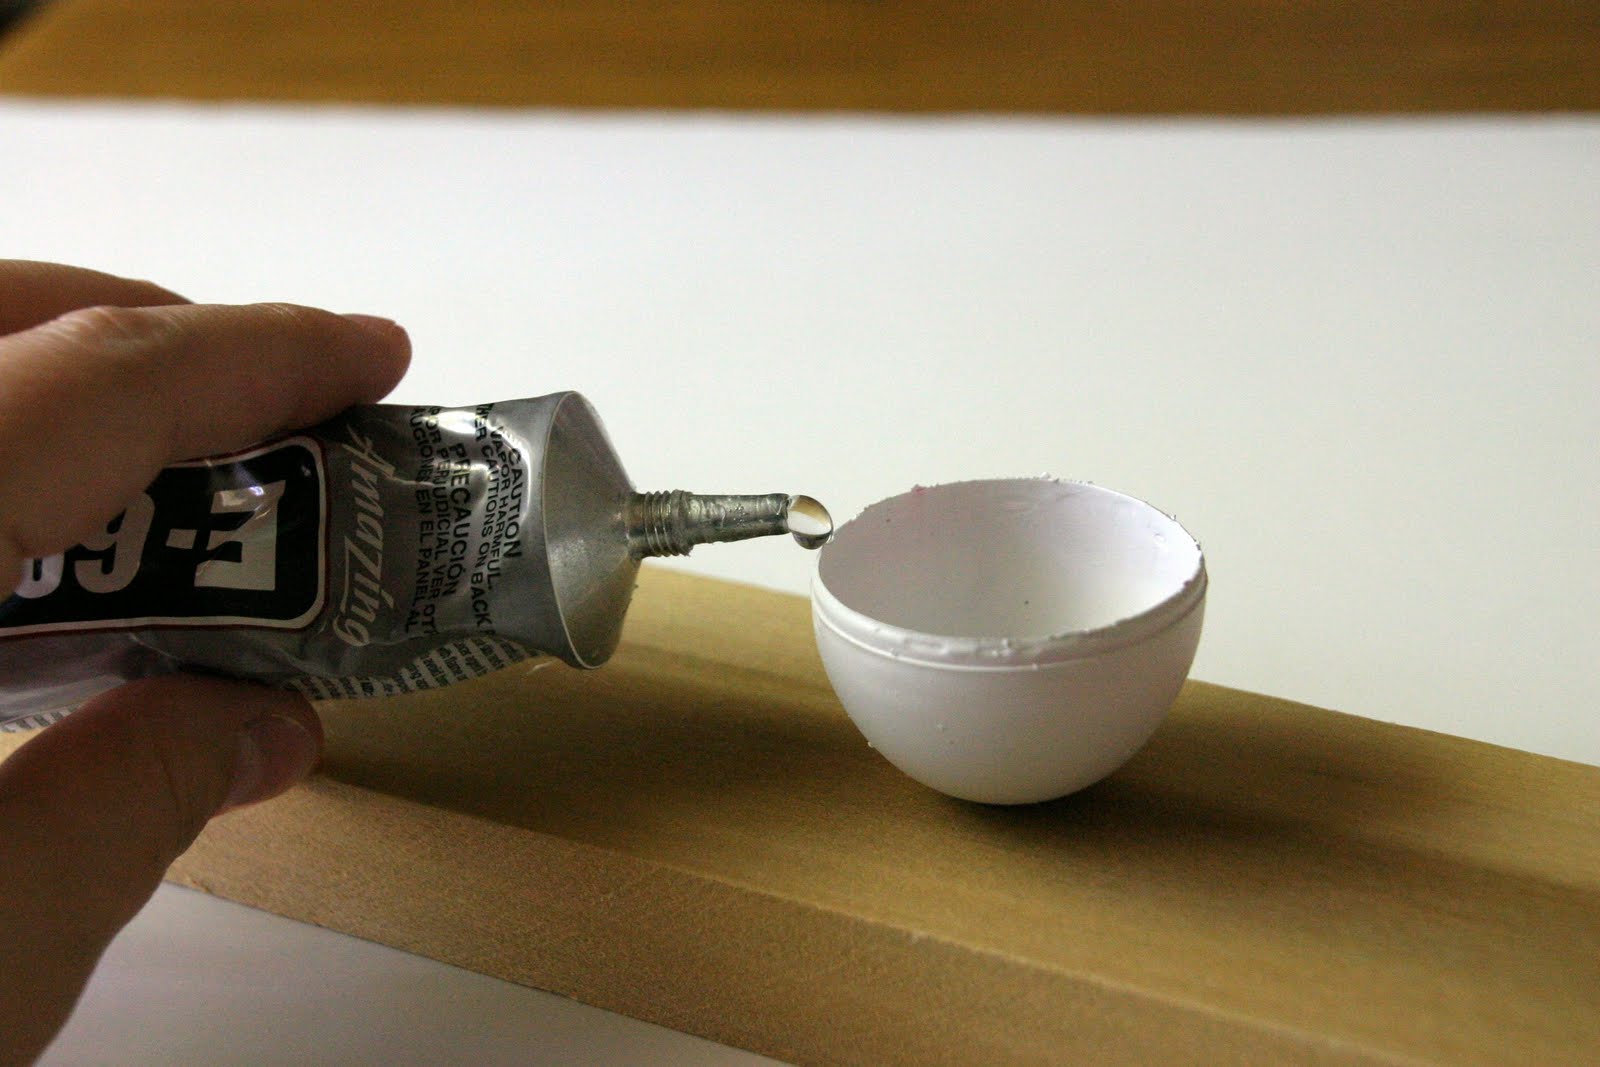
I waited for them to dry overnight before I started the next step. Then, I found a piece of scrap wood in our garage. It was flawless looking and I didn’t even need to sand it or anything. Make sure your eggs are fully covered by the spray paint.
Start by gluing the center egg to the center of the board. I used E6000, which is super strong. Use a tiny dot in the bottom if the egg then use a dot on each side of the egg to connect the ones side by side.
Keep doing this until you have glued all of your eggs down.
Wait 24 hrs before you place your tealights in!

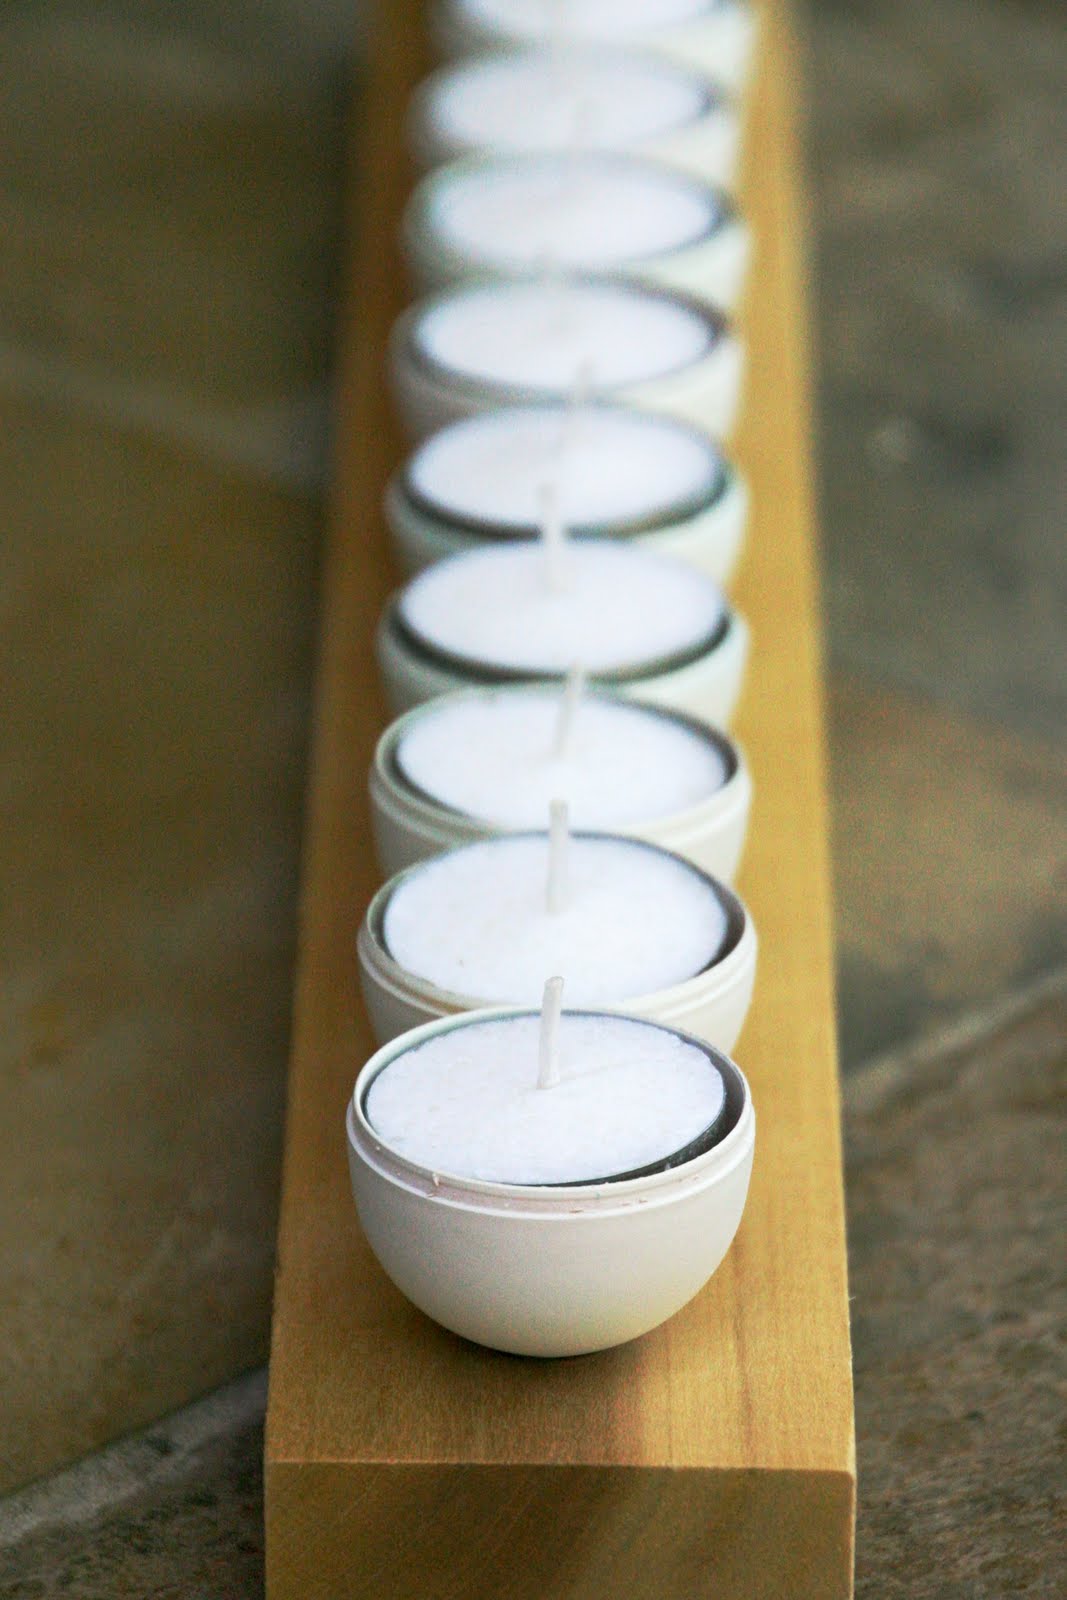
Find the perfect spot, I put mine in my fireplace…

Filed Under: craft, home goods, wood Tagged With: crafting, decor

Union Jack Card

April 28, 2011 By Taylor 5 Comments

London Calling…
Are you still bitter about not getting invited to the Royal Wedding? Well tell someone about it, in a Union Jack Card. The Wedding is only hours away, and today I heard that over 1 billion people will be tuning in. The most watched televised event in history. Crazy.

Here is what you need to feel involved :)

  • Red, White and Blue Cardstock
  • Blank Note card
  • Sewing Machine
  • Red Thread

Cut a blue piece of cardstock the size of your Note card, mine was 5.5″ x 4.5″.
Cut out the following strips:

  • 2 thick white
  • 2 slightly thinner red
  • 2 thin white
  • 2 slightly thinner red
Place a thin white strip under a thin red strip and place it corner to corner on the blue card, sew a line down the card. Isn’t there something fun about sewing on paper? Do this again across to the other corners.
Now you have an “X” on your card and we need to add the “+” over that.
1. Place the 2 thick white strips in a cross over the “X”
2. Place the thick red strips over the whites
3. Sew down both lines
Trim the excess strips and tape your flag onto the notecard.
Here’s to William and Kate…

Filed Under: craft, paper, sewing Tagged With: crafting

Etched Juice Glasses

April 11, 2011 By Taylor 5 Comments

I think I am having a love affair with Monograms (as seen in my recent post here). I know I’m not alone, right? You know who else loves monograms; couples getting married that’s who. I know when I was engaged I loved receiving gifts with my new name on it. It seemed so magical.

Our friends are getting married next month and we got them a juicer off their registry but I of course like to add something personal too. So I found these cute juice glasses and I monogrammed them. (I also maybe wanted an excuse to use my new Etching Cream that I just got.)

I created a stencil with vinyl using my Silhouette but you could easily just cut out the letters with an Exacto. Then I followed the directions on the back of my Etching Cream, kind of. My directions said to apply a thick, even layer, wait for 5 minutes then completely wash off. I looked after 5 minutes and it wasn’t a very strong etch, so I left mine on for about 12 minutes. I picture the newly weds having fresh squeezed orange juice out of these on Sunday mornings.

Filed Under: craft, etched, gift, kitchen, monogram, Silhouette Tagged With: crafting, DIY

Bird Trio

April 1, 2011 By Taylor 10 Comments

I love birds. Not in a “pet” way but in a home decor way. I didn’t even know how much I loved birds until I looked around my house about a year ago and realized I have a ton of bird stuff. Now I actually seek it out. I have at least one “birdlike” piece in every room of our home. Here is my newest edition, the Bird Trio, they are going to go over my craft table.

my craft space is so depressingly small in a picture
This project is so easy, I just spray painted three matching black frames. Then I cut all three images out with my Silhouette. The image on the right is available in the Silhouette online store. There were so many cute birdcages, I could hardly choose. Then the image on the left is a Taylor Made original. I just found a picture of a tree and used the “Trace” option (I love it) which you can read about here. When you use the Trace feature in the Silhouette software, you have to play around with the options in the sidebar. The middle image is from a Martha Stewart printable. Then all I did was mount them on grey card stock.
Here are just a few of the other birds that “live” in our house.
Welcome new birdies…
Related Posts Plugin for WordPress, Blogger...

Filed Under: craft, home goods, paper, Silhouette Tagged With: decor

  • « Previous Page
  • 1
  • …
  • 7
  • 8
  • 9
  • 10
  • 11
  • Next Page »

Welcome to Taylor Made

http://www.taylormadecreatesblog.com/about-me Hi Yall! I'm Taylor... an artsy mom of three from Houston, TX. I love sewing, collecting floral fabric, eating Mexican Food, photography, brights colors, rearranging, and rolling clay. Taylor Made Creates is all about creating a fun, colorful home, sewing cute things and eating good food. Check out my SHOP HERE HERE! Thanks for stopping by!

Search

Pin with me!

Like Me :)

Facebook Pagelike Widget

More Recent Posts

  • Kid's Animal Room
  • Kids Camping Shirts
  • Mermaid Birthday Party
  • Conversation Heart Cold Packs
  • Holiday Apple Tea Punch
  • Purple Princess Costume
  • Letterboard Costume
  • La Croix Costume

FAVORITES

  • Union Jack End Table
  • Handmade Mother’s Day: Recipe Oven Mitt
  • Octopus Costume
  • DIY Leather Tote
  • a Happy Birthday Quilt Block
  • How to Shorten a Shirt
  • Fox Costume
  • Morton Salt Girl Costume
  • Sweet Dreams Puppy Pillow

Copyright © 2026 · Web Hosting By RFE Hosting