TaylorMade

DIY, Home Decor & Sewing

  • Home
  • SHOP
  • DIY & Sewing
    • For the Home
    • Sewing
    • Costumes and Holidays
    • Cricut Projects
    • Crafting
  • Parties
  • Recipes
  • Home Tour
  • Favorites
  • About

Baby Onesie Cutoffs

July 8, 2011 By Taylor 6 Comments

When Clyde was born and I realized I had another boy in the house I thought to myself, perfect! I have a closet full of boy clothes. Well… Finn was born on August 6th and Clyde was born on February 6th. Their dates are exactly six months apart to the day. 
So, we got home from the hospital with Clyde, I opened the closet and BAM a closet full of sleeveless and short sleeved shirts on the only day that Houston ever had a “hard freeze”.  Why didn’t I realize that all of these clothes were for the opposite season? Now once again all of Finn’s old 9 month onesies are for winter and I am about to die of a heat stroke. My poor little poopsie is hot natured just like his Mommy. Solution… Baby Cutoffs!

I did this to some pants a few weeks ago too. I am now on a Baby Cutoff Spree at my house and nothing is safe. Watch out old baby jeans… its over 100 degrees and mama’s hot. 
These make me hot just looking at them… (I really can’t describe my hatred for the heat enough)

I really wanted Clyde to be able to wear this shirt because it has a special meaning. When I first found out I was pregnant with Finn this was the first thing I bought, so really the first “baby thing” I ever bought in my life :)

Use a short-sleeved onesie as your pattern and mark 1/2″ past the edge of the sleeve. (Yes I use a sharpie, I don’t like tailor’s chalk)

Serge around the edge and then pin and sew two parallel lines for the seam. 

Ahhh…. relief! 

How cute is this little model of mine? What a Happy Boy! So, what sort of summer refashioning have you done lately? And are you now going to run through your house with scissors looking for clothes to cutoff?

Filed Under: baby stuff, boy, clothes, kid stuff, serger, sewing, tutorial Tagged With: kids

Bow Ties

June 1, 2011 By Taylor 3 Comments

What is cuter than a little boy in a boy tie?… Nothing is… I tell you NOTHING!
Remember when I won Runner-Up in the Knock it Off contest? Well, I did and one of my prizes was my choice of two patterns from Little Lizard King, a cute Etsy shop. I knew I wanted to make the boys some bow ties for a wedding. It was perfect when I saw that she had a Bow Tie Pattern in her Etsy Shop. Less work when I don’t have to think of how to do something.
I followed the “bow” part just like the pattern said. The only thing I changed was the middle loop to make it a little wider. It was a very easy-to-follow pattern.
The boys looked super geek-chic in their little bow ties… ahhh little men going to their first wedding!
Instead of doing elastic around the neck, I just added an alligator clip to the back with felt and some E-6000 (best glue ever). That way I can use them again on a cardigan or in my hair.
I love these bow ties so I think I might be making more in the near future just for funsies.
What else can I do with them?

Filed Under: baby stuff, clothes, fabric, kid stuff, pattern, sewing Tagged With: accessories, clothing, kids

Little Boy Shorts

April 26, 2011 By Taylor 17 Comments

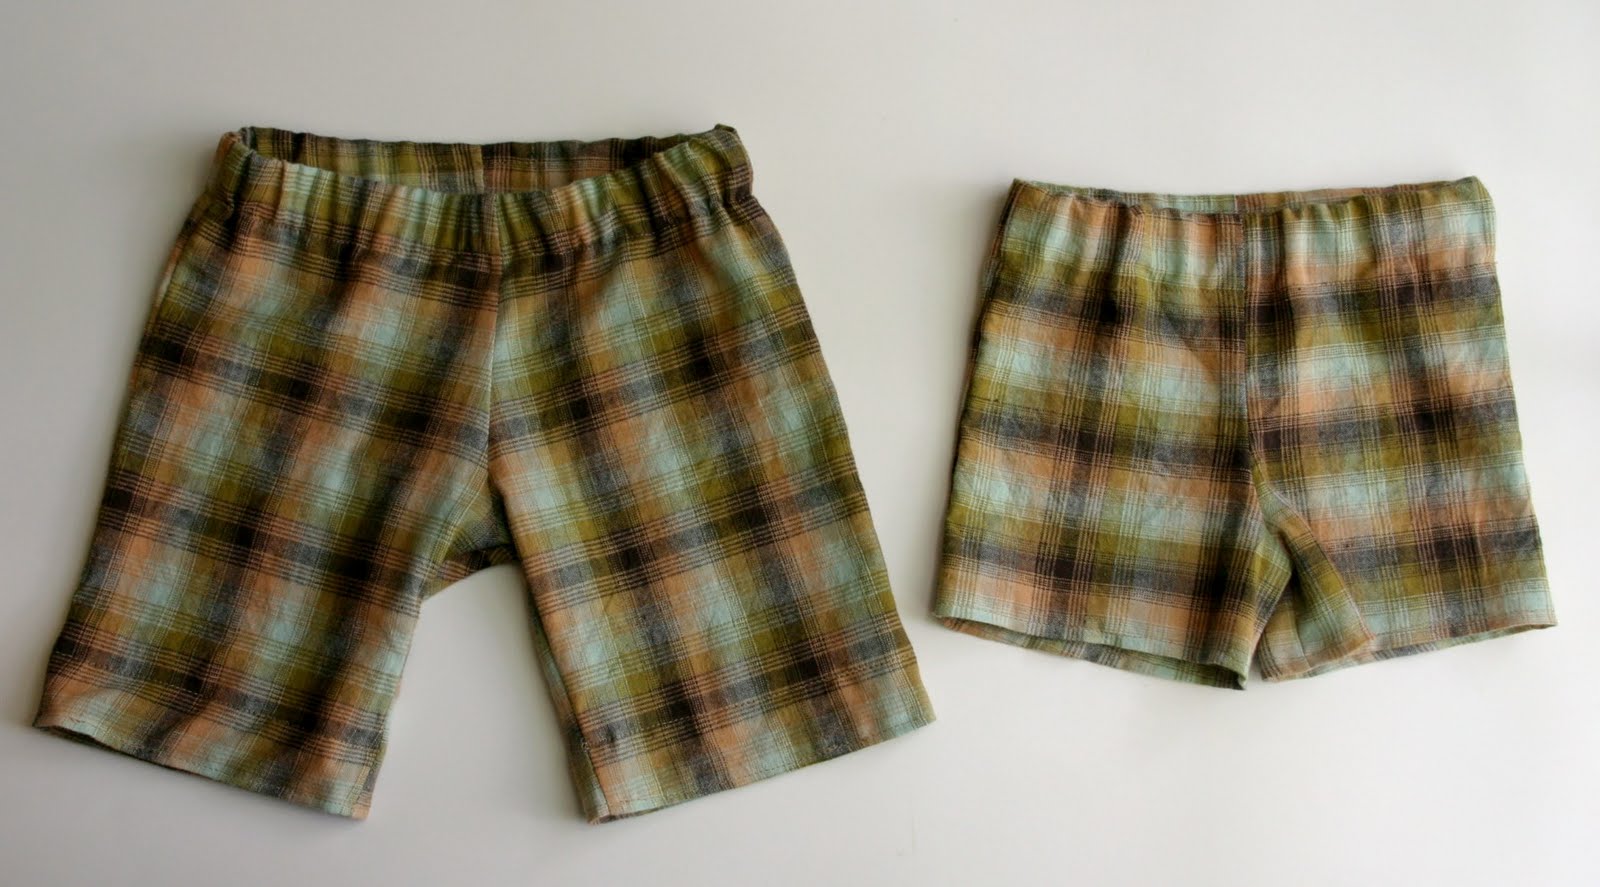
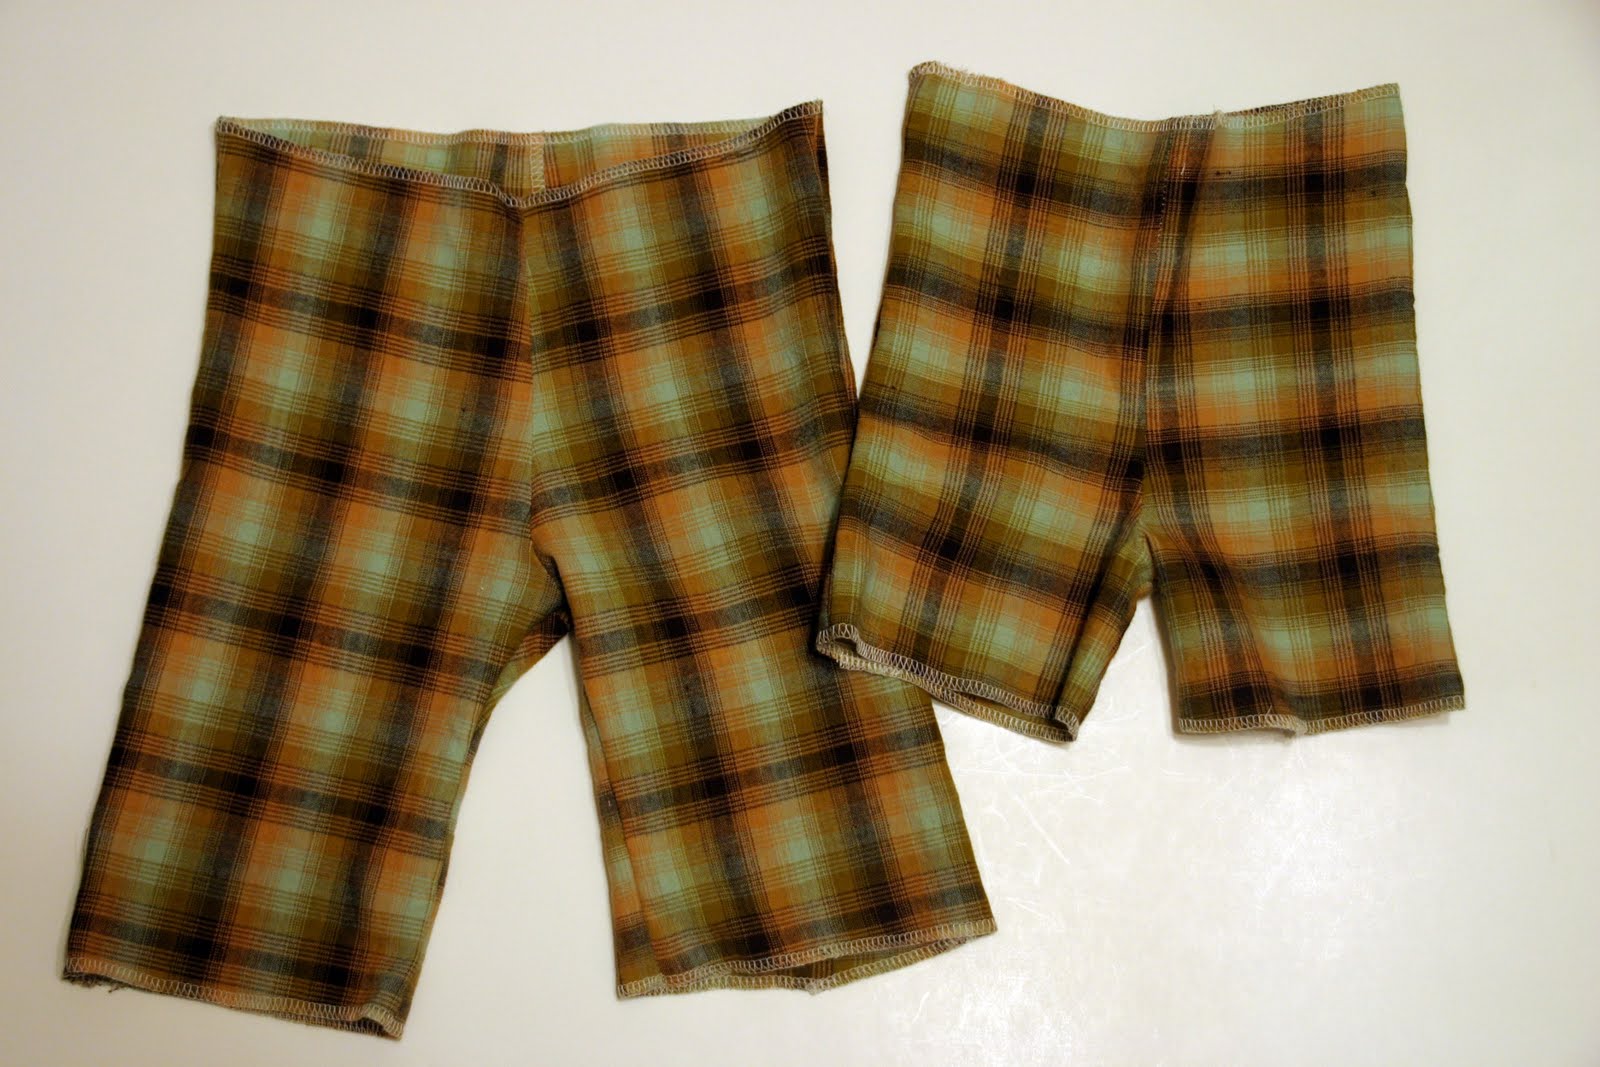
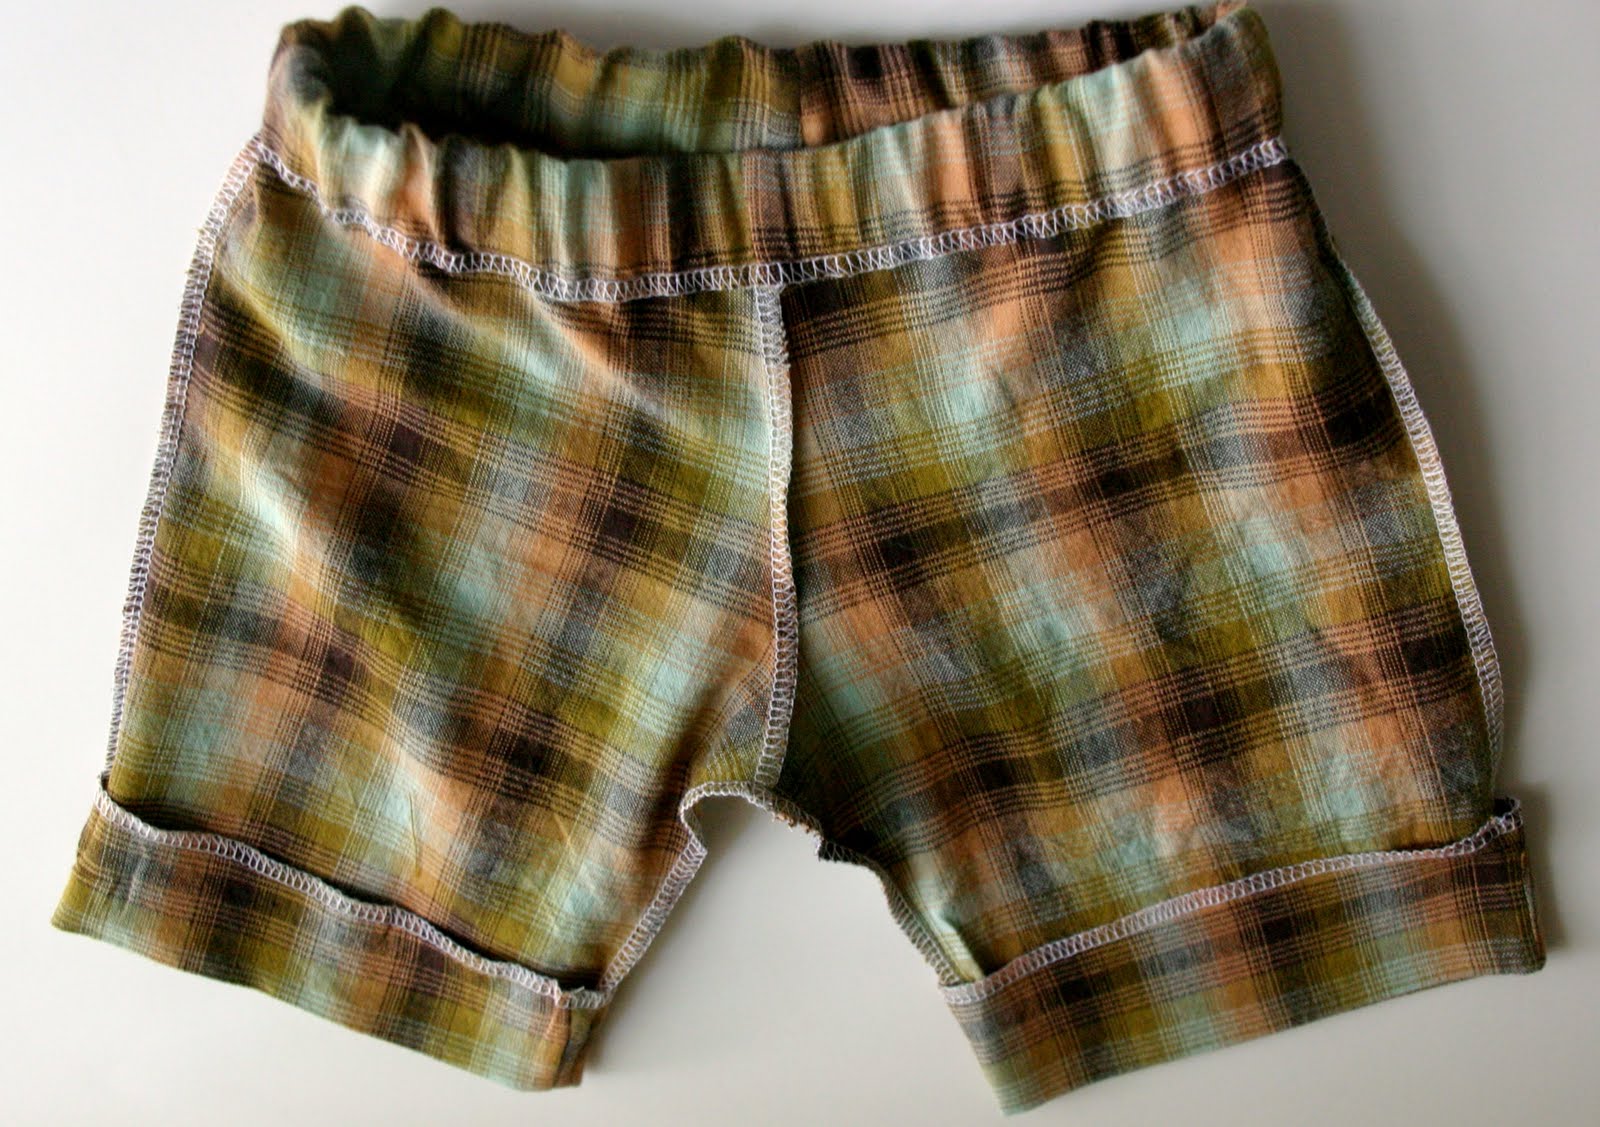
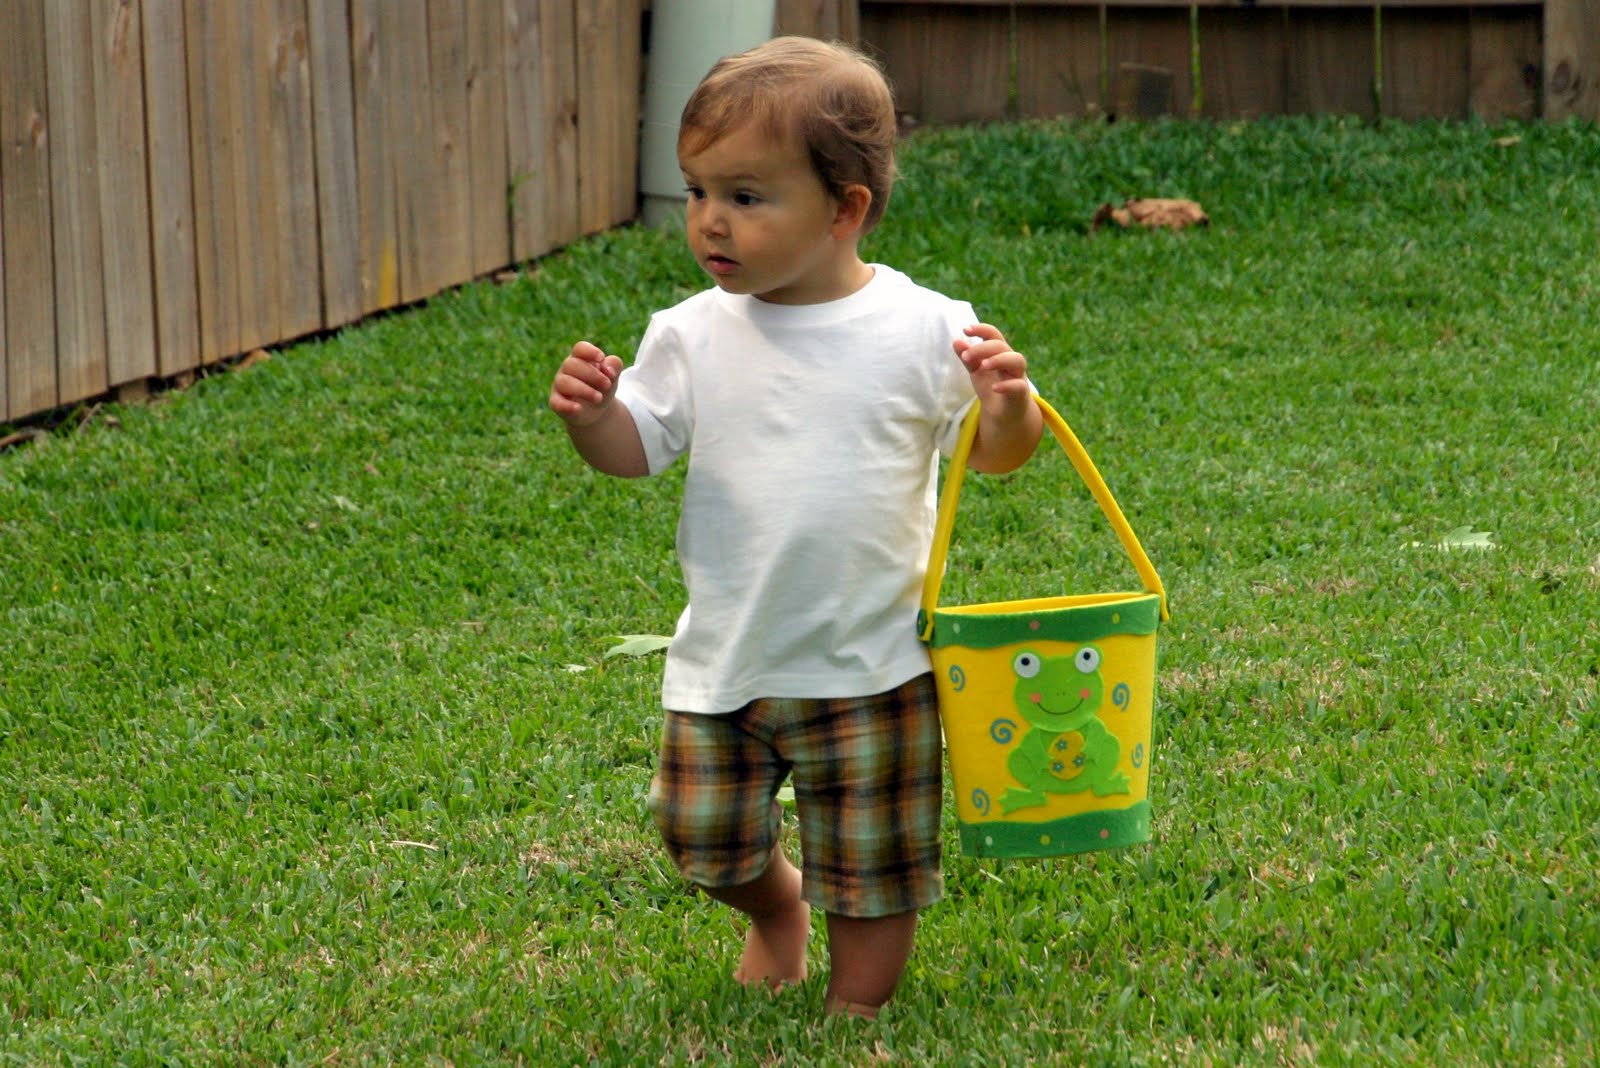
This year I had the bright idea that I would dress my boys in matching shorts for Easter. I mean how much longer are two boys going to let me do this, right (but really how much longer)? So, I found some adorable plaid fabric and decided to make them some Little Boy Shorts. I know that the best way to make a pattern is to take another article of clothing apart and trace the pieces, so that is just what I did. Add length to the top (about 1.5″) and the the bottom of the shorts (about 3″) My sons wear 2T and 6mo.

Supplies:
1/2 yd fabric
1/2” elastic
white paper for pattern
safety pin & sewing pins

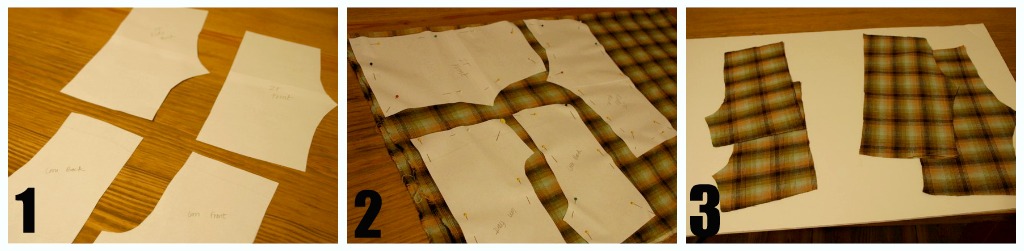
1 – Trace an old pair of shorts onto a piece of paper
2 – Pin the pattern pieces to your fabric
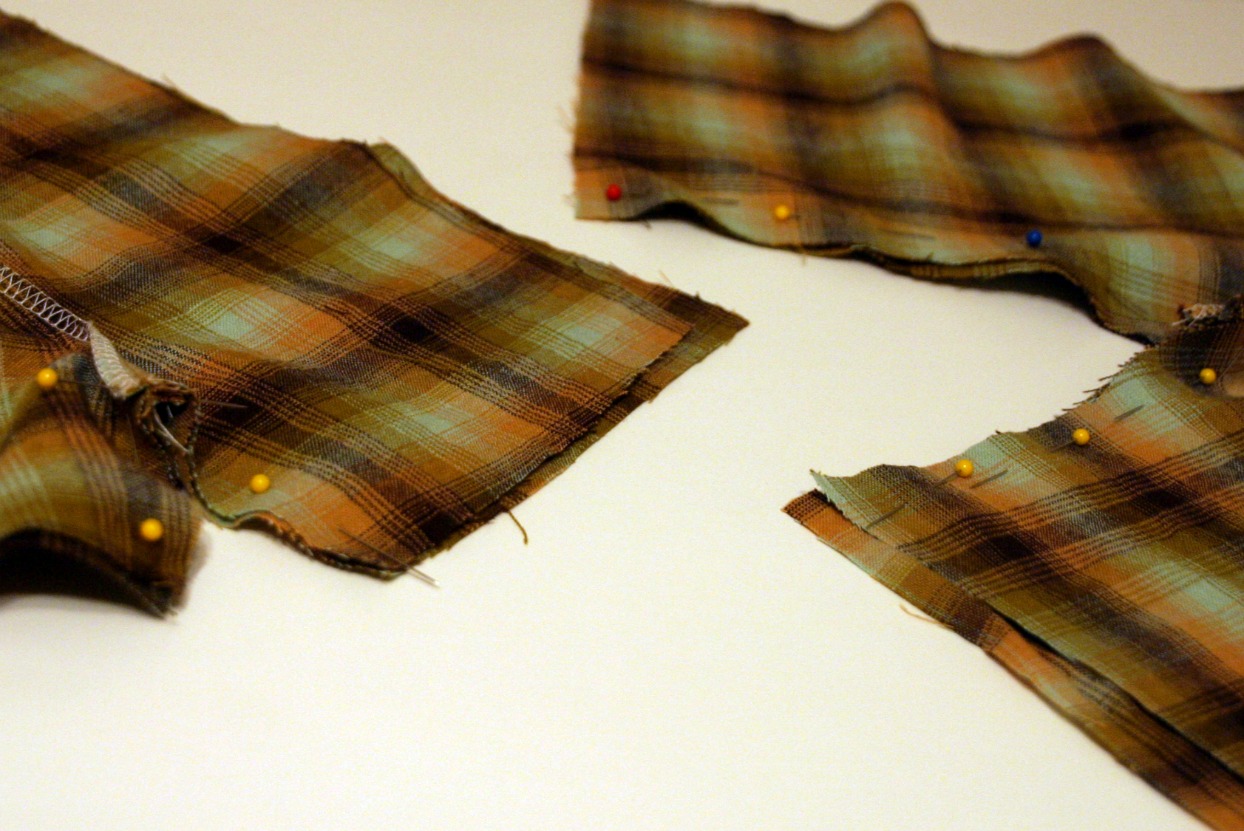
3 – Cut the new pieces out

This is the first pair of shorts I have made for the boys and I kind of just sat there after this step. I had a million ideas for the order of construction but because I was making these the night before Easter (oops) I didn’t have time for that. I remembered that one of my favorite blogs MADE has a tutorial for a Basic Kids Pants and thought it had to be pretty similar. So thanks MADE!
She says the easiest thing (which totally makes sense) is to sew up the crotch of the pants first because they are already together. If you have a fabric with a right and wrong side, flip your fabric before sewing.
After every step, serge the seam if you have a serger and press with your iron for a more professional look.
Next, pin and sew the inseam together. Then again,serge the seam and press it down.
Next, pin and sew the legs together. Serge that seam as well.
Next, I serged around the top of the pants and the bottoms of the legs because I had to try them on the boys and I didn’t want them to fray. Dana (from MADE) said that the front of the pants will be lower than the back, which is something I had never noticed. She said it will make for a more comfortable fit, so on the 6mo shorts, I actually just cut a little dip after I took this picture.
Next, we will add the elastic. Measure your little boy’s waist and add one inch. For example my oldest son’s waist is 18.5″ so I cut my elastic to 19.5″. Fold down the top of the pants with about 1/4″ overlap and use the elastic as your guide as you pin. Leave an opening of about 1″ and take the elastic out. Sew to top of the shorts closed but remember to leave that 1″ opening to put the elastic back in.
Now insert the elastic using a safety pin. Make sure it is flat all the way around. The elastic will be shorter in length that the shorts. Scrunch the shorts up, pull the elastic out a little and sew the elastic together. I used a zig-zag stitch in 2 places to make sure the elastic stays together.
Lastly, turn the shorts inside out and sew the bottom of the shorts. I sewed in two places. On the top of the serged line and on the bottom right next to the seam.
I added my fabric labels to the back.
Look at these sweet boys in their matching Little Boy Shorts.
Perfect for Egg Hunting
Stay tuned next week for an exciting project because I am a contestant on Season 3 of One Month to Win it! Woo Hoo!

Filed Under: baby stuff, clothes, fabric, holidays, kid stuff, serger, sewing, tutorial Tagged With: kids

Car Seat Strap Covers

January 30, 2011 By Taylor 3 Comments

Don’t you love an easy project that you can finish in just about an hour? I know I do, especially because I have problems a little trouble finishing projects in a timely fashion. I wanted to recover baby #2’s car seat and realized that was going to lead me to my previous problem, an unfinished project. I just don’t have enough time so I though I would spruce up his/her car seat straps! Not to mention, the old straps were looking a little rough. Does anyone have the Chicco Car seat? I LOVE it but the strap covers that came on it were sewn-on which made them super hard to wash. I decided to make my own with Velcro so I could wash them easier.

This project is really easy, all I did was use the existing strap covers as a template, a little quilt batting and used some existing fabric that I had. I did make my own bias tape (which is a little more time consuming) but you could just buy some for an even easier time.
Here are the original strap covers and the fabric I picked out, I wanted it to still match the carrier. I used the star fabric for the bias tape. I didn’t include how to make your own bias tape in the tutorial, you can find it online or like I said you can buy it from any craft store.
Lay out the original strap covers as a template. Trace onto your fabric and cut 4 new pieces. Front and back for both.
Don’t forget to cut the batting for the inside of the pieces like I almost did, oops!
Make (or buy) your bias tape, for the Chicco covers you need about 35″”. By the way… I have made my fair share of bias tape and I just found out that there is a cheap tool that folds the fabric for you and makes it so much easier! Where have I been? That is on the to-do list for this week.
Sew the “circles” of the strap covers with wrong sides together and the layer of batting in between. So it should be fabric facing down, batting and fabric facing up in your sewing machine.
Pin the bias tape all the say around on both covers and sew it on.

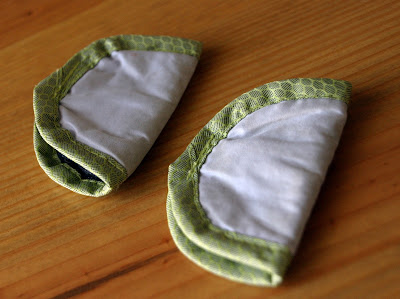
Lastly, I used a small strip of Velcro as the closure. Here is the before and after!

Not only will these be easier to take on and off, the original fabric was so scratchy and the new covers are soft fleece. I think baby 2 loves them already!
Related Posts Plugin for WordPress, Blogger...

Filed Under: baby stuff, fabric, kid stuff, sewing Tagged With: kids

  • « Previous Page
  • 1
  • …
  • 9
  • 10
  • 11
  • 12
  • Next Page »

Welcome to Taylor Made

http://www.taylormadecreatesblog.com/about-me Hi Yall! I'm Taylor... an artsy mom of three from Houston, TX. I love sewing, collecting floral fabric, eating Mexican Food, photography, brights colors, rearranging, and rolling clay. Taylor Made Creates is all about creating a fun, colorful home, sewing cute things and eating good food. Check out my SHOP HERE HERE! Thanks for stopping by!

Search

Pin with me!

Like Me :)

Facebook Pagelike Widget

More Recent Posts

  • Kid's Animal Room
  • Kids Camping Shirts
  • Mermaid Birthday Party
  • Conversation Heart Cold Packs
  • Holiday Apple Tea Punch
  • Purple Princess Costume
  • Letterboard Costume
  • La Croix Costume

FAVORITES

  • White Wine Sangria
  • Handmade Mother’s Day: Recipe Oven Mitt
  • Fresh Peach Dump Cake – a Recipe
  • Salt Dough Napkin Holders
  • Black Bean Salad
  • Stethoscope Covers
  • Tips for Catching up on Project Life
  • DIY TeePee with Forest Fables Fabric
  • Playroom Reveal

Copyright © 2026 · Web Hosting By RFE Hosting