TaylorMade

DIY, Home Decor & Sewing

  • Home
  • SHOP
  • DIY & Sewing
    • For the Home
    • Sewing
    • Costumes and Holidays
    • Cricut Projects
    • Crafting
  • Parties
  • Recipes
  • Home Tour
  • Favorites
  • About

Conversation Heart Cold Packs

February 5, 2018 By Taylor Leave a Comment

 If your kids are anything like mine then these Conversation Heart Cold Packs will be a big hit at your house!! We call them “boo boo buddies” and they are very well loved :) We keep these guys in the freezer and the kids know right where to find them… you bonked your head, got a scratch, your legs are sore? Go grab a boo boo buddy! These are the perfect little custom gift and they are easier than you think!
 
SUPPLIES:
  • pastel fabric for hearts
  • dark pink or red fabric for words
  • iron on adhesive/fusible interfacing
  • heart template (DOWNLOAD HERE)
  • rice or flax seeds for filling

Using the heart template, cut two hearts from each color fabric.

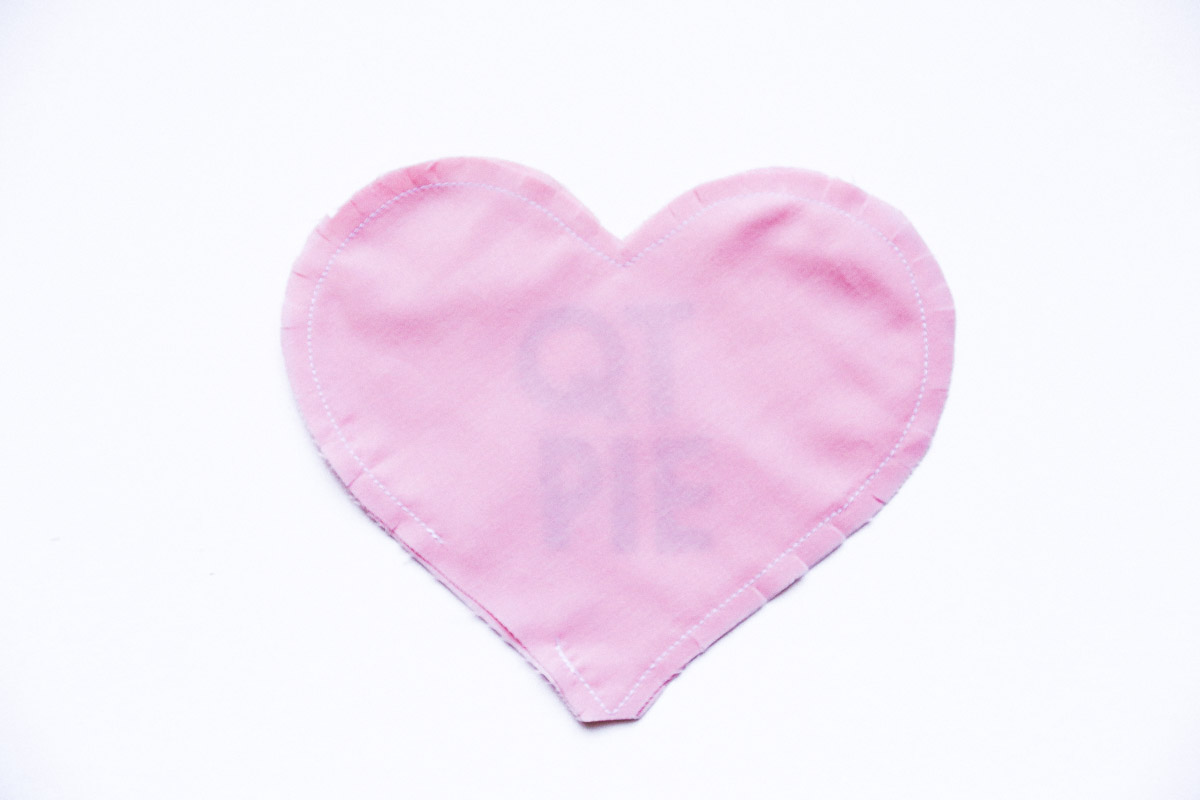
For the letters, there are several ways you can do them. If you have a Cricut or Silhouette Machine, cutting your letters out on that is a great option. You could also use felt and sew them on. I used Wonder Under (fusible interfacing) and ironed it to my dark pink fabric. Then I hand wrote my letters (don’t forget to write them backwards) on the back and cut them out.

Iron the letters to one side of the hearts you have cut out.


Next, place the heart pieces right sides together, pin and sew. Be sure to leave a 2″ opening on one side of the heart. That will be where you fill the heart in the next step! After you sew the hearts, clip the curves, the tip of the heart and the center where the heart meets. Clip carefully! You don’t want to clip too close to the line you just sewed but clipping well around those curves will allow your heart to lay flat with no puckering.


Flip your hearts right side out and press.


Now its time to fill your hearts 🙂 I used plain brown rice because thats what I had. Flax seeds are a little more expensive but they make amazing cold packs. If you have any essential oils it would be a great idea to add a few drops to your rice also… we have a Lavender one and they kids actually fight over it, it smells amazing! I just spooned the rice into the opening then used a pin to keep it closed and sewed the opening shut.

Voila! Super easy custom cold packs! Your kids bonked heads will be so happy! Happy Valentine’s Day

Check out another favorite Valentine’s Day project HERE and another Boo Boo Buddy HERE :)

Filed Under: craft, fabric, kid stuff, sewing Tagged With: accessories, holidays

DIY Leather Tote

March 31, 2014 By Taylor 19 Comments


DIY Leather ToteIf you are anything like me at the beginning of this project then you are scared of sewing with leather, am I right? Cause I was… I didn’t even know if my sewing machine could handle it. The Leather Hide Store asked me if I wanted to try out some leather sewing. They are a small family owned store that sells wholesale leather hides and remnants… they also work closely with the craft community! I was up for a challenge so I chose a color called “Peanut Brittle” from their remnant section. The piece received a few days later was HUGE!!

DIY Leather tote

I decided on a lined tote. Here are some “sewing with leather tips” I learned along the way:

sewing tips

diy leather tote

I started with my pattern. This is a very rough and not to scale picture of what I measured out on the wrong side of the leather. I just used a ball point pen to measure out my pattern.

bag measurements

diy tote bag IMG_8134

After tracing the pattern, I cut it all out. For the straps I cut out two pieces at 2.5″ x 32″. I like REALLY long straps so most peolple might want to shorten this.

diy tote bag

Remember not to use pins on leather. This was the hardest part for me, the leather needle actually cuts a little dot so once you make those sew lines you can’t really do it over. I used my clover clips to keep it all together. Place right sides together and sew up the sides and the bottom of the bag leaving the corners alone.

diy tote bag

I also read not to back stitch and to tie up the ends of the thread. However I back stitched in a few places and I think it did fine.

diy leather tote

Next, I closed up the corners. Do this by “smooshing” the sides together and matching the seams. diy leather tote

This was the hardest part for my machine, I had to sew to the seam then use my wheel to manually go through all the layers.

diy leather tote

At this point it should look like this… kind of bag-ish :)

diy leather tote

Now on to the lining. This part could be skipped all together because leather won’t fray. I wanted a pop of color and I needed a pocket so I decided on it. I cut two pieces at the exact same measurements as the outer bag pieces.

diy leather tote

I also made a pocket by cutting two pieces at 11″x 7″. Place pocket pieces right sides together and sew all around leaving an opening for flipping. Flip and and press so you have a double sided rectangle. Top stitch the top of the pocket. Place on your lining where ever you want. Pin and top stitch around the two sides and the bottom.

Diy leather tote IMG_8150 IMG_8151

Then I measured my phone to make a perfect little pouch for her. I just sewed up the center of the pocket making two.

diy leather tote

I also added a little taylormade tag for fun. I used my burning tool then cut some leather into an oval and sewed it to the other side of the lining.

diy leather tote

With the two lining pieces cut, do the exact same thing as you did with the leather. With right sides together, sew up sides and bottom then sew the corner.

diy leather tote

diy leather tote

You should have two bag pieces now. With right sides together place the lining part over the leather part. diy leather tote IMG_8164

Match the seams and use clips or clothespins and sew all the way around the top edge leaving an opening for flipping.

diy leather tote IMG_8167

Flip the bag right side out and push the lining into place. I usually would sew the lining down so it doesn’t show from the outside but I liked the little pop of color so I sewed it with a little lip showing. Either way top stitch all the way around.

diy leather tote IMG_8170

Lastly we have to make the straps, remember that my measurements are extra long so feel free to shorten them. I just pinched the wrong sides together and sewed leaving a few inches at the end. I marked where to stop sewing.

leather bag straps

Next, I measured 4″ from the seam of the bag and placed the straps. Then I just used a box stitch to make sure they are good and sturdy!

diy leather tote

Voila.. I sewed with leather!

diy leather tote

DIY Leather Tote with tips!

IMG_8195

Thanks so much to Leather Hide Store for providing the leather and helping me overcome my fear :) Have I inspired you to make your own tote? Its your lucky day! Leather Hide Store is giving one lucky reader a $50 gift card to their online store! Enter by the Rafflecopter below. Good Luck!
a Rafflecopter giveaway

Filed Under: sewing Tagged With: accessories

The Frozen Fox

August 14, 2013 By Taylor 24 Comments

frozen fox

Meet The Frozen Fox. My boys love band aids, what kid doesn’t? I’ve seen these little mommy-made ice packs around blogland and thought it would be a great little surprise. Now, when someone gets hit (by their brother) they have a little something to take their mind off of it.

IMG_6717

All you need is the Frozen Fox Template, fabric, felt and a button. Click on this picture to enlarge,save and then print it off.

frozen fox template

Cut everything out.

IMG_6693

Place everything on the front of the fox face. Pin it and sew.

IMG_6695

IMG_6694

IMG_6696

For the ears: pin the inner white part on top of the larger fabric ear and sew. Then get the other large fabric ear and put right sides together. Sew around the two longest sides leaving the bottom open and flip.

IMG_6697

IMG_6698

Sew a button to the face right where the white cheeks meet.

IMG_6704

IMG_6705

With the white sides of the ears facing down, place the ears on the face lining up the edges.

IMG_6706

Then place the other side of the face right side down on top of the fox. Pin all the way around and leave the bottom open. IMG_6708

Sew around the fox. On the bottom, leave a 2″-3″ opening. Clip the corners and flip right side out.

IMG_6710

Pour rice in to the opening at the bottom. I tried both beans and rice… I like the rice better but the beans are a little heavier, and both will work. (husband’s man hands not mine haha)

IMG_6712

Hand sew the bottom up to close the fox :)

IMG_6713

IMG_6718

TaDa! Now you have a very easy mom tool right in your freezer :)

IMG_6719

Filed Under: craft, fabric, felt, kid stuff, sewing, tutorial, Uncategorized Tagged With: accessories

Zipper Pouch Love

April 7, 2013 By Taylor 4 Comments

For Valentine’s Day I always try to make my mom a little handmade something. Mainly because I love making little gifts and sewing for your husband is never as exciting :) And yes I am posting something from Valentines Day in April. 
I used Anna’s Pattern from Noodlehead. It’s the Open Wide Zippered Pouch found HERE. 
I added a little heart by using a reverse applique. 

My favorite part is the little zipper pull with polka dots.

Really easy little gift to whip up. Also, you can never have enough little bags, am I right?

Follow on Bloglovin

Related Posts Plugin for WordPress, Blogger...

Filed Under: fabric, gift, sewing Tagged With: accessories

  • 1
  • 2
  • 3
  • …
  • 6
  • Next Page »

Welcome to Taylor Made

http://www.taylormadecreatesblog.com/about-me Hi Yall! I'm Taylor... a crafty mom of three from Houston, TX. I love sewing, collecting floral fabric, eating Mexican Food & Margaritas, photography, brights colors, rearranging, and decorating. Taylor Made Creates is all about creating a fun, colorful home, sewing cute things and eating good food. Check out my SHOP HERE HERE! Thanks for stopping by!

Search

Pin with me!

Like Me :)

Facebook Pagelike Widget

More Recent Posts

  • Kid's Animal Room
  • Kids Camping Shirts
  • Mermaid Birthday Party
  • Conversation Heart Cold Packs
  • Holiday Apple Tea Punch
  • Purple Princess Costume
  • Letterboard Costume
  • La Croix Costume

FAVORITES

  • More Casserole Carriers
  • Built in Bunkbeds
  • Marble Counter Alternatives
  • 30 Minute Sundress with Forest Floor Fabrics
  • Winged Peasant Dress
  • Fresh Peach Dump Cake – a Recipe
  • A Peppa Pig Tea Party Birthday
  • How to Shorten a Shirt
  • A Yo Gabba Gabba Birthday Party

Copyright © 2022 · Web Hosting By RFE Hosting