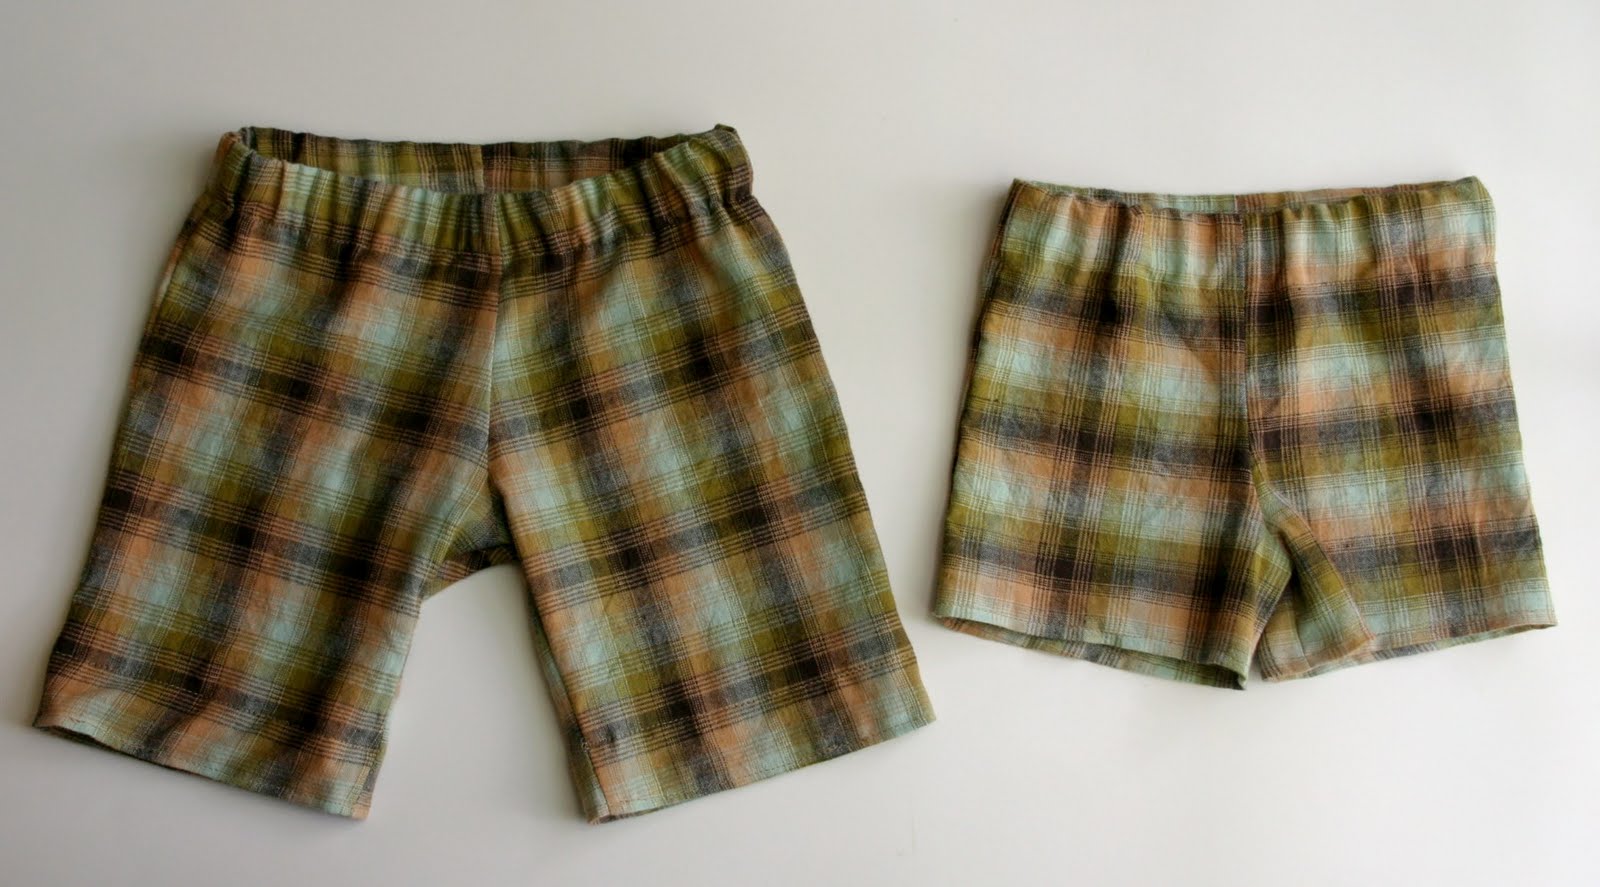
This year I had the bright idea that I would dress my boys in matching shorts for Easter. I mean how much longer are two boys going to let me do this, right (but really how much longer)? So, I found some adorable plaid fabric and decided to make them some Little Boy Shorts. I know that the best way to make a pattern is to take another article of clothing apart and trace the pieces, so that is just what I did. Add length to the top (about 1.5″) and the the bottom of the shorts (about 3″) My sons wear 2T and 6mo.
Supplies:
1/2 yd fabric
1/2” elastic
white paper for pattern
safety pin & sewing pins

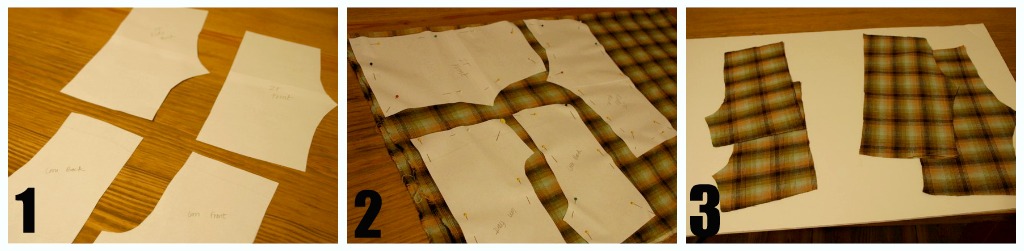
1 – Trace an old pair of shorts onto a piece of paper
2 – Pin the pattern pieces to your fabric
3 – Cut the new pieces out
This is the first pair of shorts I have made for the boys and I kind of just sat there after this step. I had a million ideas for the order of construction but because I was making these the night before Easter (oops) I didn’t have time for that. I remembered that one of my favorite blogs MADE has a tutorial for a Basic Kids Pants and thought it had to be pretty similar. So thanks MADE!
She says the easiest thing (which totally makes sense) is to sew up the crotch of the pants first because they are already together. If you have a fabric with a right and wrong side, flip your fabric before sewing.

After every step, serge the seam if you have a serger and press with your iron for a more professional look.

Next, pin and sew the inseam together. Then again,serge the seam and press it down.

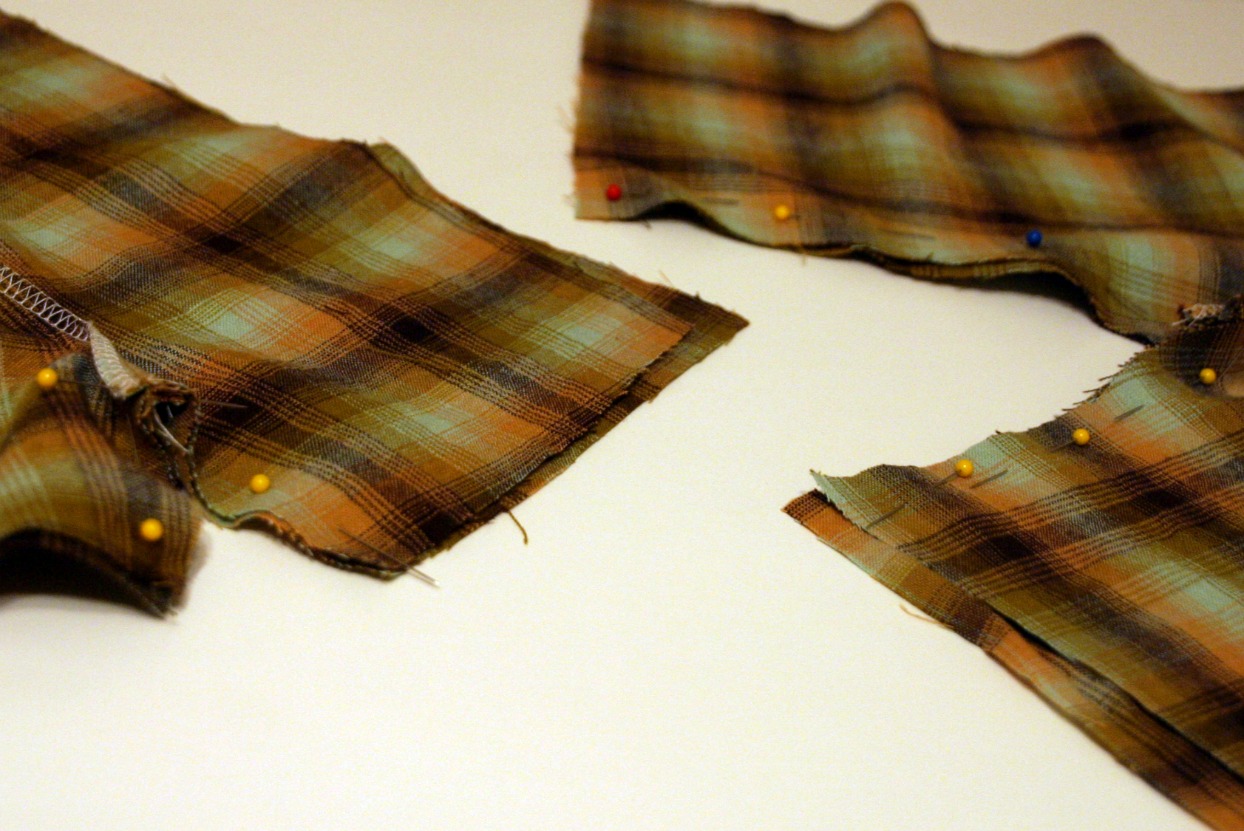

Next, pin and sew the legs together. Serge that seam as well.

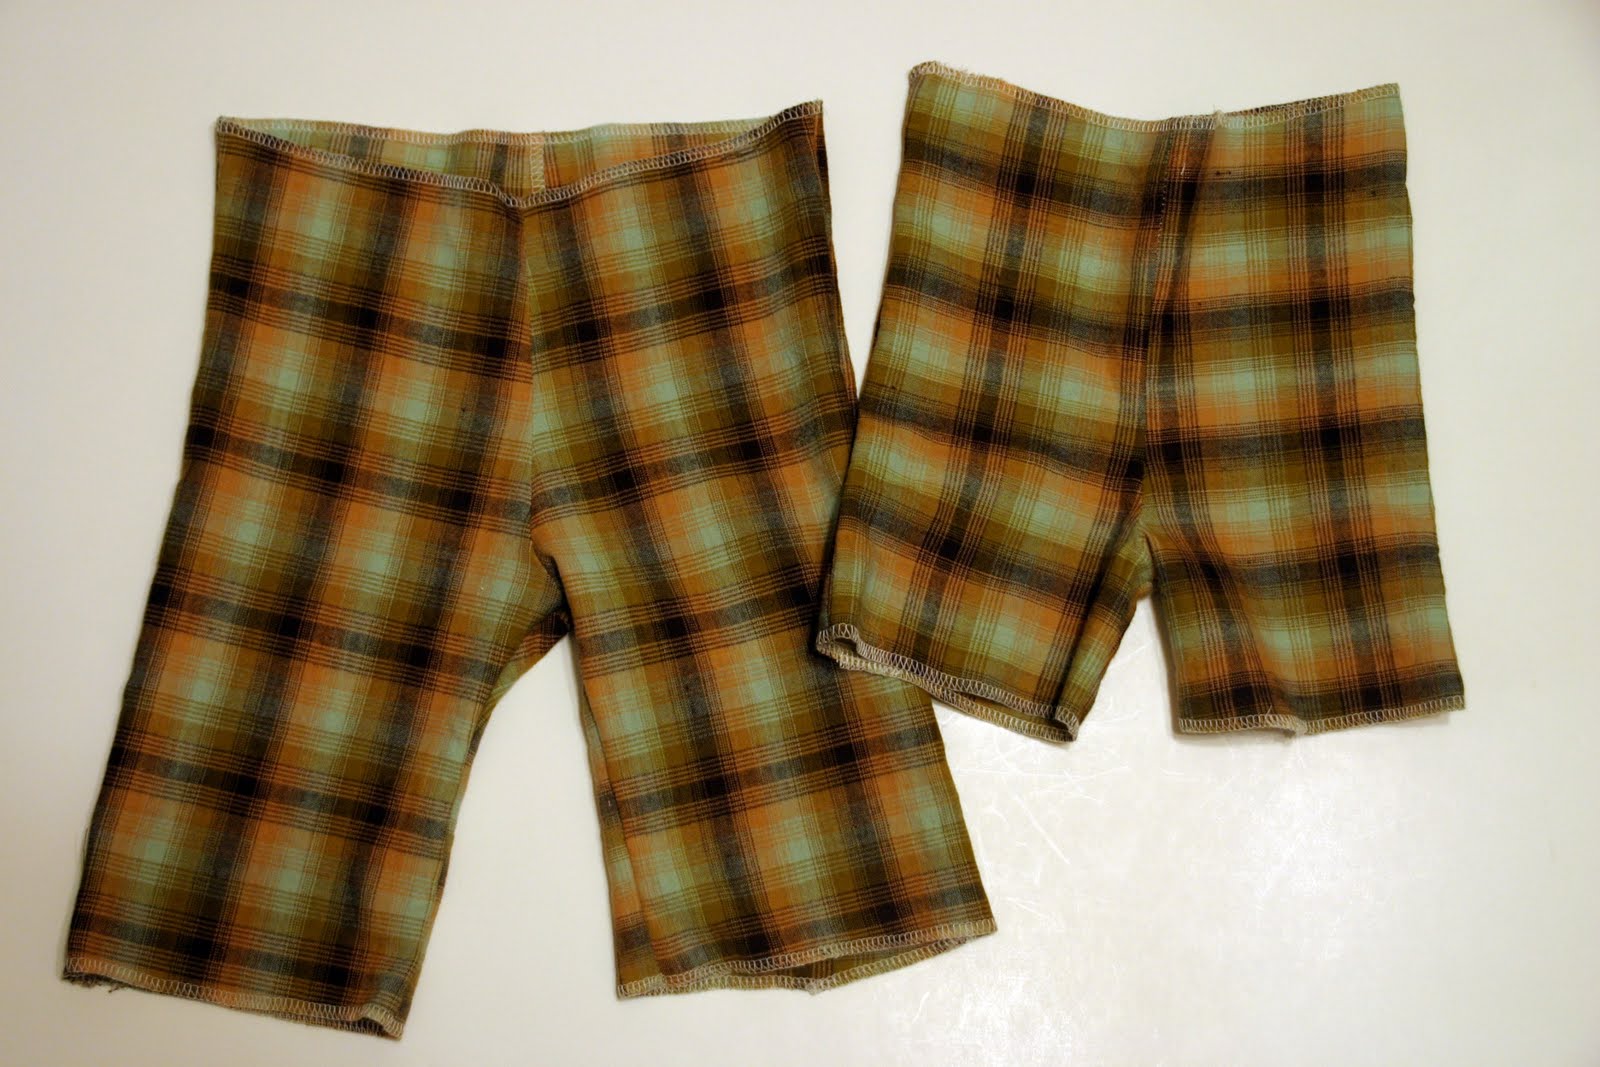
Next, I serged around the top of the pants and the bottoms of the legs because I had to try them on the boys and I didn’t want them to fray. Dana (from MADE) said that the front of the pants will be lower than the back, which is something I had never noticed. She said it will make for a more comfortable fit, so on the 6mo shorts, I actually just cut a little dip after I took this picture.
Next, we will add the elastic. Measure your little boy’s waist and add one inch. For example my oldest son’s waist is 18.5″ so I cut my elastic to 19.5″. Fold down the top of the pants with about 1/4″ overlap and use the elastic as your guide as you pin. Leave an opening of about 1″ and take the elastic out. Sew to top of the shorts closed but remember to leave that 1″ opening to put the elastic back in.

Now insert the elastic using a safety pin. Make sure it is flat all the way around. The elastic will be shorter in length that the shorts. Scrunch the shorts up, pull the elastic out a little and sew the elastic together. I used a zig-zag stitch in 2 places to make sure the elastic stays together.


Lastly, turn the shorts inside out and sew the bottom of the shorts. I sewed in two places. On the top of the serged line and on the bottom right next to the seam.
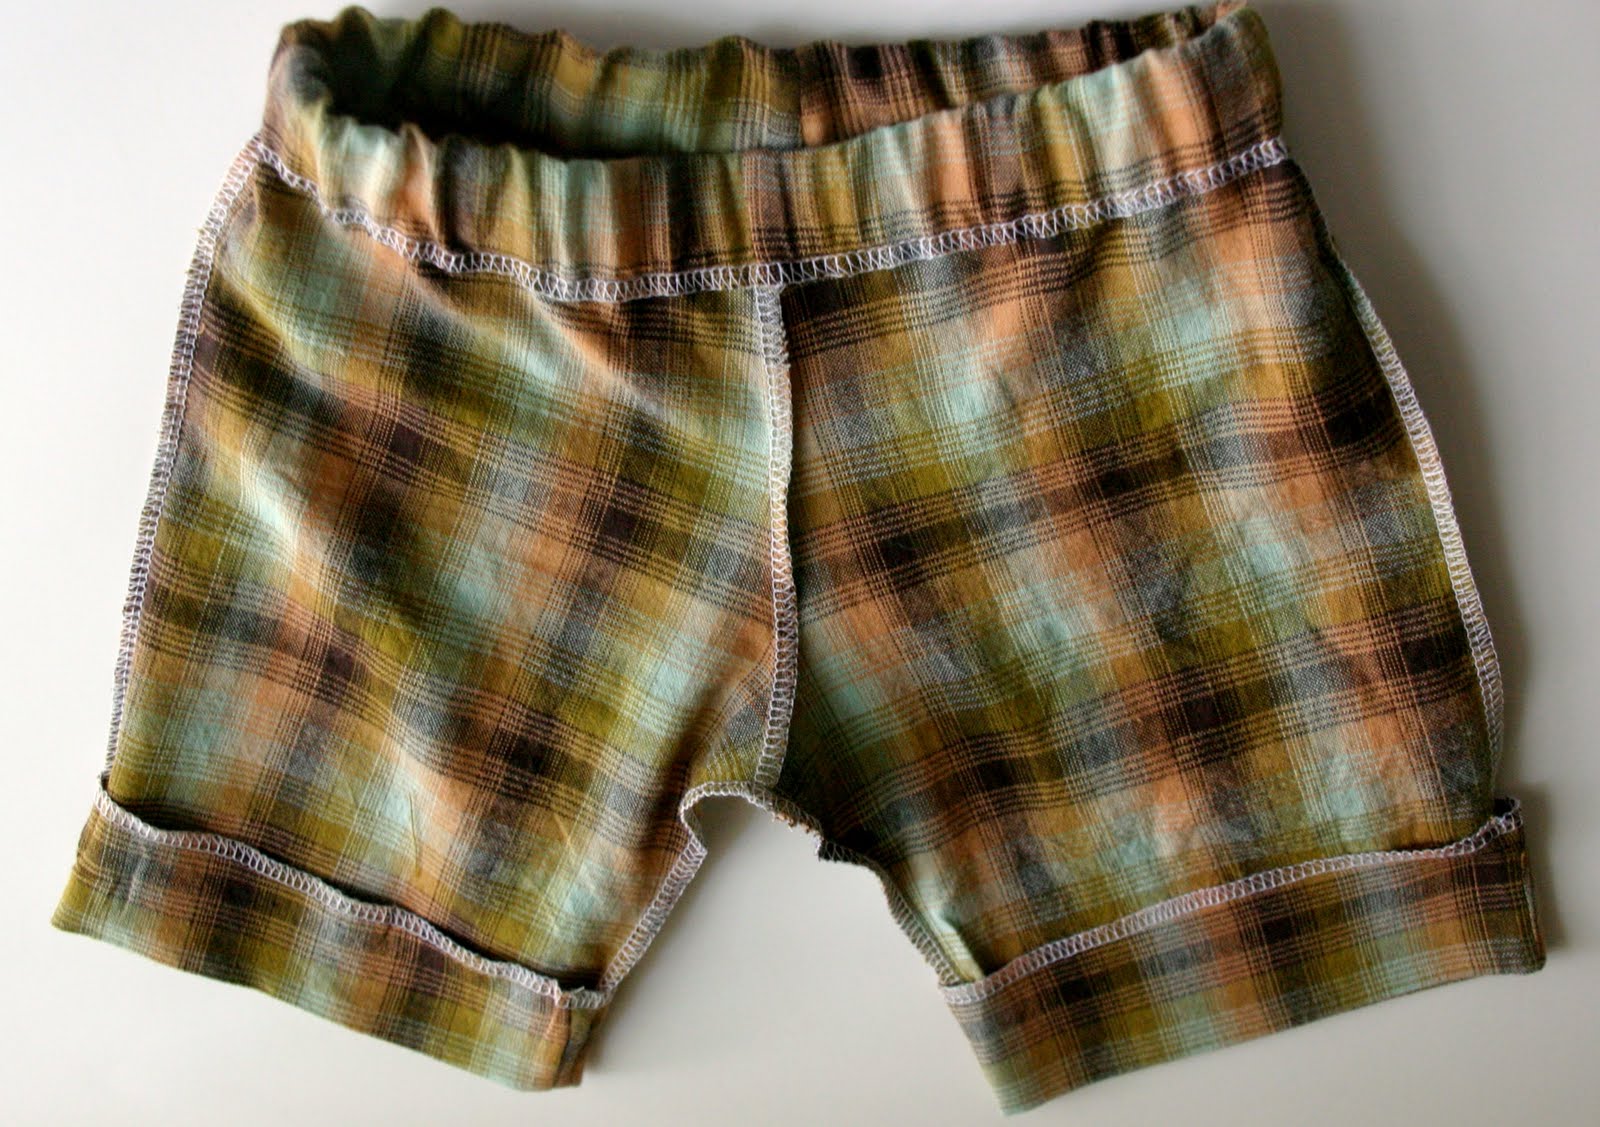
I added my fabric labels to the back.

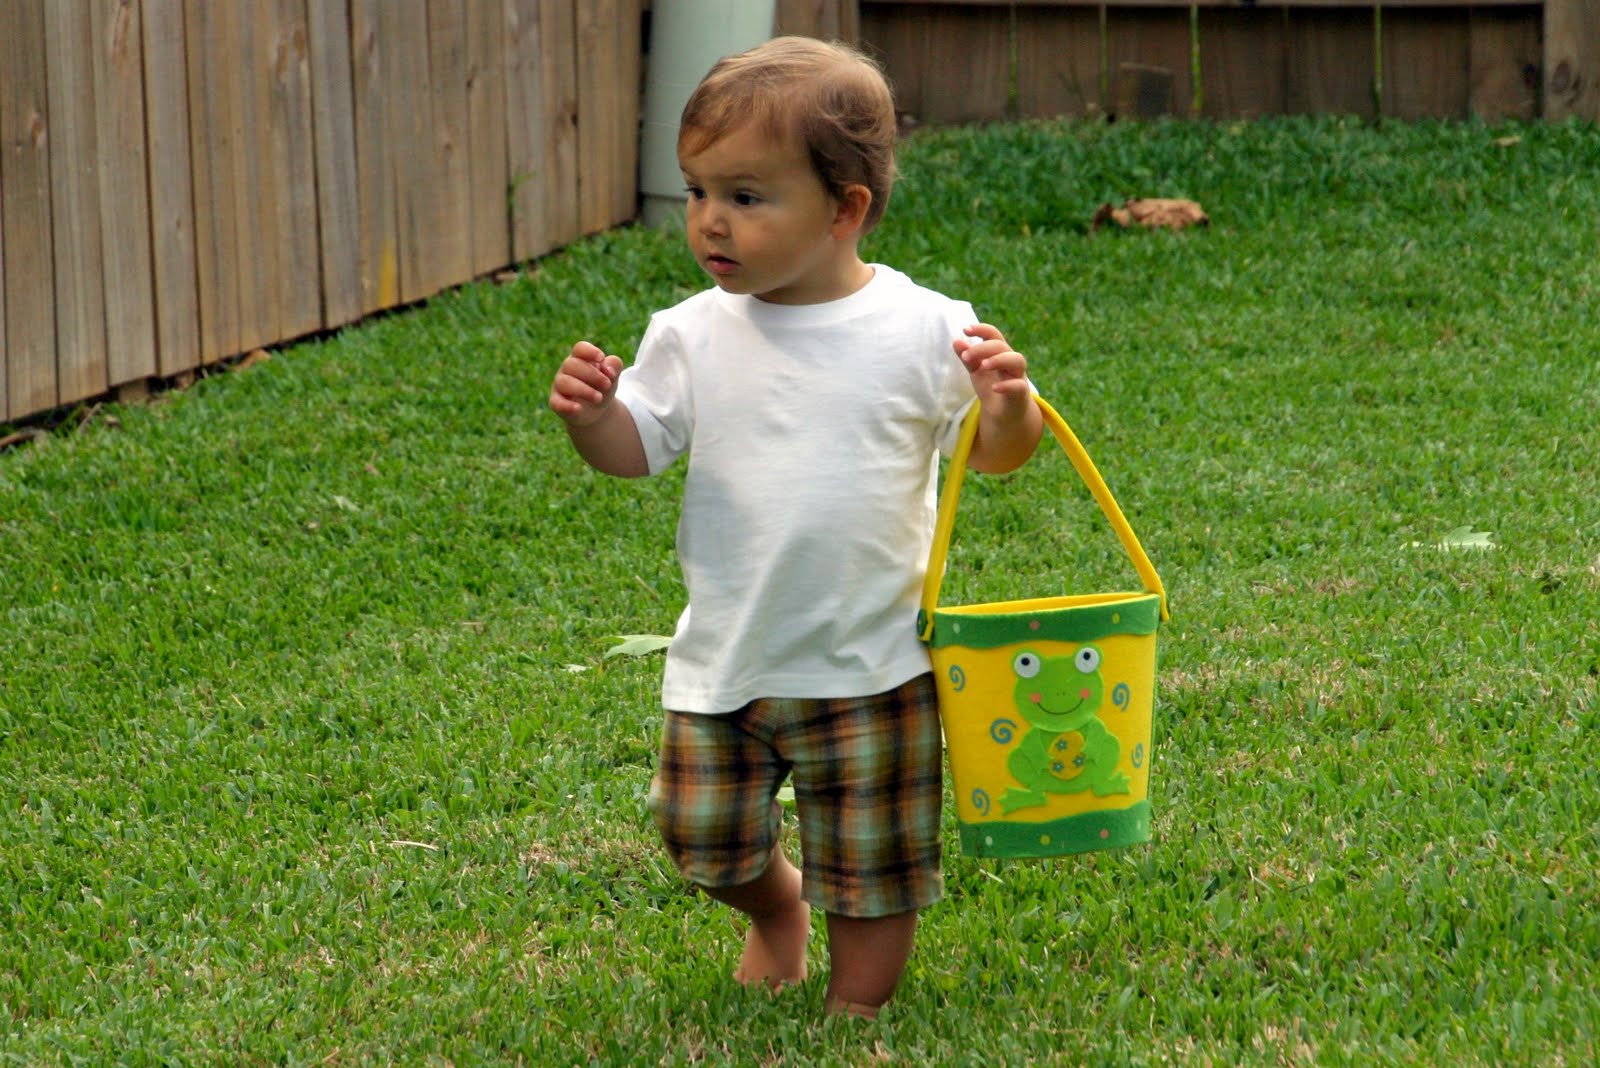
Look at these sweet boys in their matching Little Boy Shorts.

Perfect for Egg Hunting

Stay tuned next week for an exciting project because I am a contestant on Season 3 of One Month to Win it! Woo Hoo!

So cute and perfect for that age. I didn’t really understand how to use elastic but it makes complete sense now. Thanks!
Adorable! I would totally do this if I had young boys!! (Or, really, any boys at all!). :)
Andrea
http://www.addicted2tutes.blogspot.com
These shorts are so cute! I love how you made some for both of your sons. They look so handsome! Great job!
justenoughstyle.blogspot.com
Those are so ADORABLE!!! The shorts ar ecute too ;) Im your newest follower!
I would LOVE to have you link up to my Whassup Wednesday Par-Tay! And I have a party button you can grab and put on your blog so your friends can come too:)
If you are NOT already a Follower of Elements Interiors….HELLEEERRRR!
Click that Google Follow button and YOU will be ENTERED in my
“Its a SURPRISE!” GIVEAWAY to be announced EVERY MONDAY! Yeppers! You read it right,
a Winner EVERY MONDAY!!! With GREAT Goodies you wont want to miss!!
Hope to see ya at Whassup Wednesday!!!
*ENTER LINKY PAR-TAY Here! *
xoxokara
These are darling! But I really love that pic of your two boys! Too adorable and priceless! How far apart are they? I have 2 boys 20 months apart. It’s a crazy life, but I wouldn’t trade it! Great shorts tutorial. I think I might even be able to make my boys some!
Jen
Scissors & Spatulas
Oh that is so stinking CUTE!! Love it!
New follower here via GFC and FB..
Found you on OMTWI…Good luck can’t wait to see what you create and Have Fun!
Adorable. Enjoy all the matching clothes opportunities. That phase doesn’t last as long as you think it might.
Hi Taylor! I saw you on One Month To win it! I made the top 12 as well. I have seen your shower curtain before and have been dying over it!!! I love it sooo much. You should totally sell them! I am your newest follower as well :-D
Oh My Gosh! Your boys are too cute! Excited to be participating in OMTWI with some talented crafters! Come by and say hi sometime!
Your blog is so cute! I am excited to be participating with you in OMTWI!!!
Lois
ohmygosh your boys are adorable in their little shorts!
Saw you as a contestant on OMTWI. Congrats on being chosen, and good luck!
Super cute and great step-by-step pictures…super helpful!
Cute shorts for two ADORABLE boys!!
Thanks for linking @’Sew Cute Tuesday’! I’ll be featuring you on May 3rd, so be sure to stop by and grab a ‘featured’ button!
Golly those are so cute! And the baby is so cute and huge! So cute!
FWIW, the boys will let you dress them matching as long as you want them too! Then after that, you can “co-ordinate” them! That is what we do all the time. My 7 at home were in green on Easter.
Great job on the shorts :) Btw, I’m admiring all your creative projects here so can you please share them with us at the Creative Bloggers’ Party & Hop? I hope to see you there at the party :)
now that i know you were a costume design major, you’re sewing ability makes so much sense!!
http://www.cupcakesomg.blogspot.com