TaylorMade

DIY, Home Decor & Sewing

  • Home
  • SHOP
  • DIY & Sewing
    • For the Home
    • Sewing
    • Costumes and Holidays
    • Cricut Projects
    • Crafting
  • Parties
  • Recipes
  • Home Tour
  • Favorites
  • About

DIY Anthropologie Flamenco Shower Curtain in Sunshine

April 7, 2011 By Taylor 61 Comments

Best Shower Curtain Ever

I have been eyeing these from Anthropologie for years…

But I have some problems:
#1 I don’t want to spend $118.00 on a shower curtain
#2 Those colors don’t match my room

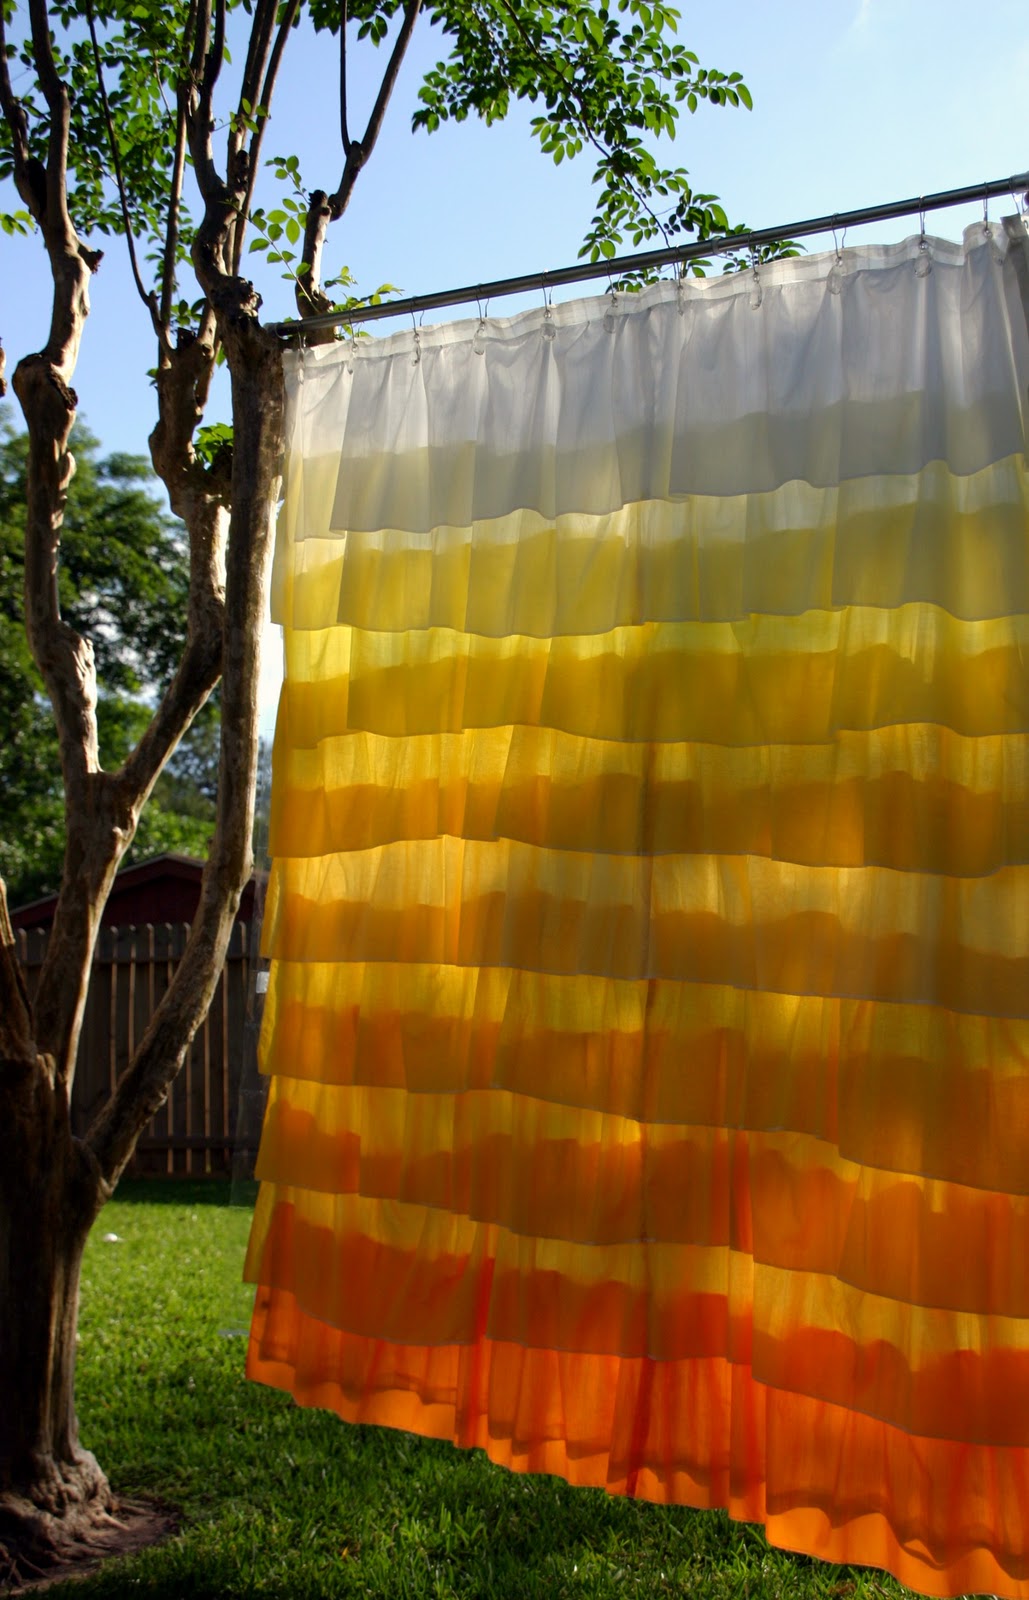
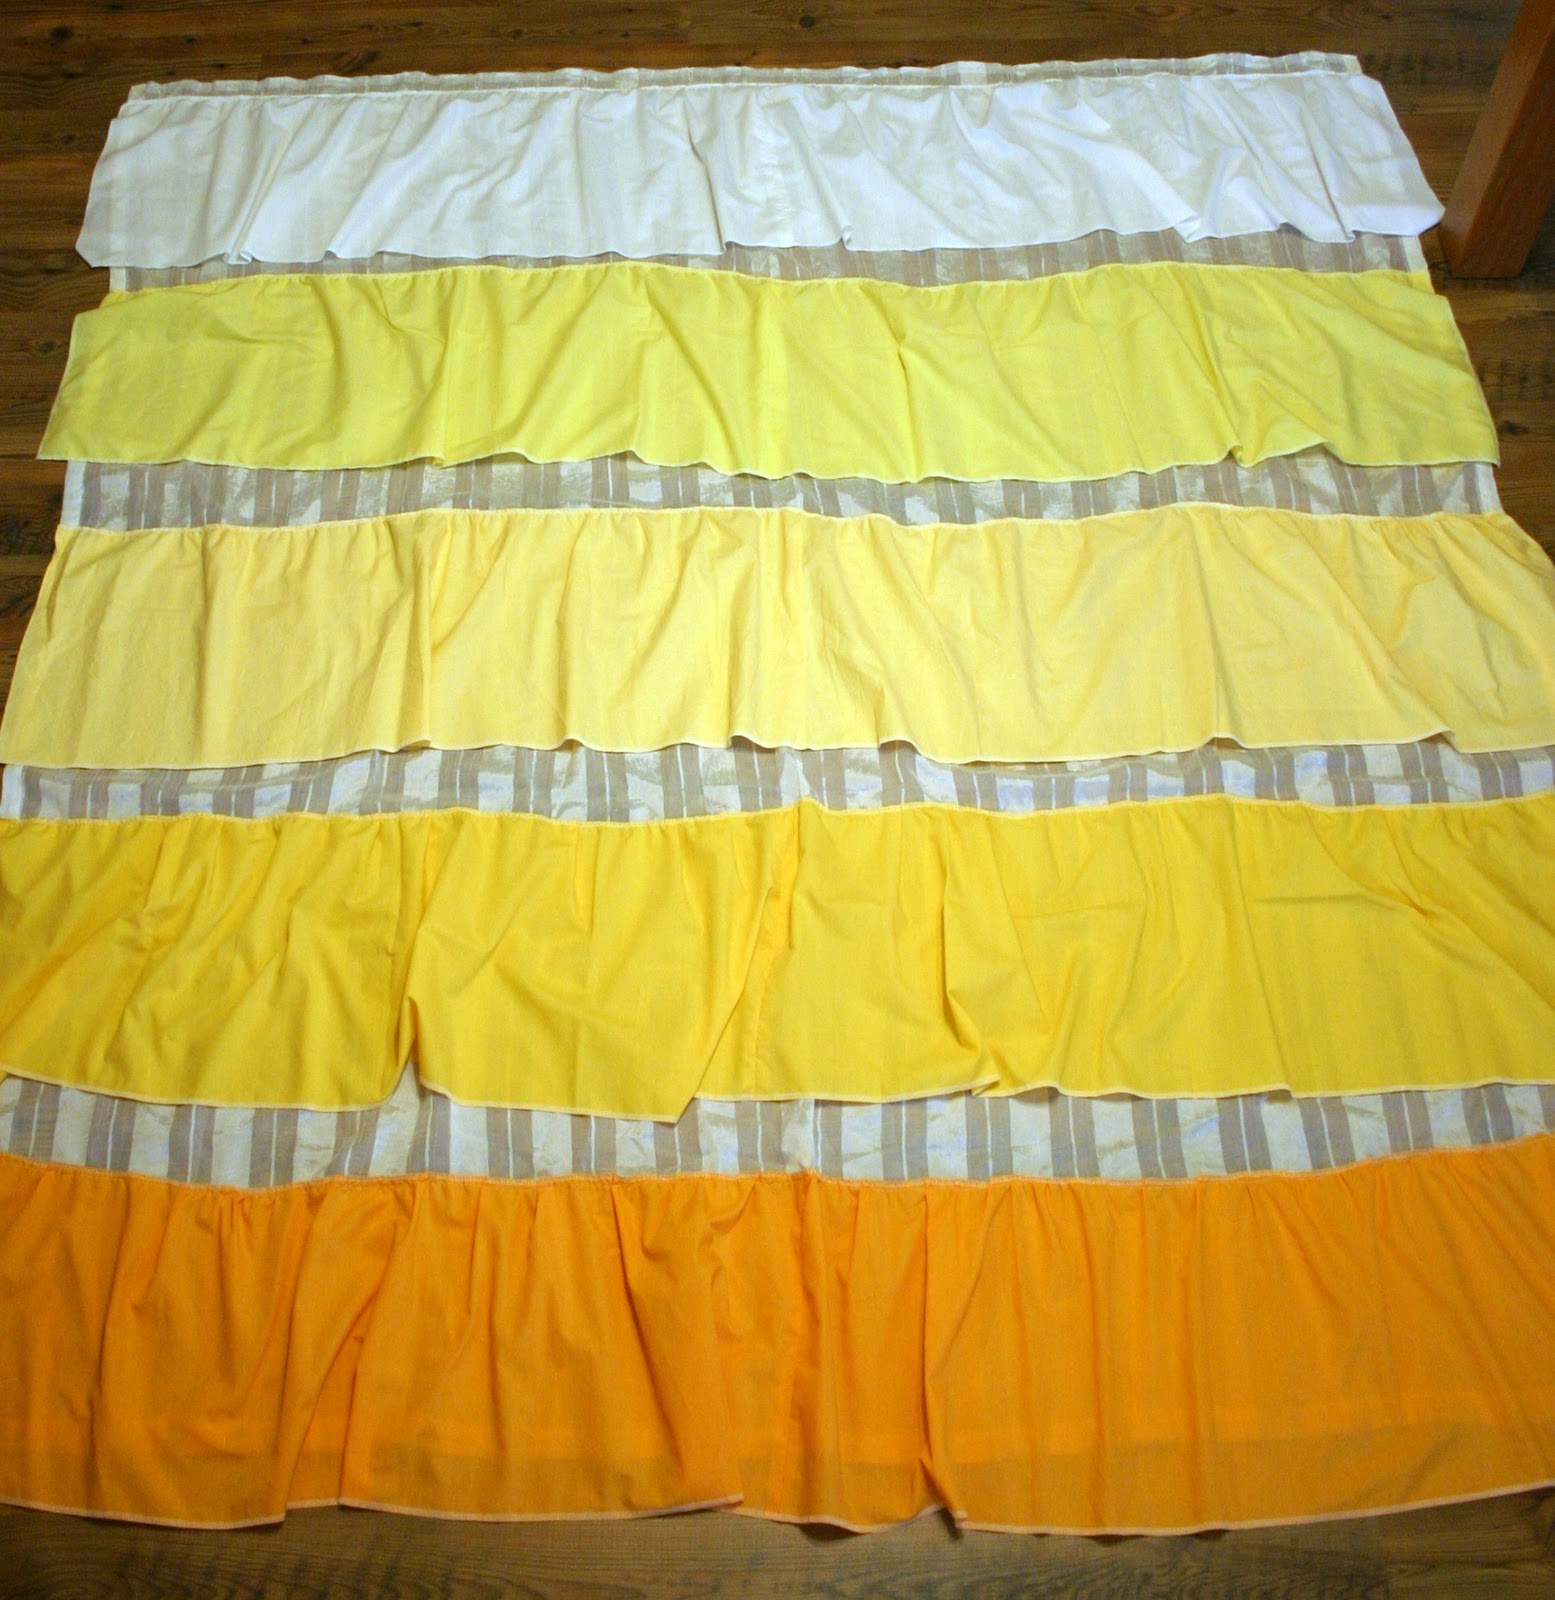
So what is a girl to do… how about make one. And I call mine “Sunshine”. Anthropologie’s Shower Curtain has ten “panels” of descending color. I could only find nine fabrics that I thought  really worked so mine has nine. Also, please don’t judge me on the TERRIBLE photos in this tutorial, my bathroom has no windows and it was a rainy day! That’s why I named her Sunshine.

What you need:
– 9 yards of solid fabric in a monochromatic color palate; light to dark
– light colored shower curtain to cover
– sewing machine
– serger (optional but makes it 10x easier)

Wash and iron all of your fabric
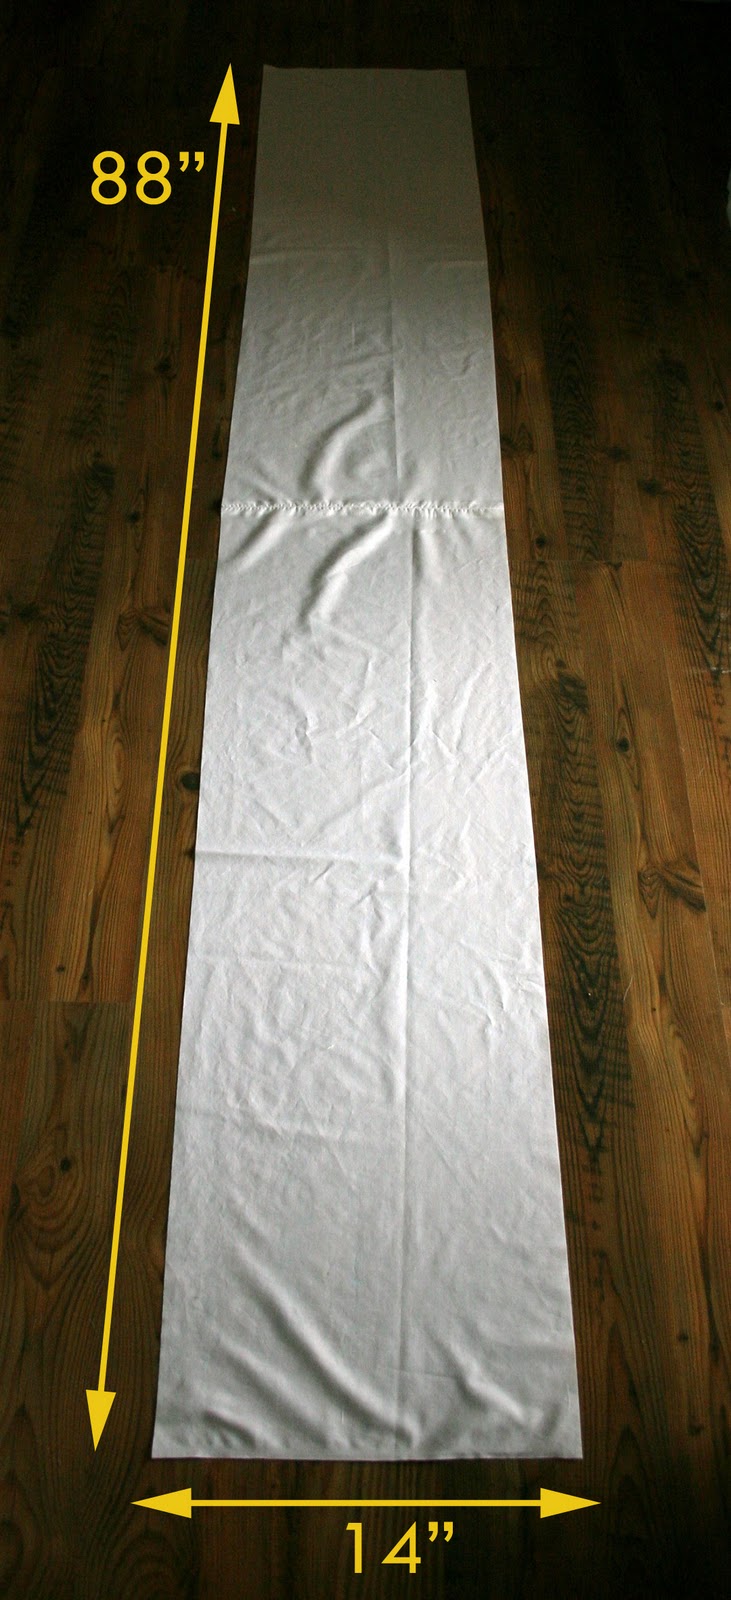
I am going to call each color a “panel”. So, each panel needs to be 88″ x 14″. Most fabric is either 44″ or 60″ wide. I was at Hobby Lobby and I found broadcloth in a bunch of colors that were 44″ wide. So that is why the panels are 88″ long. Cut your yards in half with the selvages on the short ends. Do this to all of the panels. (This is the longest & most boring part)
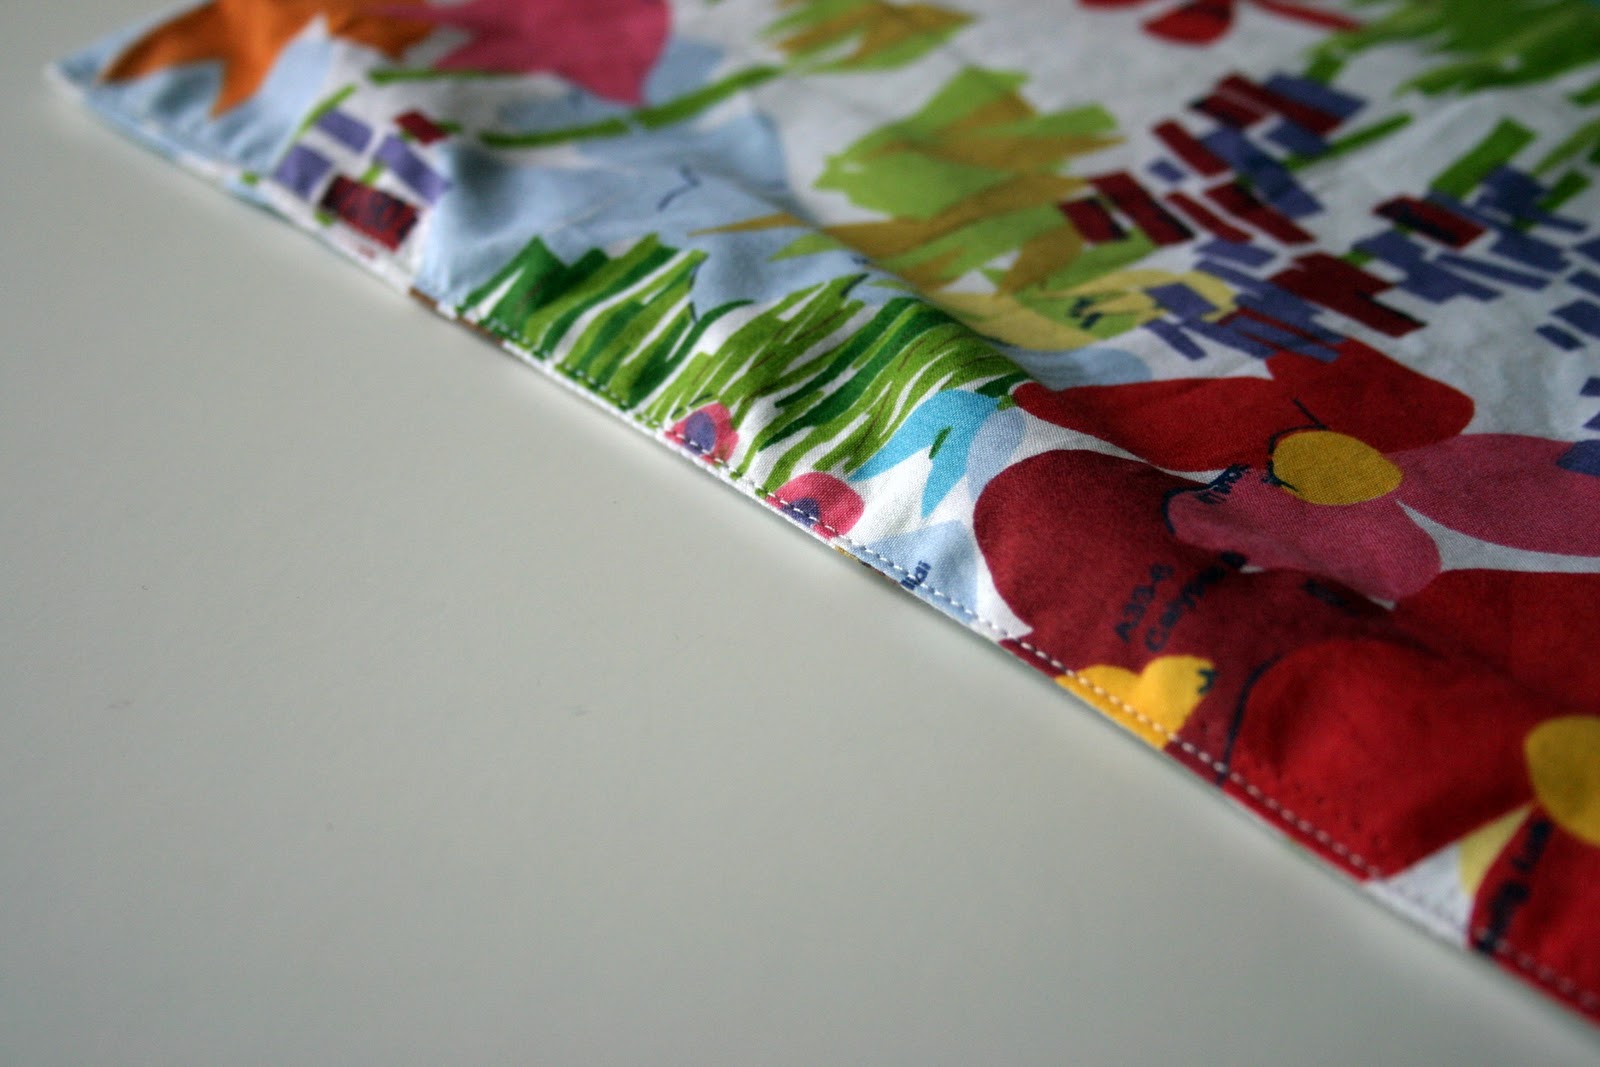
Now each panel has two sides, a top and a bottom. Serge the bottom of every panel.
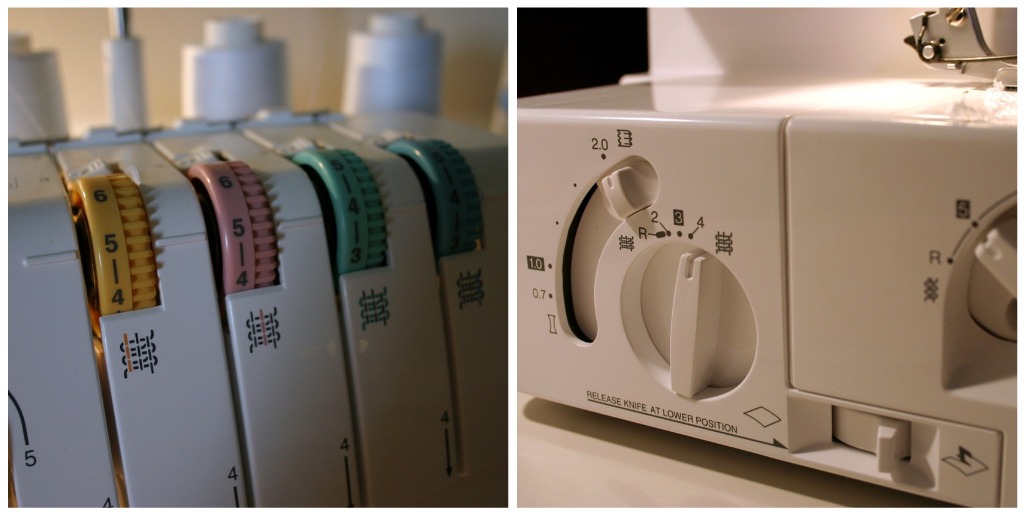
Now it is time for ruffles and who doesn’t love a good ruffle? I used my serger to make them, and here were my settings, (click to make it larger). Do this to every panel. You will have to play around with your settings. The panels should now measure 71″ wide. If they are too long that is ok, you can “ruffle” them more when you sew them on to the shower curtain. If they are too short, you will have to pull the ruffle out a little.
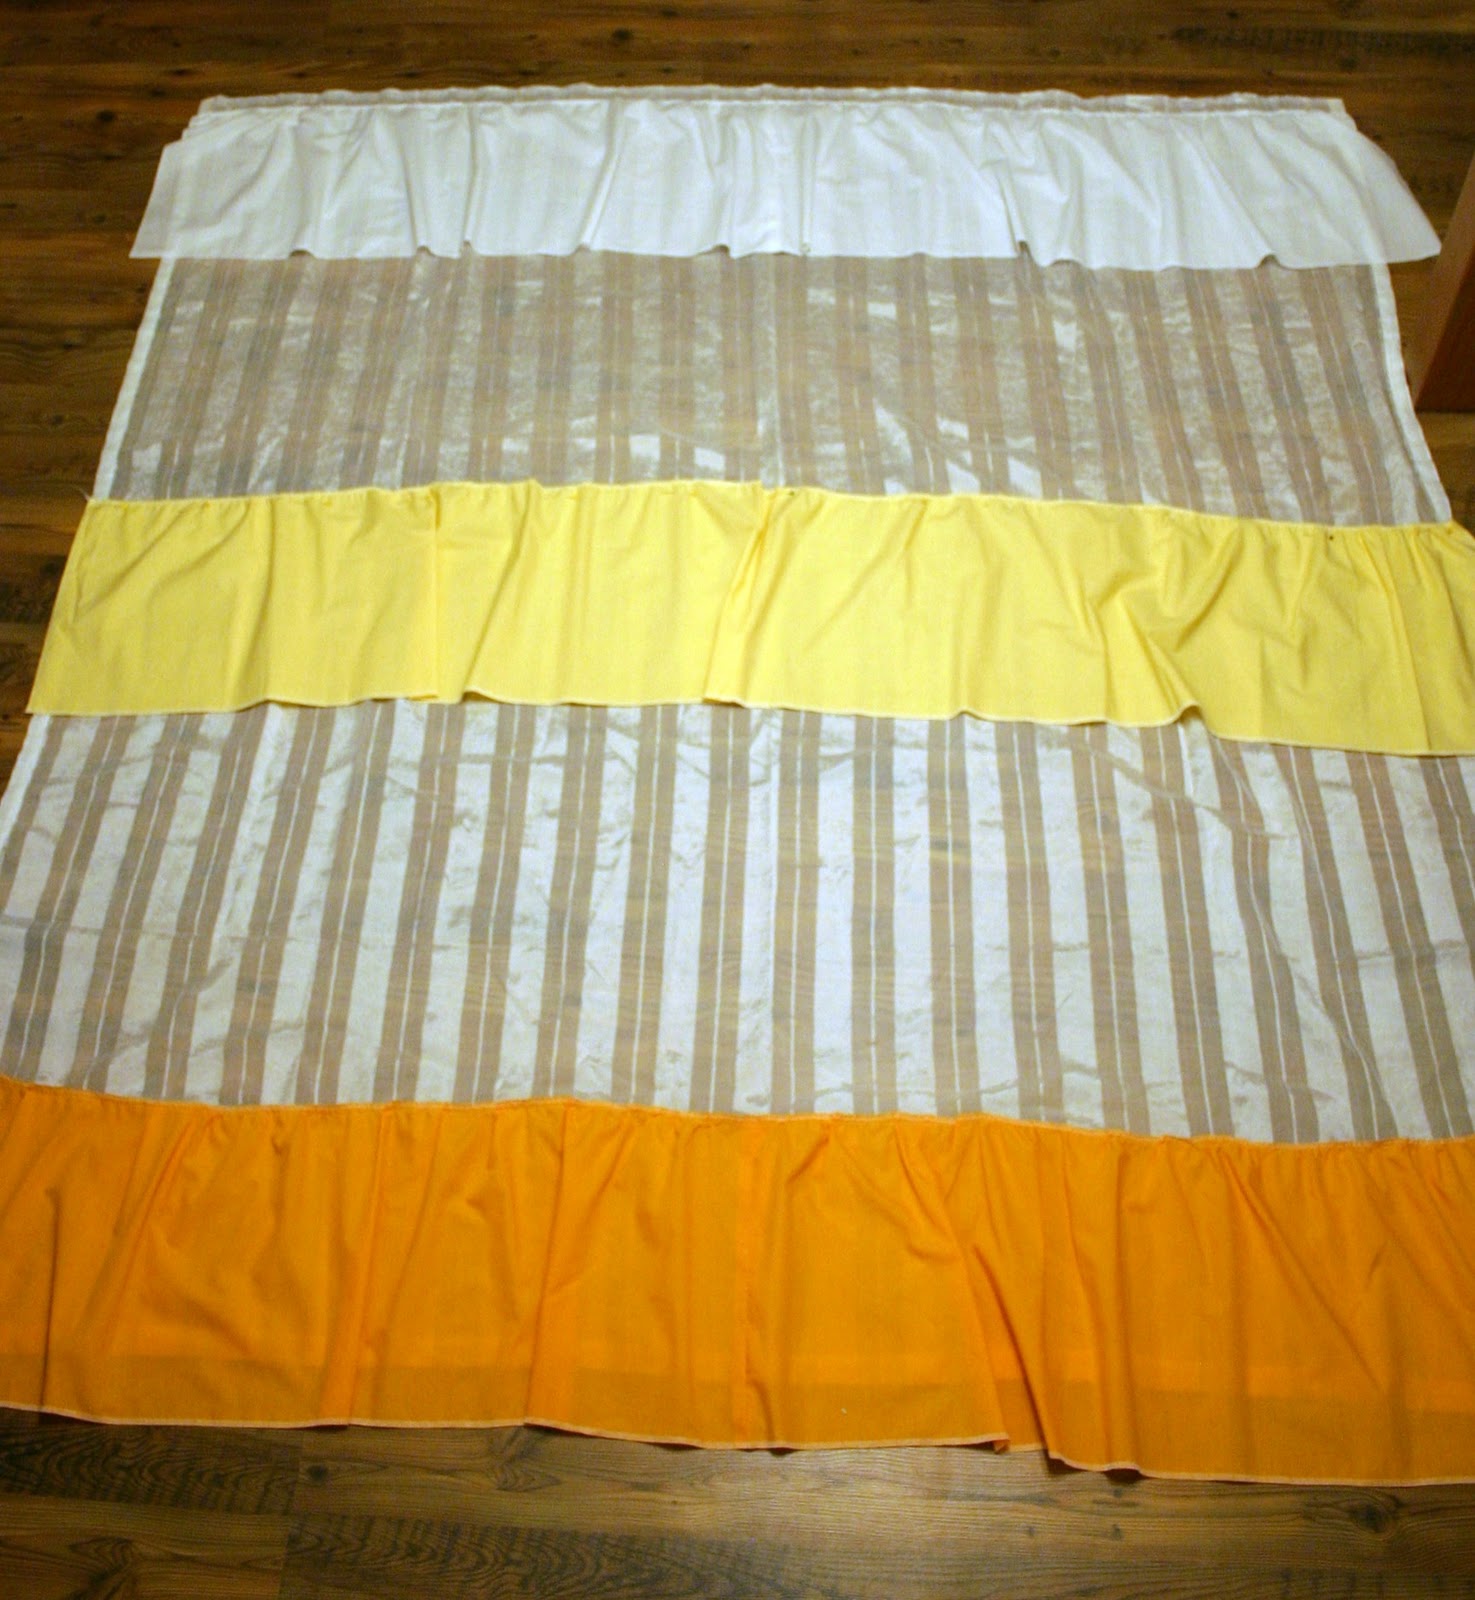
Now we will sew the panels on to the shower curtain. You could just make one yourself out of solid fabric. The dimensions of a regular shower curtain are 71″ x 71″. Start with the very bottom panel and lay it down so that the bottom of the ruffle comes about an inch past the bottom of the shower curtain and pin it down. Sew this panel on. (These pictures make me cringe)
Now do the same with the top panel. Start the ruffle just under the holes in the shower curtain.
Now here are my lovely math skills… I’m sure there is a better way to do this but I like to eyeball. I measured from the “sew line” of the top panel to the “sew line” of the bottom panel and cut that number in half.
For example: The distance between my two sew lines was 60″. So half of that is 30″ so I marked 30″ with a pencil on the edge of the shower curtain and that was the middle. That is where I sewed my middle panel. Be sure NOT to measure from the bottom of the ruffle and measure from the actual sew line. Also maybe number your panels in order so to not confuse them.
You will continue with this method until you have added all of the panels. So again, measure from the middle panel’s sew line to the bottom’s sew line and mark halfway then sew that panel there.
Pin It

Filed Under: fabric, home goods, serger, sewing, tutorial Tagged With: home goods

Spring Clutch

March 30, 2011 By Taylor 14 Comments

Have you ever bought something that came in a fabric bag that you liked and you couldn’t throw the bag away? Because this happens to me all the time. I have a little fabric bag collection going from shoes, sheets and even my Moby Wrap. If you have no clue what I’m talking about here is a picture…

My Mom bought an amazing duvet cover from Pottery Barn a few years ago and it came in this bag… I had to have it. I knew it would come in “craft-project-handy” one day and I was right. It only took me about 30 minutes to make because it was already halfway done for me.

Take out the drawstring and sew up the top.
Fold the bag into itself, take the top that you just sewed shut and make that new bottom. Make sure the two layers are completely touching.
Now sew a line around what is now the top of the bag. This will make it easier to sew the zipper on. I added one of my fabric labels.
Now add the zipper. I bought these zippers from an Etsy shop last week and I love them! They were much cheaper than in a craft store and even came with a zipper pull, it was hard to choose a color with this fabric.
Start with one side of your bag. Now- I know making a traditional zipper pouch would hide your zipper, but first of all I don’t mind the exposed zipper and secondly this way is much quicker. I am big on free time these days so I dont waste it! Pin one side of your zipper to the inside of one side of the pouch.
(outside view)
My zipper was 14″ and my bag was about 12″ so I needed to make my zipper shorter. It is easy, just pick the place where you want your zipper to end and handstitch about 5-6 times around the zipper. You can actually cut the zipper after you do this, but I just tucked mine into the bag.
Sew this first side using your zipper foot if you have one. Tip: move the zipper around when you are sewing so that you dont have to sew around the actual zipper and your line will look uniform.
Do the same thing on the other side. Pin your zipper and sew. You will want the zipper to be open to sew this side.
There are you have it, it literally too me longer to write this post. Also, I feel good about actually crafting somthing out of this “free” fabric!

Filed Under: fabric, sewing Tagged With: accessories

Silhouette Dust Cover

March 10, 2011 By Taylor 7 Comments

I got a new toy!!!!!!!!! And obviously, I’m really excited about it- the Silhouette SD!! So, because I love it so much, I clearly needed to make it pretty protect it from the dust. I was really excited when I saw that Char from “Crap I’ve Made” posted a tutorial for the Silhouette Dust Cover. I love her blog, thanks Char for the tutorial!

All you need is a fat quarter and Char’s template (and the amazing Silhouette, of course)
Cut your main piece to 18″ by 14″ with the 18″ side on the bottom. Then cut out the sides from the template, make sure to cut them in opposite directions.
Next place the small sides on the large piece with right sides together and the shorter side facing out.
Pin all the way around.
Next I added the yellow ribbon and my little fabric tag. Then I serged all the way around.
 I am excited that I won’t have smudgy little boy fingerprints on the beauty! Look at the happy home!

Filed Under: sewing, Silhouette, tutorial Tagged With: accessories

Car Seat Strap Covers

January 30, 2011 By Taylor 3 Comments

Don’t you love an easy project that you can finish in just about an hour? I know I do, especially because I have problems a little trouble finishing projects in a timely fashion. I wanted to recover baby #2’s car seat and realized that was going to lead me to my previous problem, an unfinished project. I just don’t have enough time so I though I would spruce up his/her car seat straps! Not to mention, the old straps were looking a little rough. Does anyone have the Chicco Car seat? I LOVE it but the strap covers that came on it were sewn-on which made them super hard to wash. I decided to make my own with Velcro so I could wash them easier.

This project is really easy, all I did was use the existing strap covers as a template, a little quilt batting and used some existing fabric that I had. I did make my own bias tape (which is a little more time consuming) but you could just buy some for an even easier time.
Here are the original strap covers and the fabric I picked out, I wanted it to still match the carrier. I used the star fabric for the bias tape. I didn’t include how to make your own bias tape in the tutorial, you can find it online or like I said you can buy it from any craft store.
Lay out the original strap covers as a template. Trace onto your fabric and cut 4 new pieces. Front and back for both.
Don’t forget to cut the batting for the inside of the pieces like I almost did, oops!
Make (or buy) your bias tape, for the Chicco covers you need about 35″”. By the way… I have made my fair share of bias tape and I just found out that there is a cheap tool that folds the fabric for you and makes it so much easier! Where have I been? That is on the to-do list for this week.
Sew the “circles” of the strap covers with wrong sides together and the layer of batting in between. So it should be fabric facing down, batting and fabric facing up in your sewing machine.
Pin the bias tape all the say around on both covers and sew it on.

Lastly, I used a small strip of Velcro as the closure. Here is the before and after!

Not only will these be easier to take on and off, the original fabric was so scratchy and the new covers are soft fleece. I think baby 2 loves them already!
Related Posts Plugin for WordPress, Blogger...

Filed Under: baby stuff, fabric, kid stuff, sewing Tagged With: kids

  • « Previous Page
  • 1
  • …
  • 20
  • 21
  • 22
  • 23
  • 24
  • Next Page »

Welcome to Taylor Made

http://www.taylormadecreatesblog.com/about-me Hi Yall! I'm Taylor... an artsy mom of three from Houston, TX. I love sewing, collecting floral fabric, eating Mexican Food, photography, brights colors, rearranging, and rolling clay. Taylor Made Creates is all about creating a fun, colorful home, sewing cute things and eating good food. Check out my SHOP HERE HERE! Thanks for stopping by!

Search

Pin with me!

Like Me :)

Facebook Pagelike Widget

More Recent Posts

  • Kid's Animal Room
  • Kids Camping Shirts
  • Mermaid Birthday Party
  • Conversation Heart Cold Packs
  • Holiday Apple Tea Punch
  • Purple Princess Costume
  • Letterboard Costume
  • La Croix Costume

FAVORITES

  • Swan Wings + Hello Ollie Fabrics
  • Triangle Baby Quilt
  • Mini Fabric Lamps
  • Banana Nut French Toast
  • Casserole Carrier
  • Pippa Peplum Piggy Dress
  • Valentine Mantle
  • Chicken Pitas and Tzatziki
  • Skunk Costume

Copyright © 2026 · Web Hosting By RFE Hosting