When Clyde was born and I realized I had another boy in the house I thought to myself, perfect! I have a closet full of boy clothes. Well… Finn was born on August 6th and Clyde was born on February 6th. Their dates are exactly six months apart to the day.
So, we got home from the hospital with Clyde, I opened the closet and BAM a closet full of sleeveless and short sleeved shirts on the only day that Houston ever had a “hard freeze”. Why didn’t I realize that all of these clothes were for the opposite season? Now once again all of Finn’s old 9 month onesies are for winter and I am about to die of a heat stroke. My poor little poopsie is hot natured just like his Mommy. Solution… Baby Cutoffs!
I did this to some pants a few weeks ago too. I am now on a Baby Cutoff Spree at my house and nothing is safe. Watch out old baby jeans… its over 100 degrees and mama’s hot.
These make me hot just looking at them… (I really can’t describe my hatred for the heat enough)
I really wanted Clyde to be able to wear this shirt because it has a special meaning. When I first found out I was pregnant with Finn this was the first thing I bought, so really the first “baby thing” I ever bought in my life :)
Use a short-sleeved onesie as your pattern and mark 1/2″ past the edge of the sleeve. (Yes I use a sharpie, I don’t like tailor’s chalk)
Serge around the edge and then pin and sew two parallel lines for the seam.
Ahhh…. relief!
How cute is this little model of mine? What a Happy Boy! So, what sort of summer refashioning have you done lately? And are you now going to run through your house with scissors looking for clothes to cutoff?
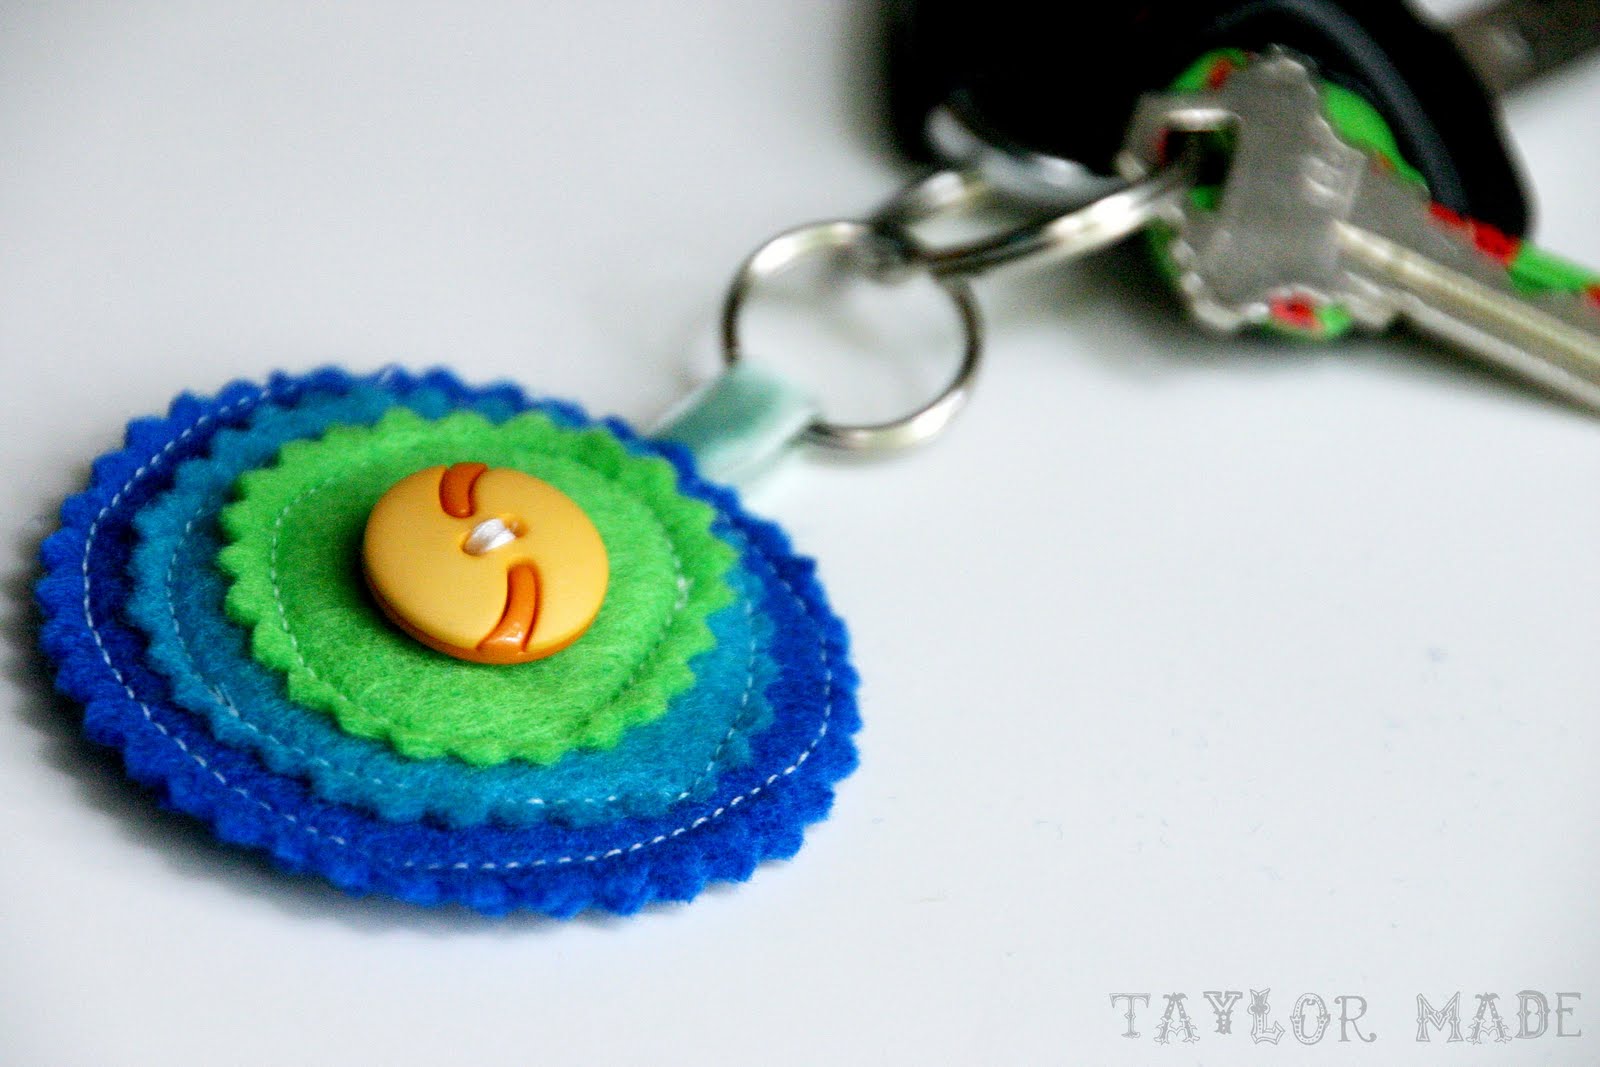
Do you have a whole box of felt scraps?… Oh that’s just me? I can’t let go of them for some reason even though an entire sheet is .25 cents. Well, I found a way to use all of those precious scraps.
All you need is a keyring from the Hardware Store or Walmart. Use pinking shears (p.s. love my pinking shears) and cut two pieces for the front and back. I used a piece of cardboard as a template and a scrap piece of ribbon to attach the fab to the ring.
Cut out three layers; each a little smaller than the last. I started by making perfect circles then I tried to go for a more abstract/messy look.
Work backwards… sew the button on the smallest circle, then sew that circle on the middle and so on…
Do you use your button foot as much as I do? I can’t live without it. I mean, call me a lazy sewer but it sews a button on in literally about 4 seconds. Continue sewing the other layers on in reverse order.
Sandwich the ribbon (with the key ring on it) between your two layers of felt.
Do you see how I tried to make it look “messy” but I didn’t follow through… might be a minor craft fail? No, not for me, I slapped this baby on my key ring!
I am going to have to perfect the look, I might even put some extras in the Taylor Made Shop. My keys are happy and that is all that matters :)
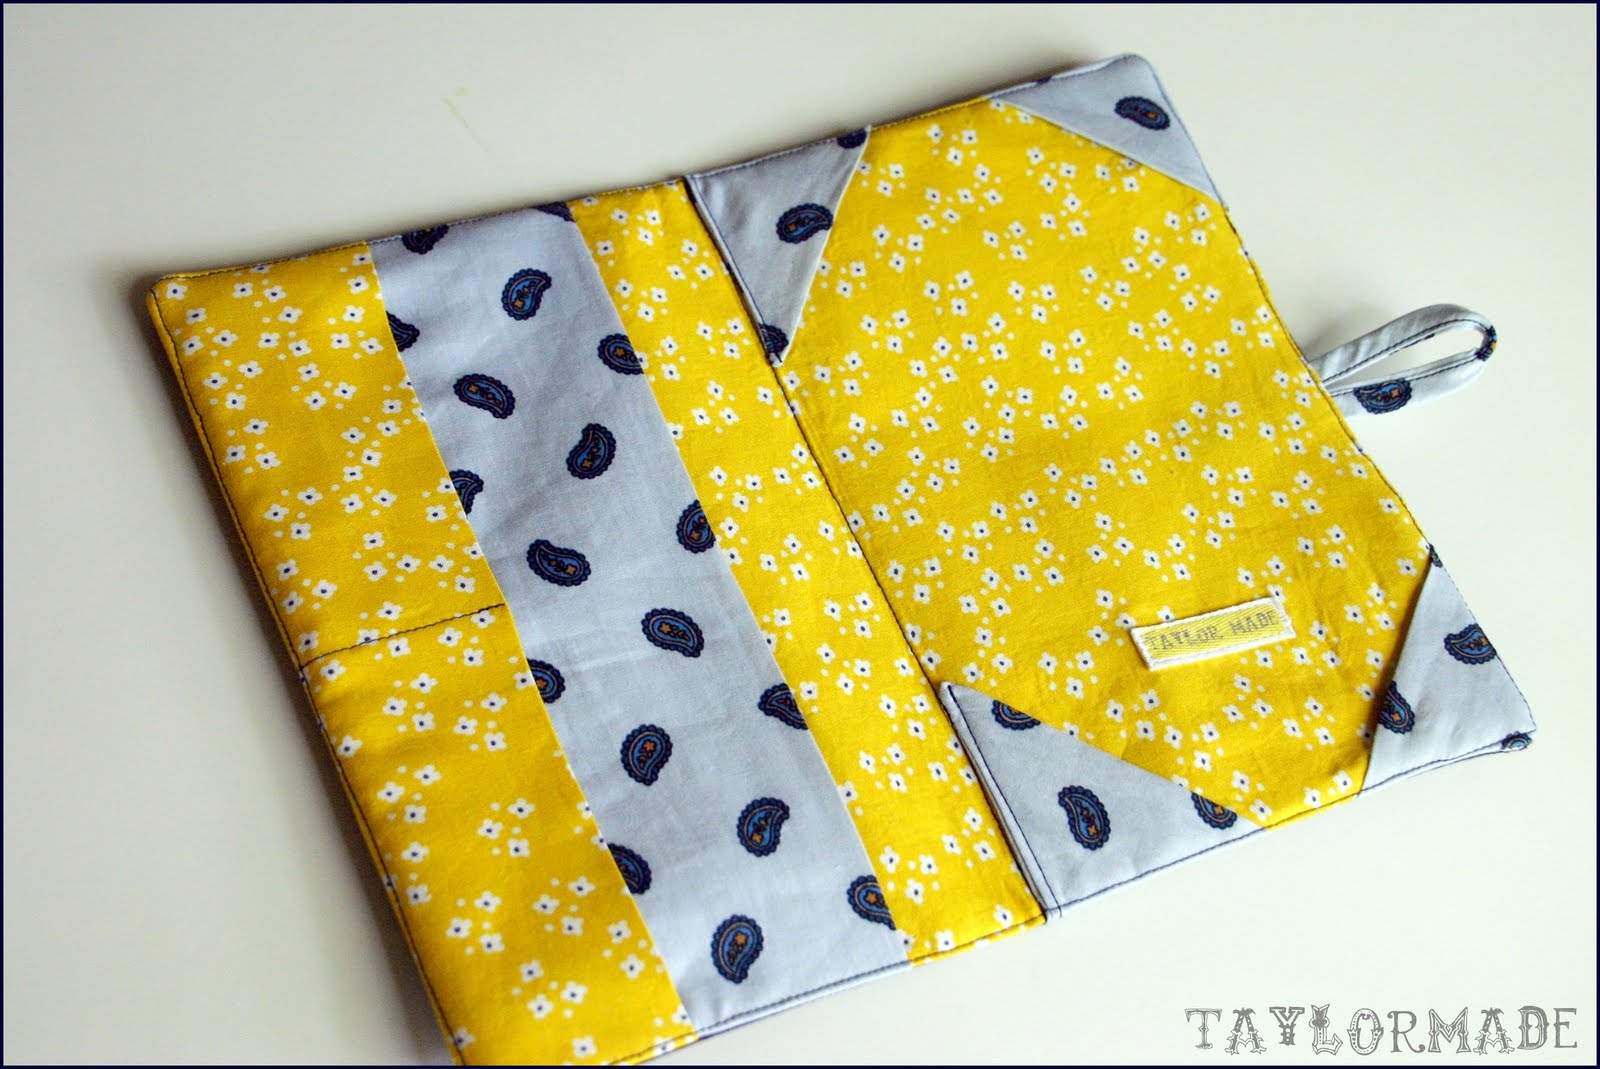
Do you have an E-reader? Because it is my new obsession. I can actually blame my current lack of crafts posts on my Nook. I guess reading is a good “new” hobby, right? Well, like any good nook owner I knew I needed a cover. I shopped around but didn’t find one that I loved. Then I found a DIY pattern on Etsy – yay. The pattern was very easy to follow. I have already made one for my sister too.
You can really add any sort of personal touch to your e-reader cover. My sister has a more classic style so hers is the navy one. And I wanted something more bold. The hardest part is picking out a button.
I used my Silhouette to cut out the “read” in fabric for the front of mine. I used Silhouette’s fabric interfacing and cut the fabric straight from the machine. How did I make the heart at the end of the word? Oh thanks for asking… I drew a heart and merged it into the end of the word in the Silhouette software. Then I just did a tight zig-zag stitch around the letters (not very perfectly).
Does any one have any must reads that I need to know about? I am reading Water for Elephants right now then I am going to read The Help. Since I am in my late twenties and just now taking up reading as a hobby I have some catching up to do…
What is cuter than a little boy in a boy tie?… Nothing is… I tell you NOTHING!
Remember when I won Runner-Up in the Knock it Off contest? Well, I did and one of my prizes was my choice of two patterns from Little Lizard King, a cute Etsy shop. I knew I wanted to make the boys some bow ties for a wedding. It was perfect when I saw that she had a Bow Tie Pattern in her Etsy Shop. Less work when I don’t have to think of how to do something.
I followed the “bow” part just like the pattern said. The only thing I changed was the middle loop to make it a little wider. It was a very easy-to-follow pattern.
The boys looked super geek-chic in their little bow ties… ahhh little men going to their first wedding!
Instead of doing elastic around the neck, I just added an alligator clip to the back with felt and some E-6000 (best glue ever). That way I can use them again on a cardigan or in my hair.
I love these bow ties so I think I might be making more in the near future just for funsies.