TaylorMade

DIY, Home Decor & Sewing

  • Home
  • SHOP
  • DIY & Sewing
    • For the Home
    • Sewing
    • Costumes and Holidays
    • Cricut Projects
    • Crafting
  • Parties
  • Recipes
  • Home Tour
  • Favorites
  • About

Memory Hall

May 9, 2011 By Taylor 11 Comments

Happy Monday, today, I give you my Memory Hall. My favorite moments of all time. No boring portraits or fake smiles here, all of the pictures I chose are real moments that represent something to me. I can’t think of a better way to give life to the hall in our home. I love the colorful frames on the grey wall.

How I did it:

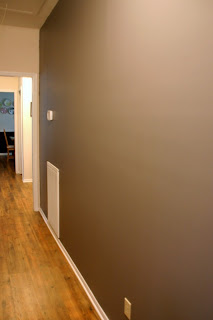
I started by painting our hall Slate Grey. So much better than a boring white hallway already!

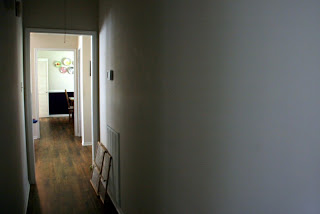
I added a chair rail, painted it white and hung it at eye level.
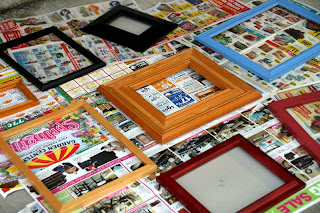
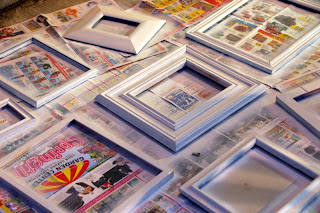
I collected different sized frames (super cheap from Good Will) and primed them with white
primer. I used the spray paint for plastic because I think the paint sticks better.

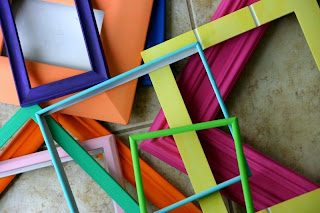
Then I painted the frames bright colors.
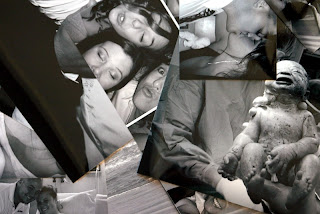
Printed out my “Favorite Memories” in black and white. This was the hardest part because I had to pick only ten pictures with a good mix, naturally I wanted them all of my babies!

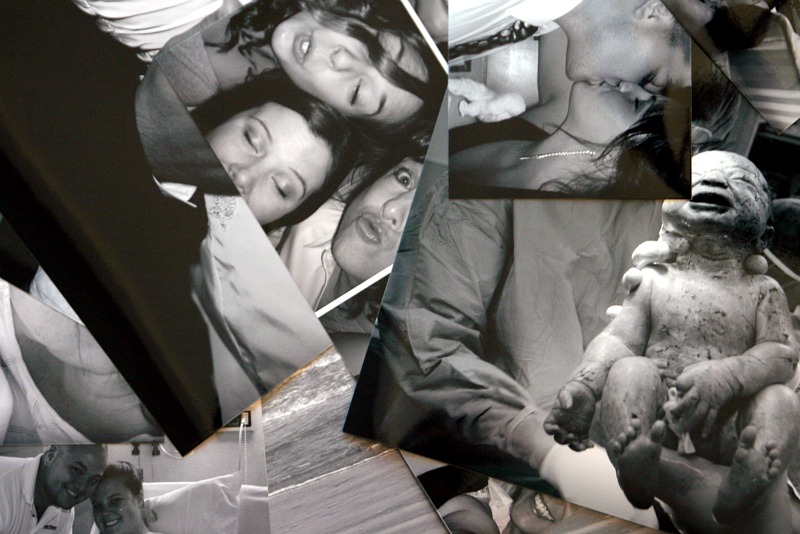
Then I hung the pictures to the wall, with the bottoms resting on the chair rail.

(lovely camoflauged a/c controler?)
I love the way it turned out, now I am reminded of my favorite moments everyday

Filed Under: home goods, paint, pictures, wood Tagged With: room makeovers

Tealight Flight

May 6, 2011 By Taylor 46 Comments

*New Update* Thank you all for your comments,  anytime that fire is involved, please be careful! Also, the tea-lights are in a metal container and I have never had a tea-light burn the metal. Also, this goes in my fireplace so even if it did, perfect place right :) If you are too worried then please don’t make this project
Taking junk and turning it into something beautiful, what’s not to like? The first thing that came to my mind was the huge bag of used plastic Easter Eggs taking up space in my pantry. It felt wrong to throw them away and I am glad I didn’t. After some brainstorming, I came up with…. The Tealight Flight. It was super simple and came out really modern and classic looking.
Here is how I did it:
I took 12 egg bottoms (which I only ended up using 11).
I spray painted the top side and waited for that to dry, then painted the bottom side. Make sure to use a spray paint that is specifically for plastic. It took me about 3-4 coats; waiting 20 minutes between coats.
I waited for them to dry overnight before I started the next step. Then, I found a piece of scrap wood in our garage. It was flawless looking and I didn’t even need to sand it or anything. Make sure your eggs are fully covered by the spray paint.
Start by gluing the center egg to the center of the board. I used E6000, which is super strong. Use a tiny dot in the bottom if the egg then use a dot on each side of the egg to connect the ones side by side.
Keep doing this until you have glued all of your eggs down.
Wait 24 hrs before you place your tealights in!

Find the perfect spot, I put mine in my fireplace…

Filed Under: craft, home goods, wood Tagged With: crafting, decor

Cloffice

January 23, 2011 By Taylor 33 Comments

What is a cloffice you ask? Well… our entry-way closet and our office had a baby and my husband named him “Cloffice”. As I’ve mentioned, our office/craft room has been taken over by our soon to be baby #2 (only 5 wks, yay!) so, I had to have a place for my computer desk and office stuff. Bryan really helped out as usual and did a ton of work! There is actually a lot of storage for my pictures, computer programs and all of our office supplies. I love my little cloffice!


Features:
-Full desk
-2 storage shelves
-overhead lighting
-plug (Bryan had to add an electrical outlet)
– curtain (to hide the tower, printer and wires)
-blue walls
-hanging storage on left wall
 
How we did it:
-we painted the whole thing first
-Bryan took measurements for the desk and shelves
-desk is the total width and depth and shelves are half as deep
-we used oil based white for the shelves and desktop
-installed desk, shelves and hung light
-sewed a simple curtain and hung it with a tension rod and clips
 
Do you love it as much as I do?


Filed Under: remodeling, wood Tagged With: room makeovers

Love Sign with a Fence Frame

January 21, 2011 By Taylor 7 Comments


I know, I know, this should be in pink and red… but its going in my bedroom and staying up all year so yellow and blue it is. You could actually write anything, I thought about our last name but I like the way “LOVE” looks. My favorite part of this project is actually the frame which my husband whipped up. I got the supplies and told him what to do (naturally, hehe) but he made the actual cuts so I will give him some credit. I think this project is so simple that I really didn’t even take any pics of the steps for a tutorial, just the final product.


My mom had some fence posts she was going to throw away so I kept a few because I liked that they were weathered looking. So Bryan cut them in half “lengthwise” and I gave him the dimensions and he made a very basic frame. (43 X 23)


I got a foam board from Hobby Lobby and cut it about a 1 in. smaller than the dimensions of the frame (42 X 22). Then, I painted the background yellow. When the yellow was dry, I stapled the foam board to the back of the Fence Frame.


I also picked up some chipboard letters from HobLob and some blue paper. You could paint the letters too but the paper is much cheaper than buying 4 different colors of paint. I just traced the letters onto the paper, cut them out and applied 1 coat of Mod Podge between the letter and the paper. Then I used 2 coats on top of the letters (drying 20 mins between). Glue the letters on to the foam board. (My husband walked in at this point and wanted me to measure the distance between the letters to make sure they were evenly spaced… poor Bryan forgot who he married)


Lastly, I got a picture hanging kit from Home Depot and screwed it in to hang my “work of art”.

 
This reminds me that I need to get to work on the Valentine’s Day banner that I have been dreaming up for my mantle. Lets see if it happens :) Have a great weekend!
 
Related Posts Plugin for WordPress, Blogger...

Filed Under: bedroom, craft, home goods, Mod Podge, paper, wood Tagged With: decor

  • « Previous Page
  • 1
  • 2
  • 3
  • Next Page »

Welcome to Taylor Made

http://www.taylormadecreatesblog.com/about-me Hi Yall! I'm Taylor... an artsy mom of three from Houston, TX. I love sewing, collecting floral fabric, eating Mexican Food, photography, brights colors, rearranging, and rolling clay. Taylor Made Creates is all about creating a fun, colorful home, sewing cute things and eating good food. Check out my SHOP HERE HERE! Thanks for stopping by!

Search

Pin with me!

Like Me :)

Facebook Pagelike Widget

More Recent Posts

  • Kid's Animal Room
  • Kids Camping Shirts
  • Mermaid Birthday Party
  • Conversation Heart Cold Packs
  • Holiday Apple Tea Punch
  • Purple Princess Costume
  • Letterboard Costume
  • La Croix Costume

FAVORITES

  • Swan Wings + Hello Ollie Fabrics
  • Documenting Life… How I Do It
  • Batman and Robin
  • Cider Beetles: A Teacher Gift
  • Happy Rocks
  • Playroom Reveal
  • The Succulence Lillian Dress
  • an “April Showers” Baby Shower
  • More Casserole Carriers

Copyright © 2026 · Web Hosting By RFE Hosting