TaylorMade

DIY, Home Decor & Sewing

  • Home
  • SHOP
  • DIY & Sewing
    • For the Home
    • Sewing
    • Costumes and Holidays
    • Cricut Projects
    • Crafting
  • Parties
  • Recipes
  • Home Tour
  • Favorites
  • About

The Napkin Apron

May 24, 2011 By Taylor 4 Comments

Do you have an obsession  a healthy love for aprons like I do (seriously, I have too many)? Well here is the easiest apron you will ever make. I made this for a craft competition and the theme was “Under $5″… I made this for $4.97. Easy and cheap; what’s not to like?
All you need is:
2 cloth Napkins (I found these on sale at World Market)
2-3 yards of cotton twill tape
One napkin will be left alone for the bottom half of the apron. The other napkin will make up the top of the apron and the ruffles.
To make the top, serge and sew (or just sew) two of the sides so that your dimensions are 10″x10″. The best part of this apron is that the napkins are almost totally sewn for you!
Now you need to sew the top square to the bottom square. Center the top square on the bottom square with right sides together and sew.
Sew down the seam that you just made all the way across the bottom square.
Add the twill tape to the top of the square, hold it up to your body to determine the length. Then do the same for the side straps, make sure to tie it in a bow because it will need to be longer than you think. Remember you can always cut more later but you cant add on to it.
Now, you will have over half of the top square left over and that will be used for our ruffle. Sew it into one large rectangle and ruffle it however you like. You will need to piece two long pieces together but you wont see the seam because of the ruffleyness (new word of the day?). I like to use my serger because I don’t have a ruffle foot…whomp whomp whomp. Make sure you make two different ruffles, one for the bottom of the apron and one for the top. With the serger, I have to kind of “pleat” as I sew because it doesn’t do a very tight ruffle. Sew the ruffle to the bottom and the top of the apron.
So simple right? It is my new painting apron because I already have too many cooking ones and I don’t garden.

Filed Under: clothes, fabric, kitchen, serger, sewing, tutorial Tagged With: clothing

Little Boy Shorts

April 26, 2011 By Taylor 17 Comments

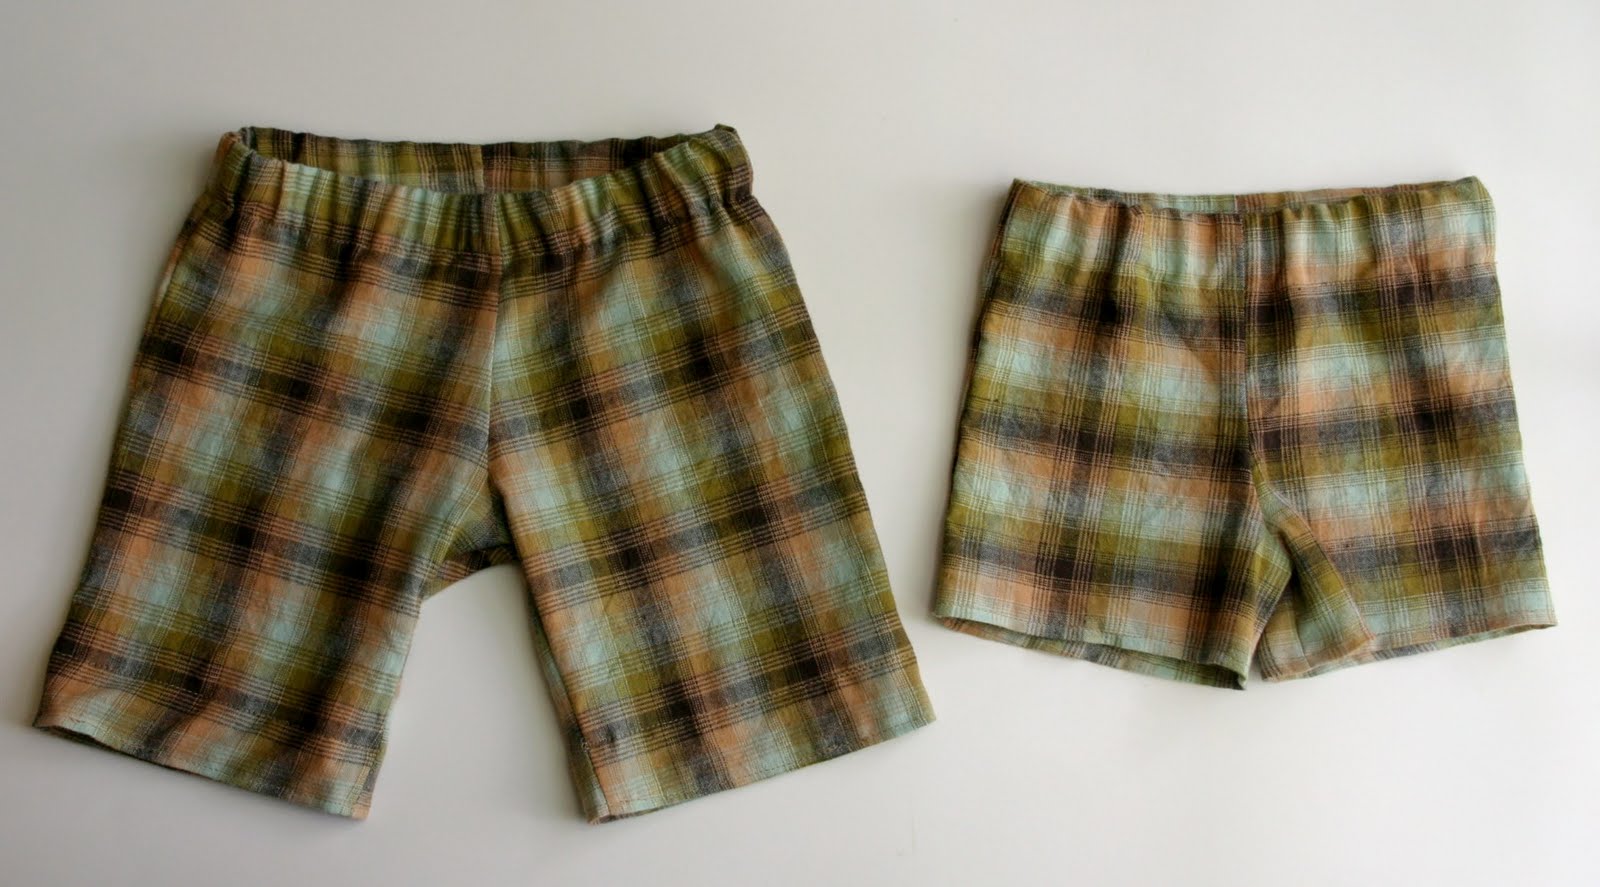
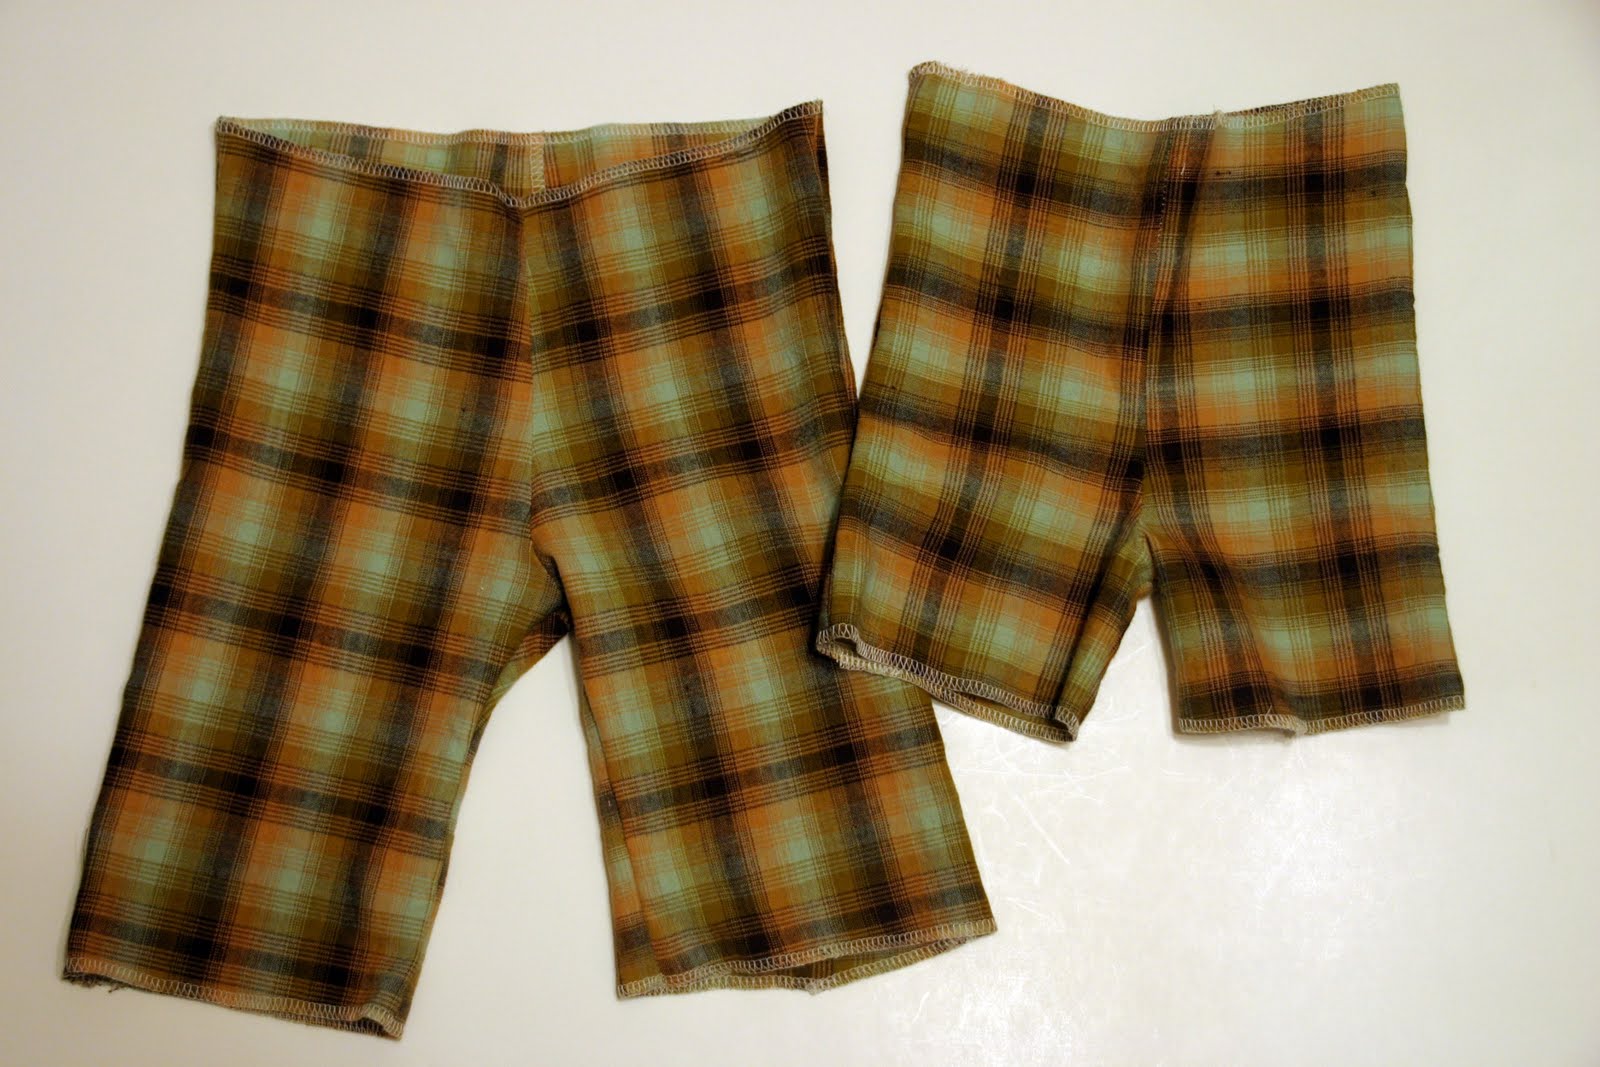
This year I had the bright idea that I would dress my boys in matching shorts for Easter. I mean how much longer are two boys going to let me do this, right (but really how much longer)? So, I found some adorable plaid fabric and decided to make them some Little Boy Shorts. I know that the best way to make a pattern is to take another article of clothing apart and trace the pieces, so that is just what I did. Add length to the top (about 1.5″) and the the bottom of the shorts (about 3″) My sons wear 2T and 6mo.

Supplies:
1/2 yd fabric
1/2” elastic
white paper for pattern
safety pin & sewing pins

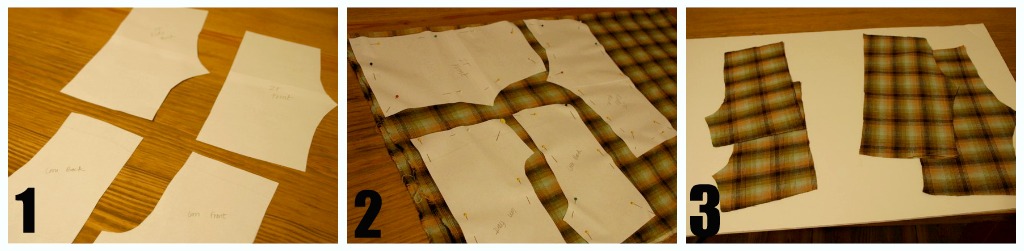
1 – Trace an old pair of shorts onto a piece of paper
2 – Pin the pattern pieces to your fabric
3 – Cut the new pieces out

This is the first pair of shorts I have made for the boys and I kind of just sat there after this step. I had a million ideas for the order of construction but because I was making these the night before Easter (oops) I didn’t have time for that. I remembered that one of my favorite blogs MADE has a tutorial for a Basic Kids Pants and thought it had to be pretty similar. So thanks MADE!
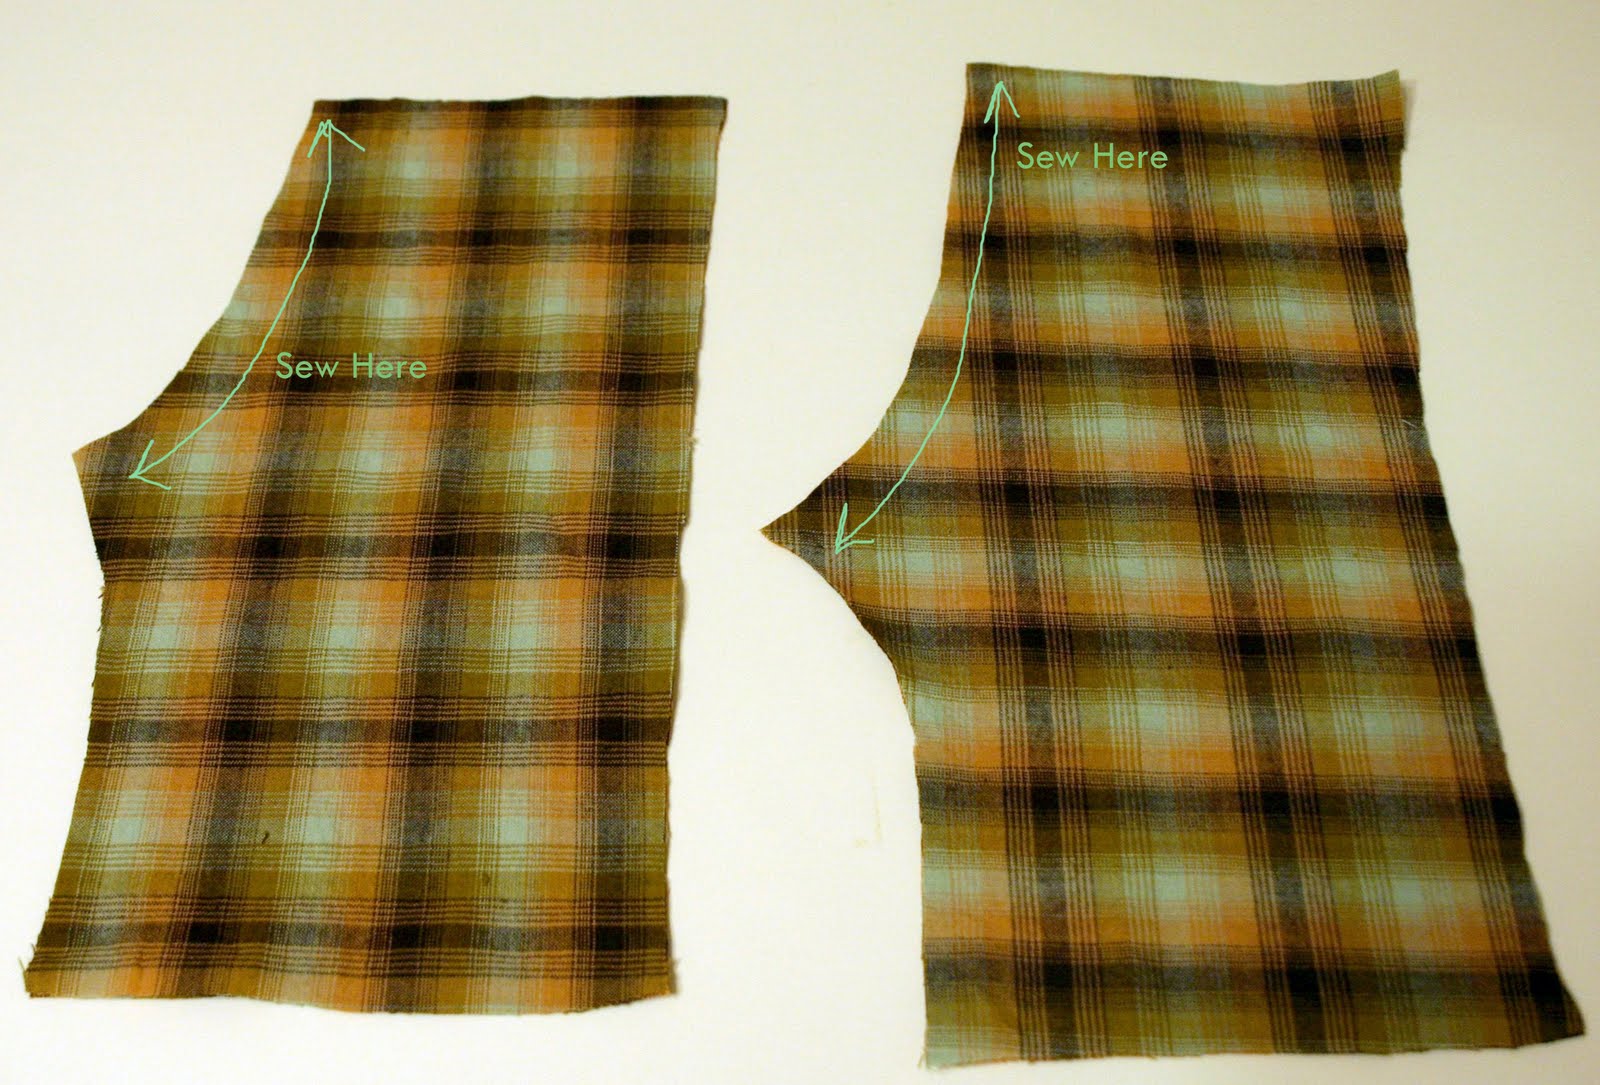
She says the easiest thing (which totally makes sense) is to sew up the crotch of the pants first because they are already together. If you have a fabric with a right and wrong side, flip your fabric before sewing.
After every step, serge the seam if you have a serger and press with your iron for a more professional look.
Next, pin and sew the inseam together. Then again,serge the seam and press it down.
Next, pin and sew the legs together. Serge that seam as well.
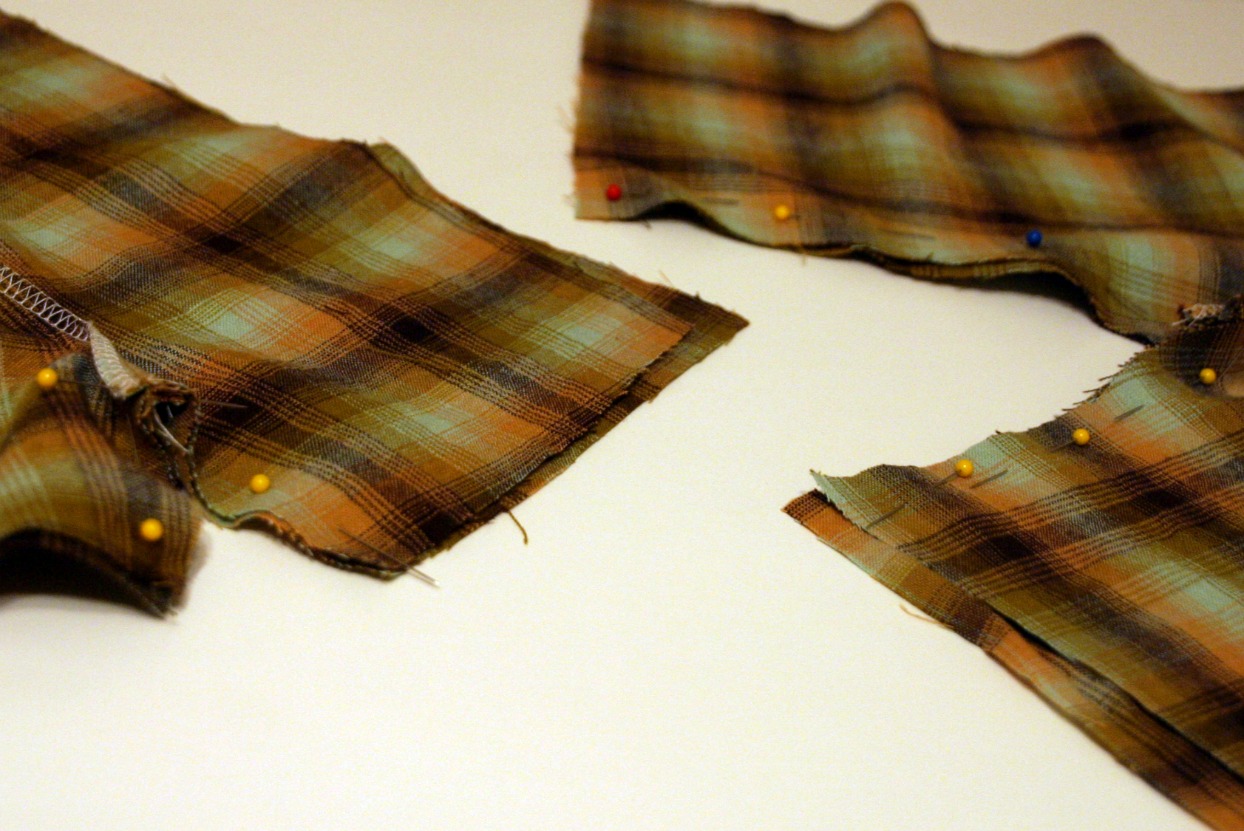
Next, I serged around the top of the pants and the bottoms of the legs because I had to try them on the boys and I didn’t want them to fray. Dana (from MADE) said that the front of the pants will be lower than the back, which is something I had never noticed. She said it will make for a more comfortable fit, so on the 6mo shorts, I actually just cut a little dip after I took this picture.
Next, we will add the elastic. Measure your little boy’s waist and add one inch. For example my oldest son’s waist is 18.5″ so I cut my elastic to 19.5″. Fold down the top of the pants with about 1/4″ overlap and use the elastic as your guide as you pin. Leave an opening of about 1″ and take the elastic out. Sew to top of the shorts closed but remember to leave that 1″ opening to put the elastic back in.
Now insert the elastic using a safety pin. Make sure it is flat all the way around. The elastic will be shorter in length that the shorts. Scrunch the shorts up, pull the elastic out a little and sew the elastic together. I used a zig-zag stitch in 2 places to make sure the elastic stays together.
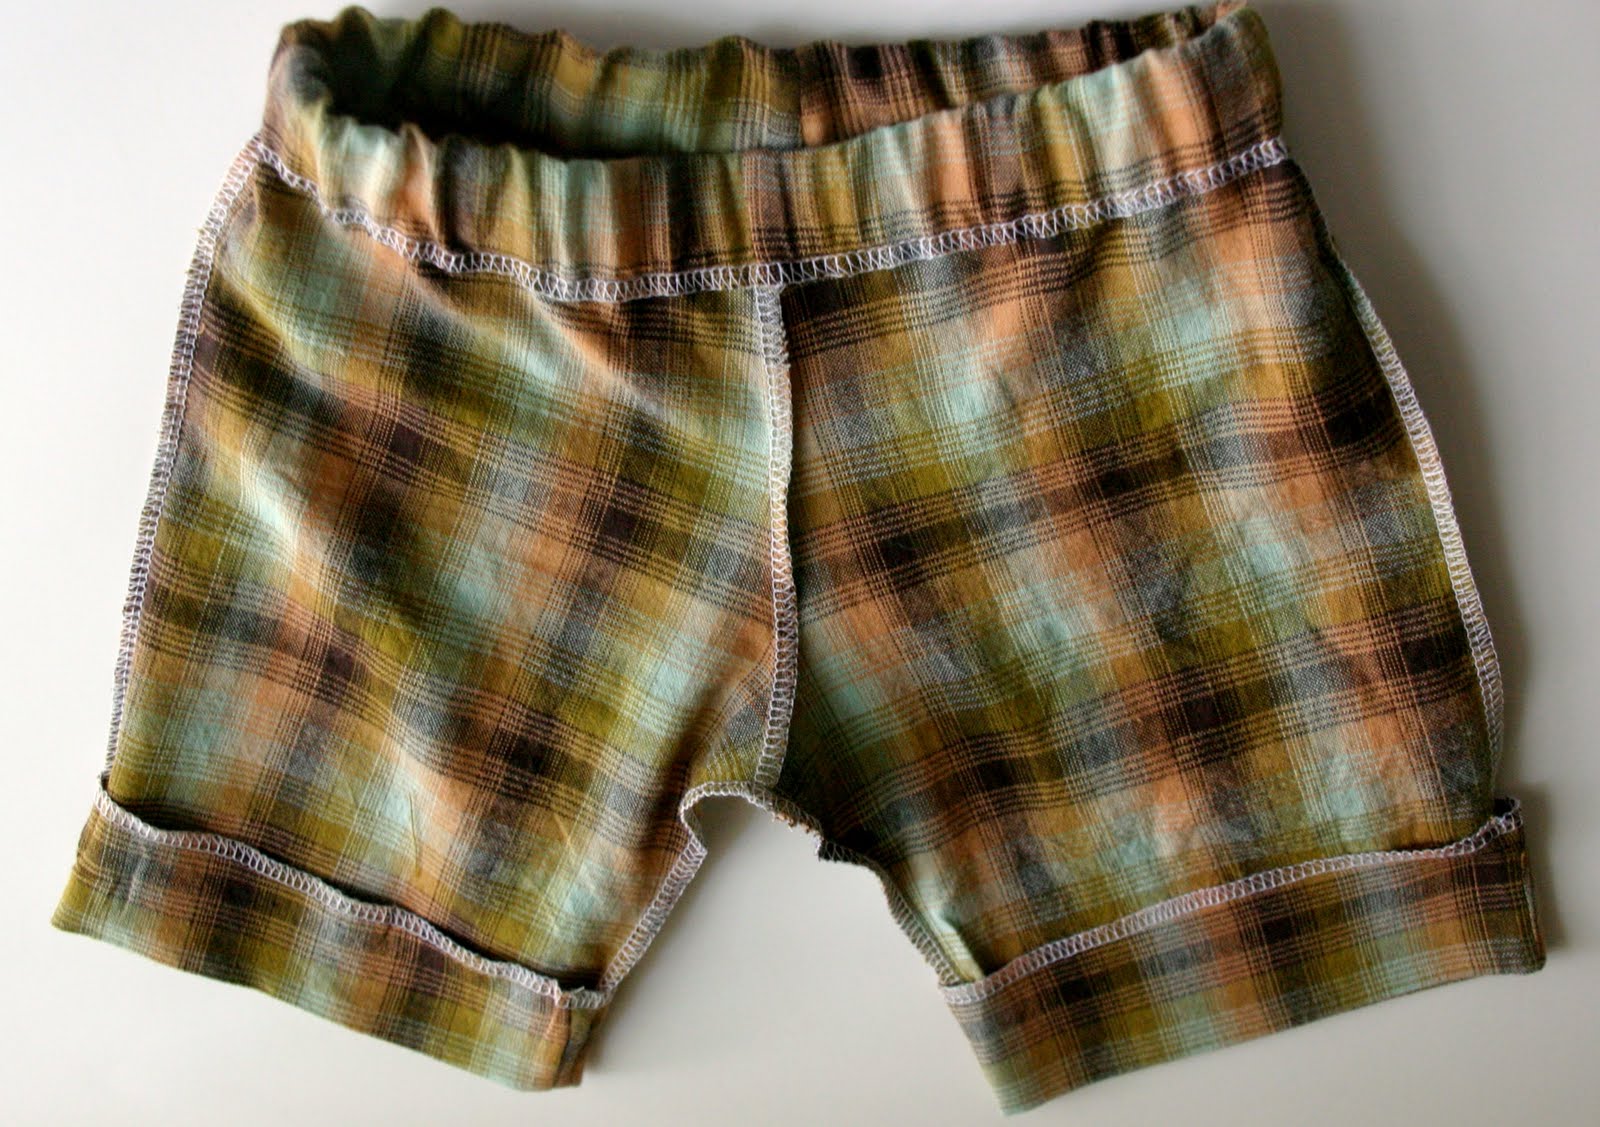
Lastly, turn the shorts inside out and sew the bottom of the shorts. I sewed in two places. On the top of the serged line and on the bottom right next to the seam.
I added my fabric labels to the back.
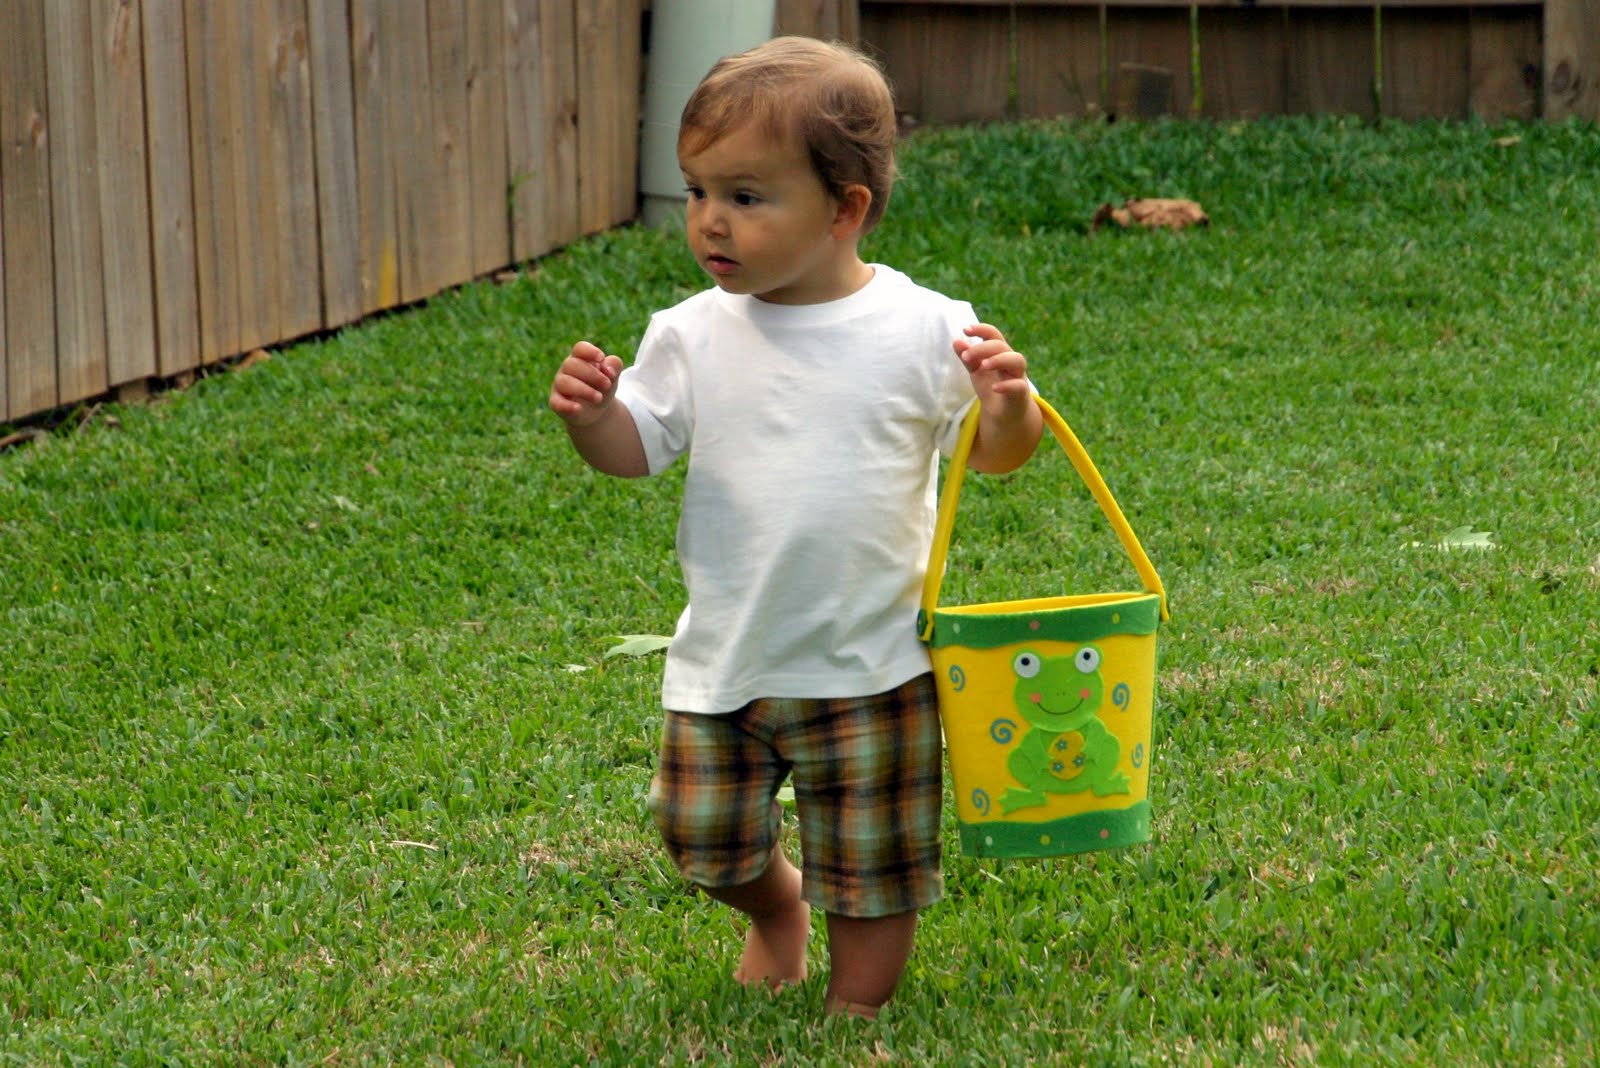
Look at these sweet boys in their matching Little Boy Shorts.
Perfect for Egg Hunting
Stay tuned next week for an exciting project because I am a contestant on Season 3 of One Month to Win it! Woo Hoo!

Filed Under: baby stuff, clothes, fabric, holidays, kid stuff, serger, sewing, tutorial Tagged With: kids

Stethoscope Covers

April 13, 2011 By Taylor 25 Comments

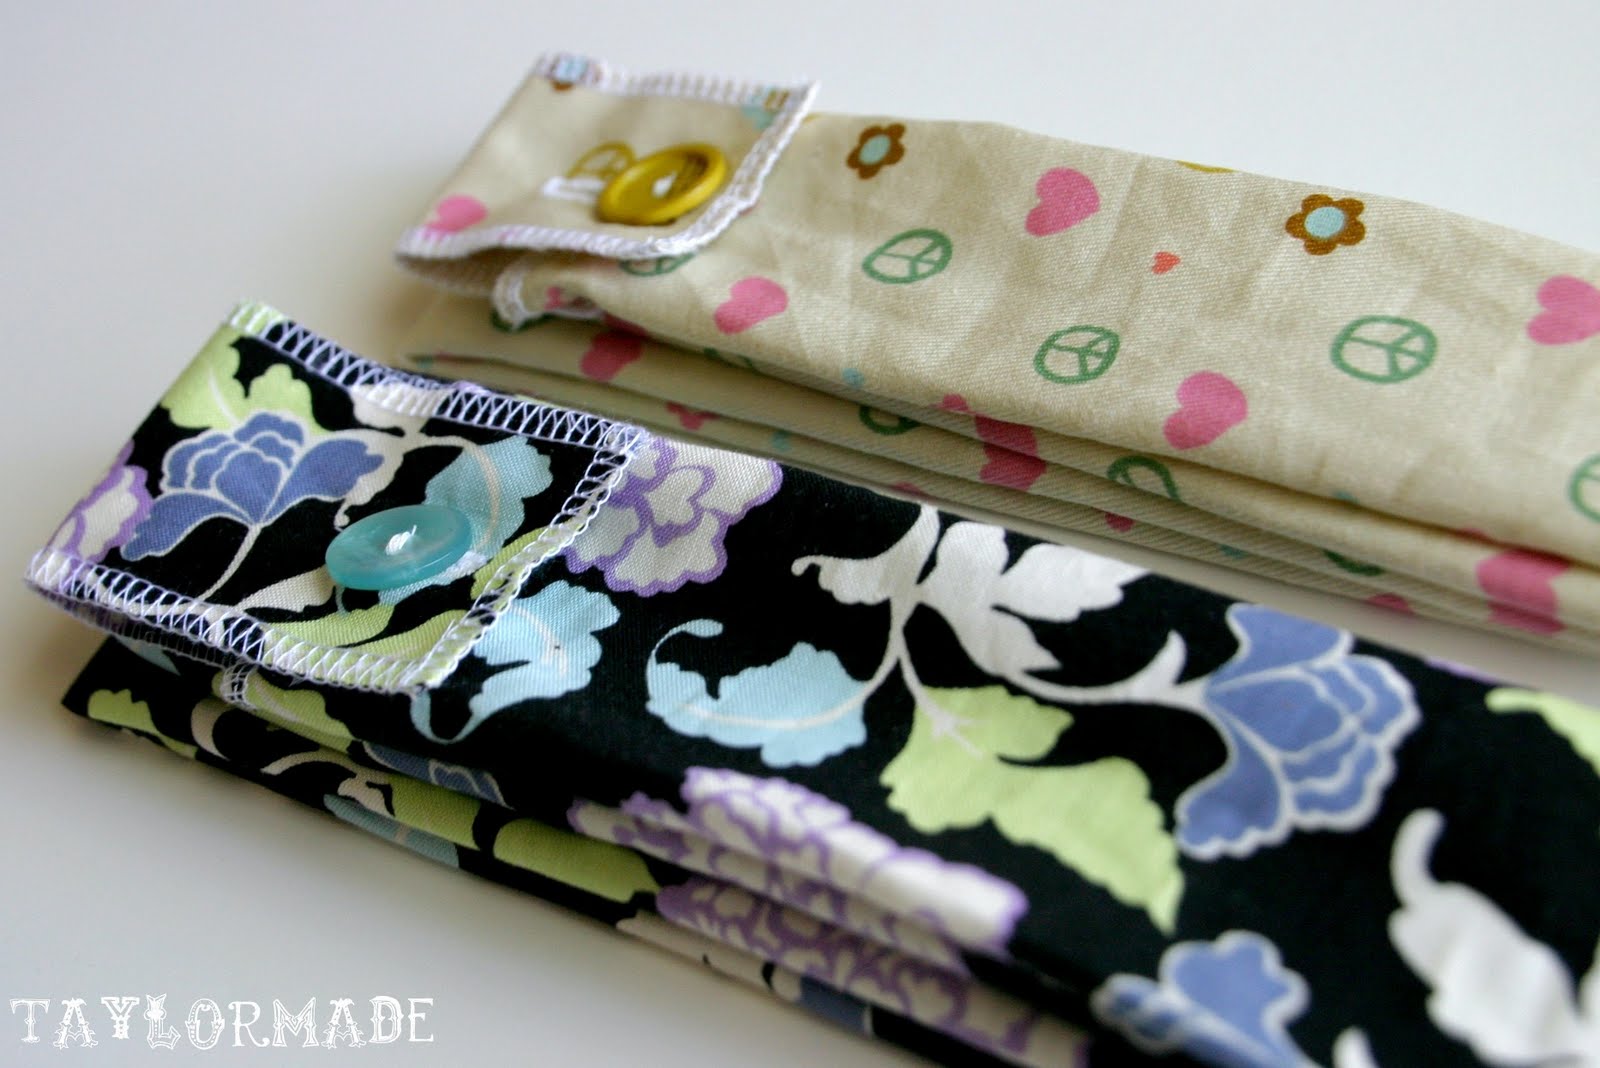
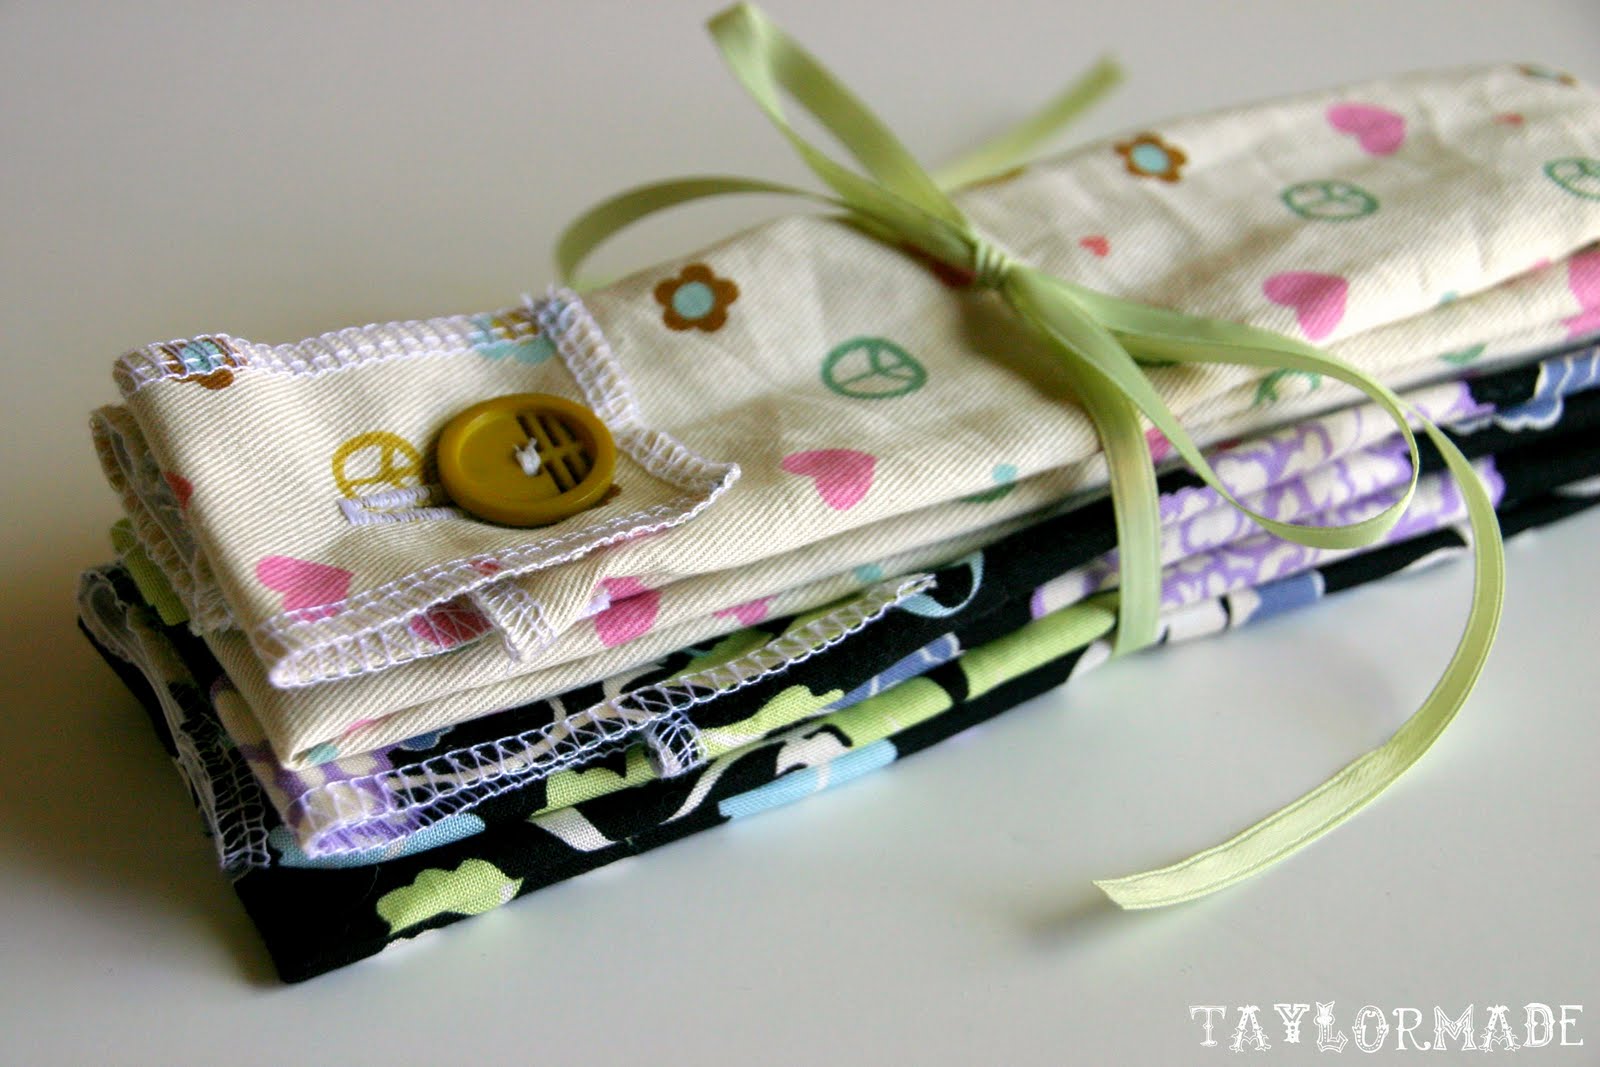
Do you have a special nurse in your life? ‘Cause I do… my sister hehe! Not only is she about to graduate from nursing school but it is also her birthday this week. (Last year I made her this) So, I cant think of a better gift than some handmade Stethoscope Covers. The sad part is after I decided to make her a few, I realized – I don’t have a stethoscope to try them onto. Oops, I hope they fit.

Materials:
– one yard of fabric (you wont use it all, you just need it for length)
– button
– elastic
– sewing machine
– serger (optional)

Directions:

Cut your fabric into a piece that is 34″ x 6″
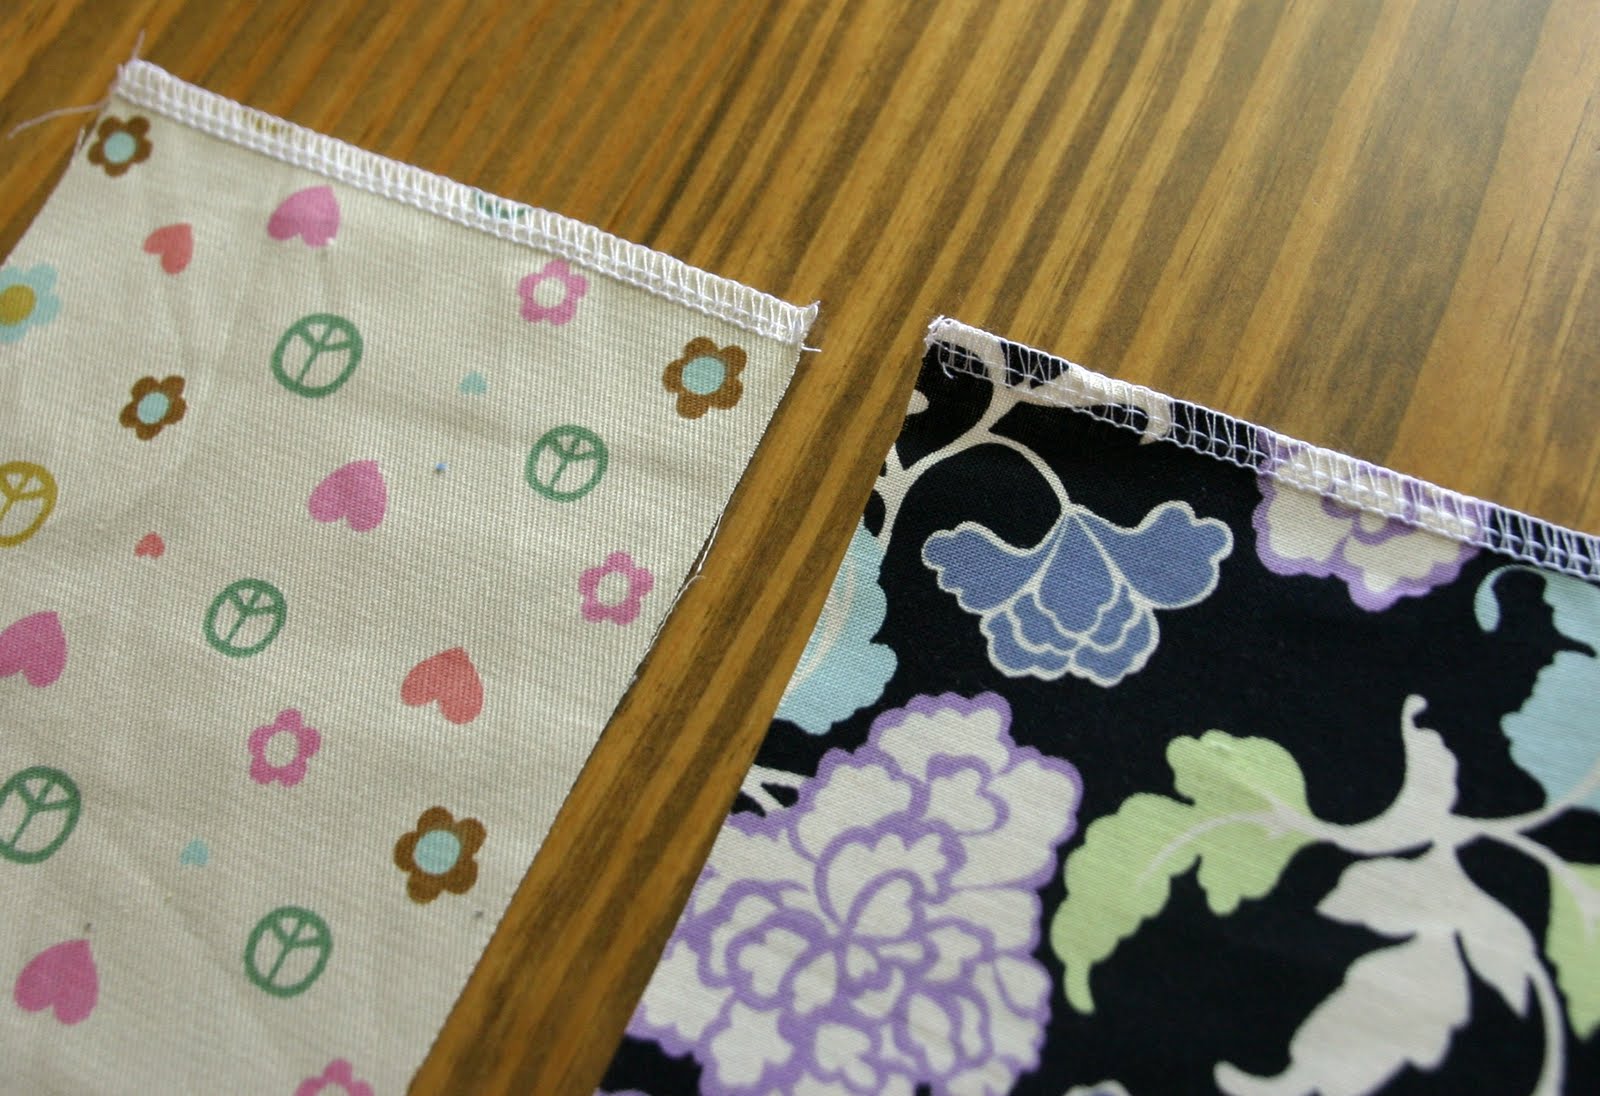
Serge the ends (the sides that are 6″ in length) If you do not have a serger, get online right now and buy one you will have to press the ends and sew a clean edge. Do this to both the top and bottom of the cover.
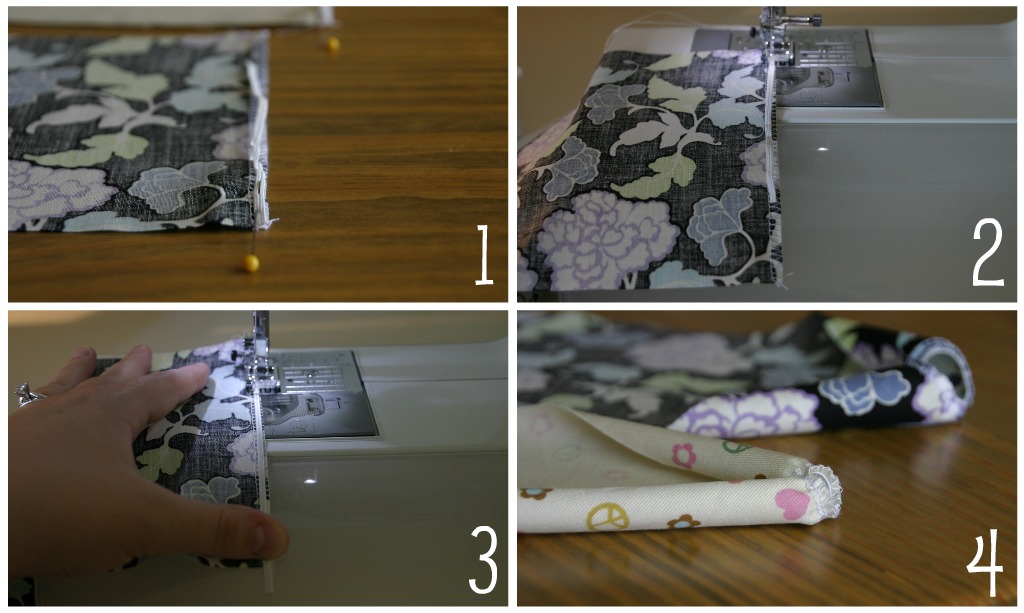
Next we will add the elastic to the bottom of the cover. If your fabric is a print like the floral one I have then just pick a bottom. My other fabric with the hearts has a specific bottom and top so don’t confuse the ends.
1. Cut the elastic about 2″ shorter than your width, so in our case 4″. Pin it to the bottom of the cover.
2. Start sewing it on.
3. Once it is on, pull the elastic with your hand while you are sewing.
4. It will look like this when you are done.
Next, pin right sides together lengthwise all the way down the cover and sew.
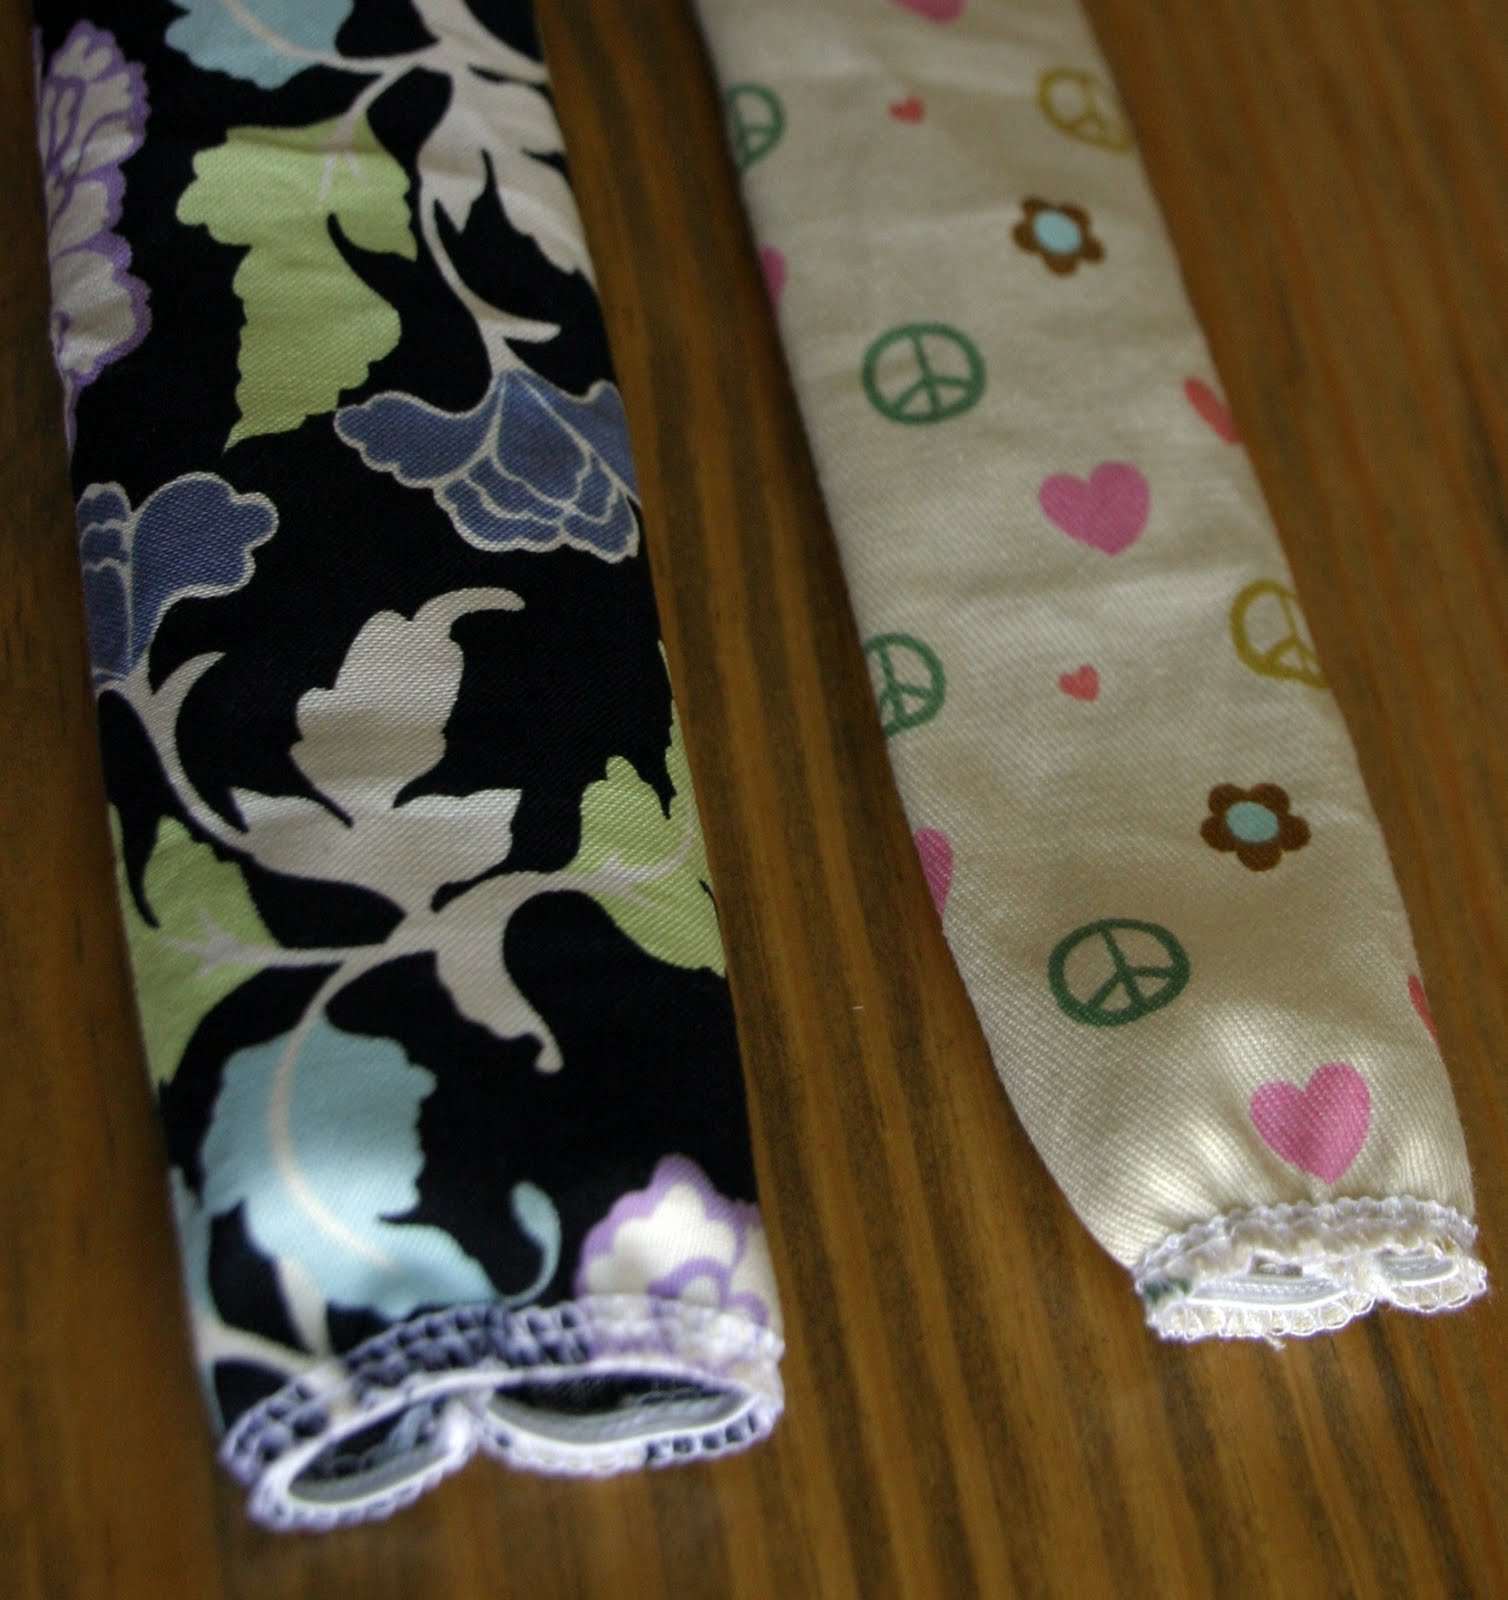
Turn the cover right side out. This is the main part of our cover. You can tell that my covers are a little different in width. I used two different seam allowances only because I wanted them to look a little different.
At this point I realized I had to come up with a way for the cover to stay on the Stethoscope. Do you see where it has a “Y” in the top. I decided to use a little flap with a button and a button hole. You could use Velcro, snaps, etc.
 I had scraps left over from the original cutting of the fabric so I used these two scraps. I folded it in half with wrong sides together and serged it into a rectangle flap. Sorry, I don’t have an exact measurement. Again if you don’t have a serger then you will have to sew right sides together leaving an opening, turn it right side out and sew again. Make sure the flap is the same width as your cover, length does not matter.
1. I added my TaylorMade label (tutorial here) to the back of the flap
2. Make a button hole on the flap
3. Pin the flap to the back of the cover
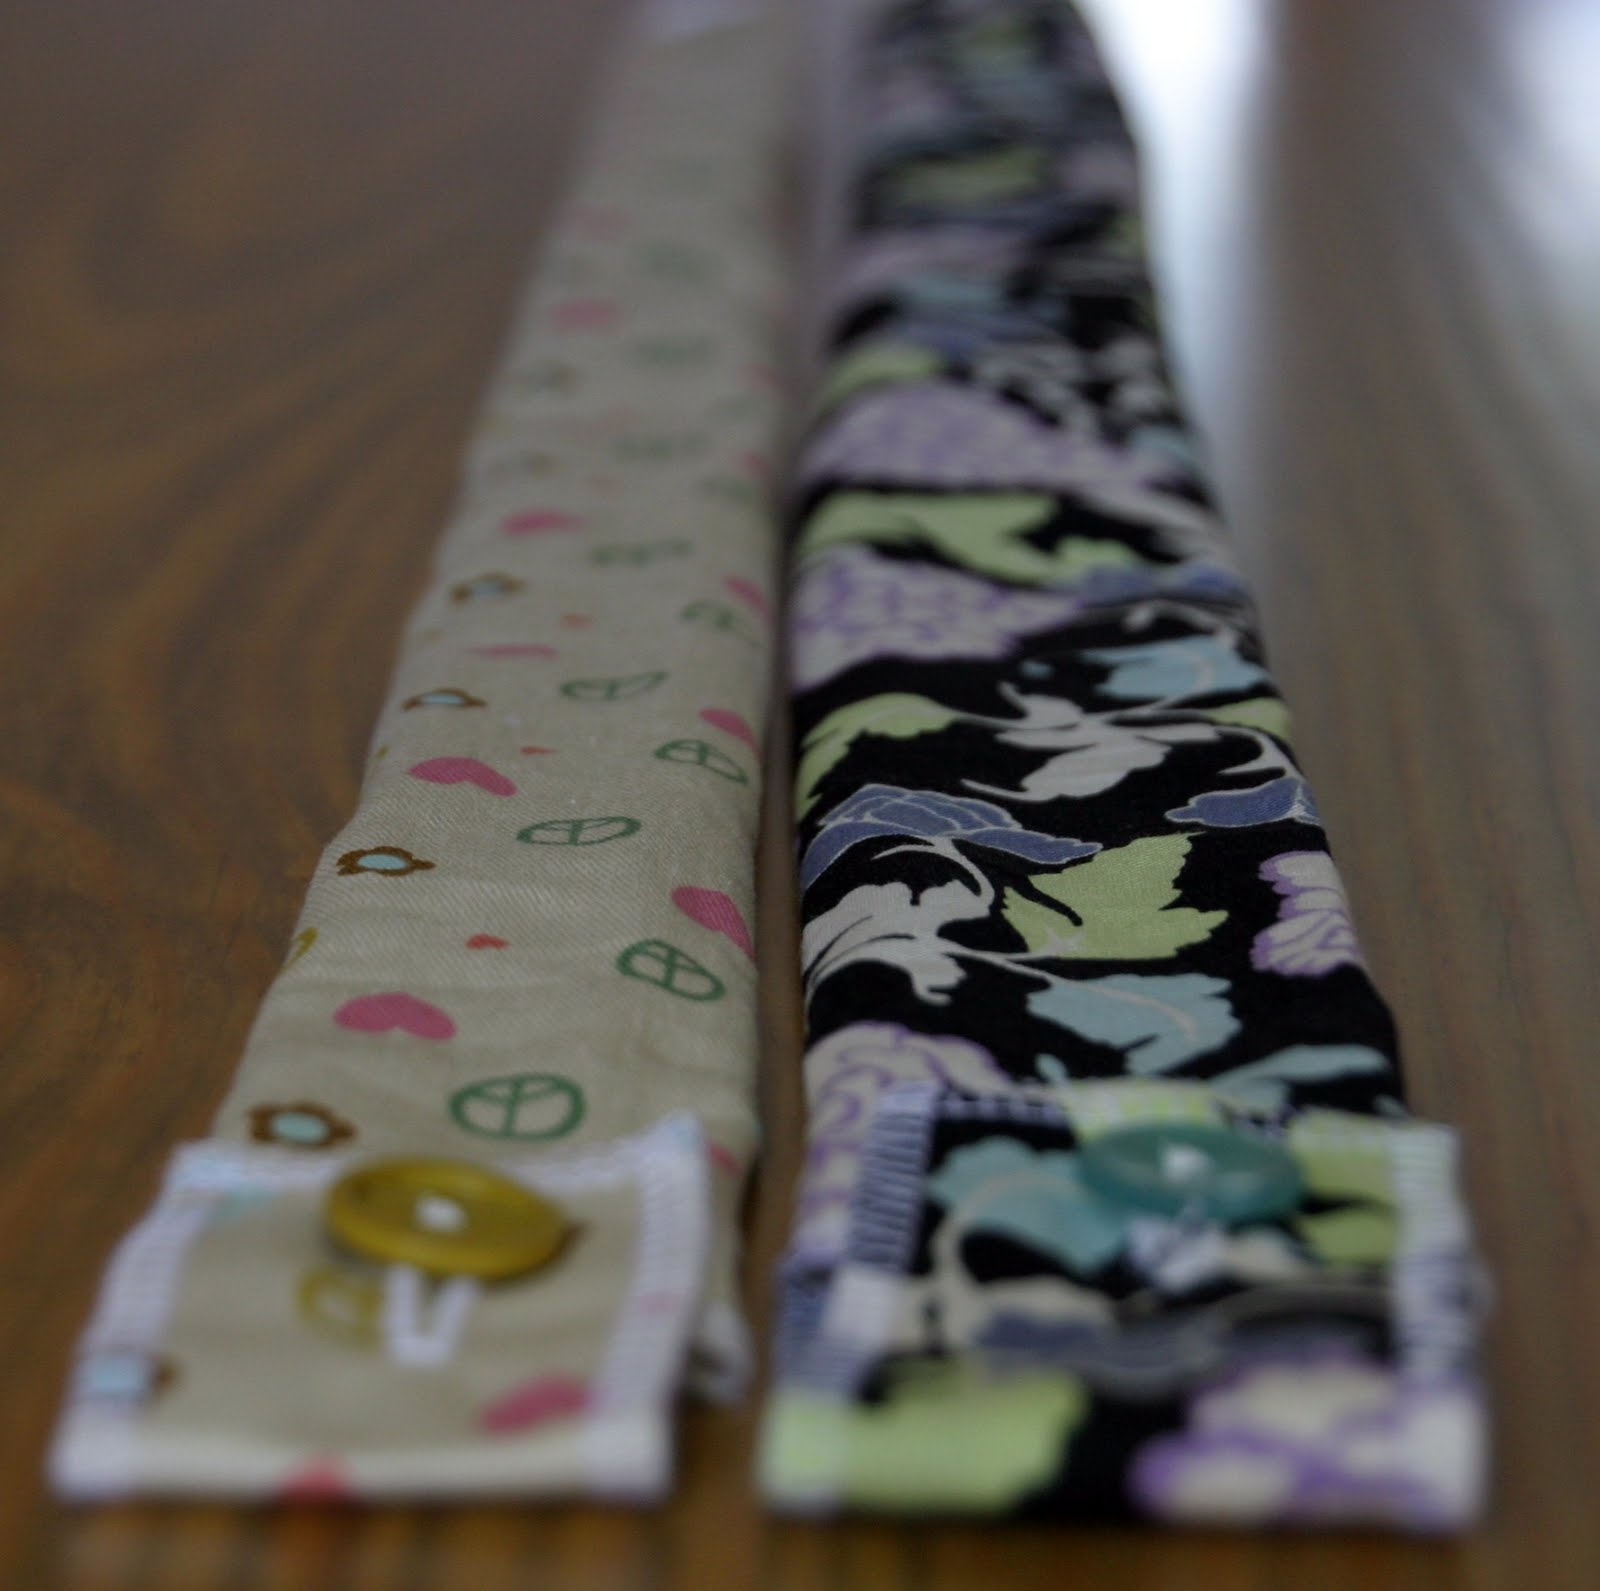
Sew the flap to the back of the cover
Last step is to add the button to the front side of the cover
Don’t you love this vintage mustard button?
Happy Birthday Sis!

Filed Under: birthday, fabric, gift, serger, sewing, tutorial Tagged With: accessories

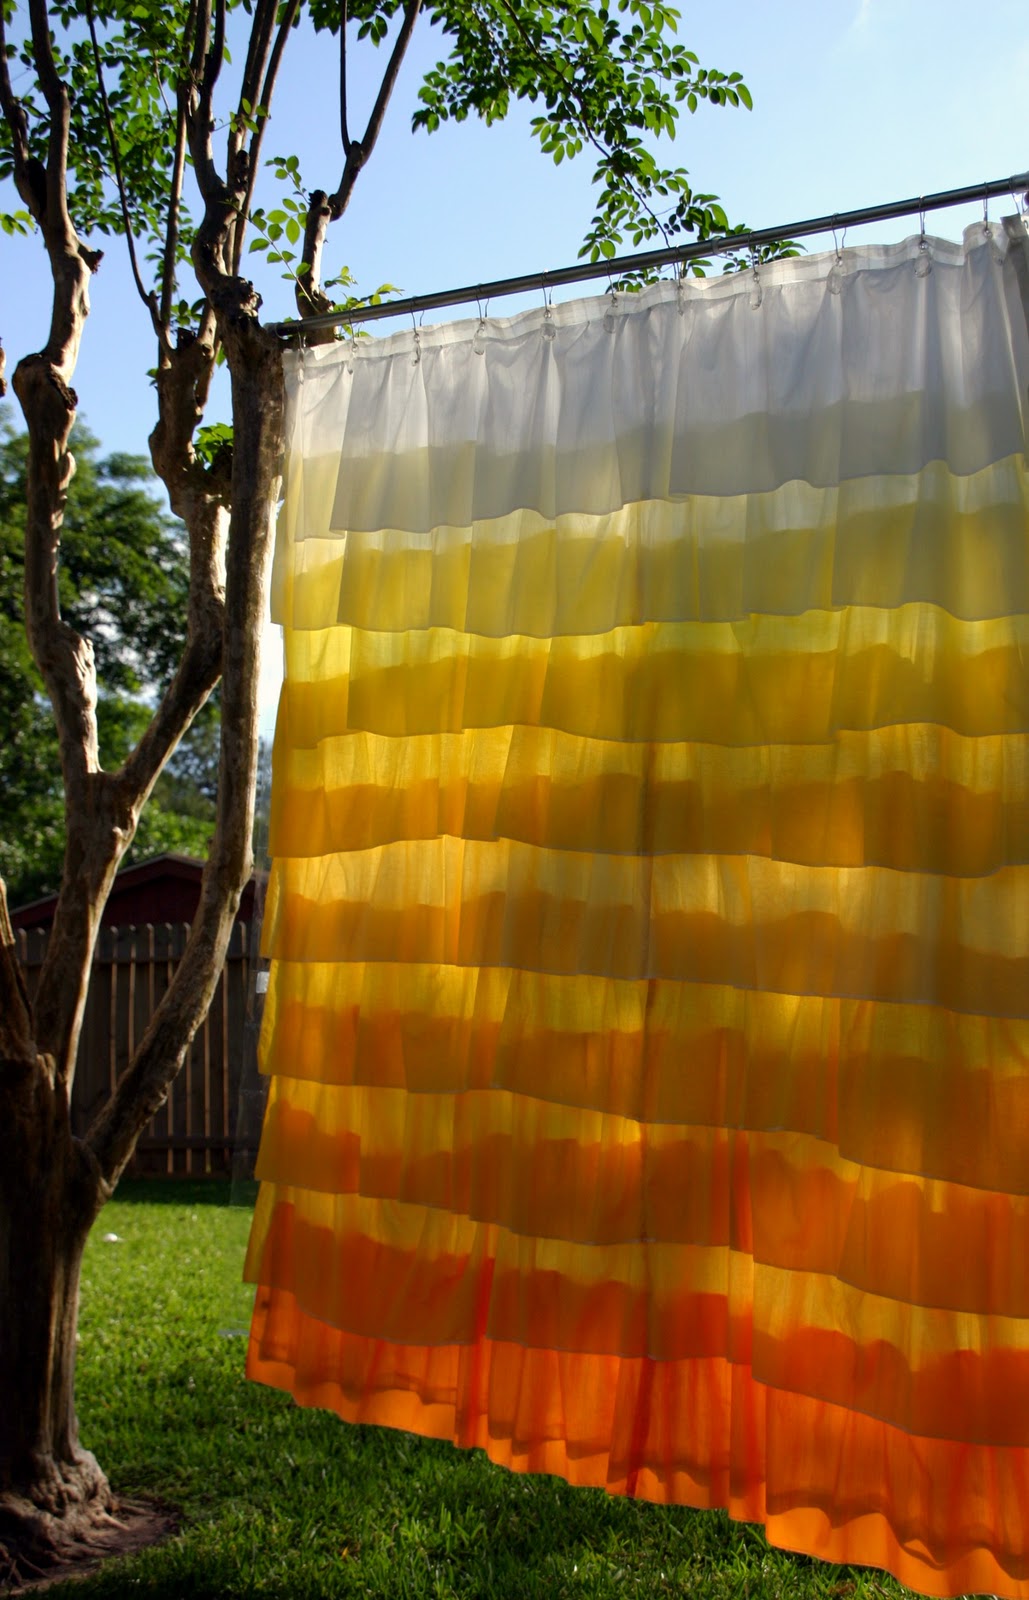
DIY Anthropologie Flamenco Shower Curtain in Sunshine

April 7, 2011 By Taylor 61 Comments

Best Shower Curtain Ever

I have been eyeing these from Anthropologie for years…

But I have some problems:
#1 I don’t want to spend $118.00 on a shower curtain
#2 Those colors don’t match my room

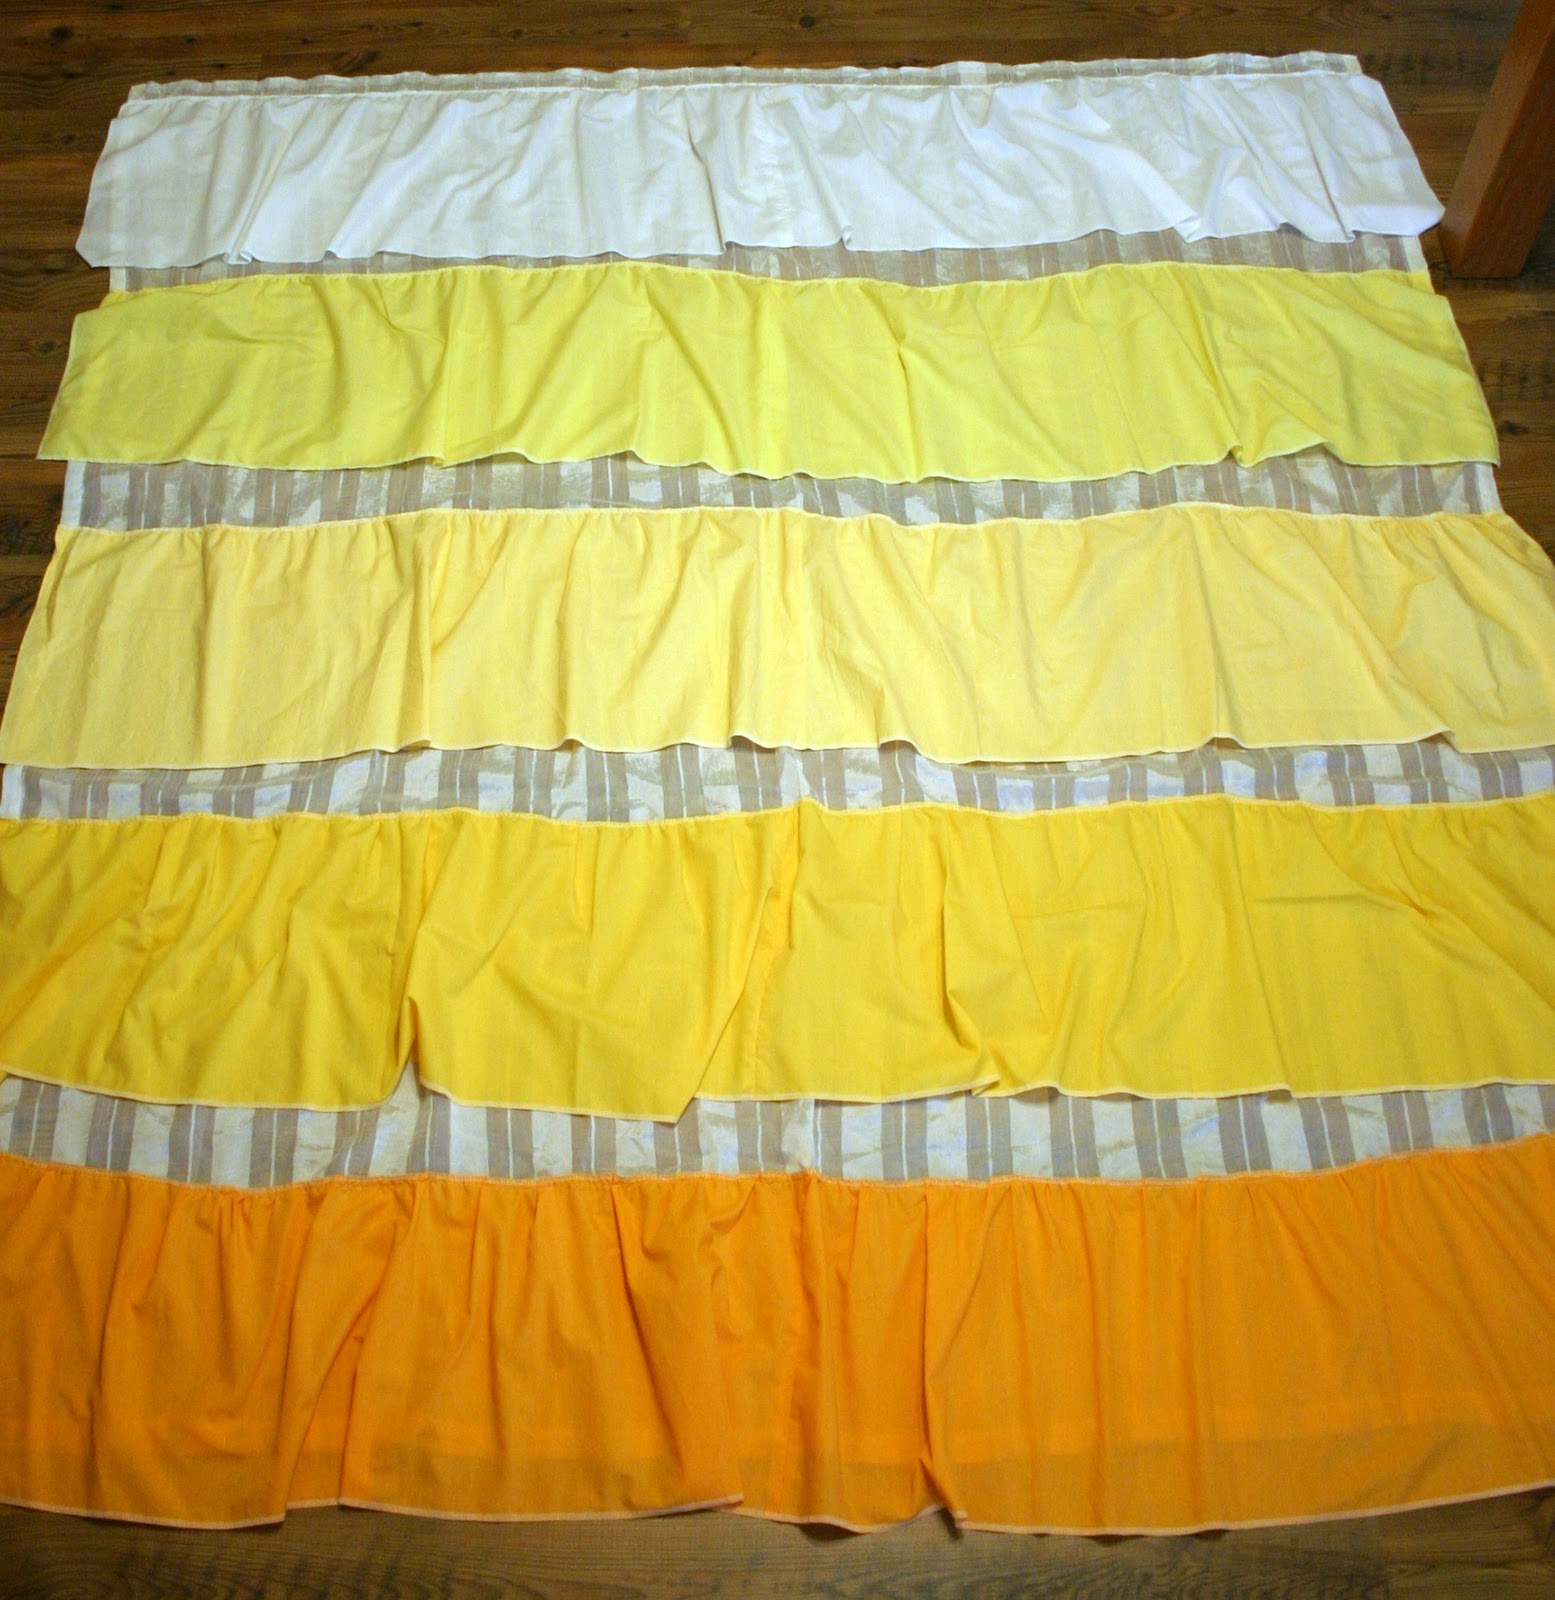
So what is a girl to do… how about make one. And I call mine “Sunshine”. Anthropologie’s Shower Curtain has ten “panels” of descending color. I could only find nine fabrics that I thought  really worked so mine has nine. Also, please don’t judge me on the TERRIBLE photos in this tutorial, my bathroom has no windows and it was a rainy day! That’s why I named her Sunshine.

What you need:
– 9 yards of solid fabric in a monochromatic color palate; light to dark
– light colored shower curtain to cover
– sewing machine
– serger (optional but makes it 10x easier)

Wash and iron all of your fabric
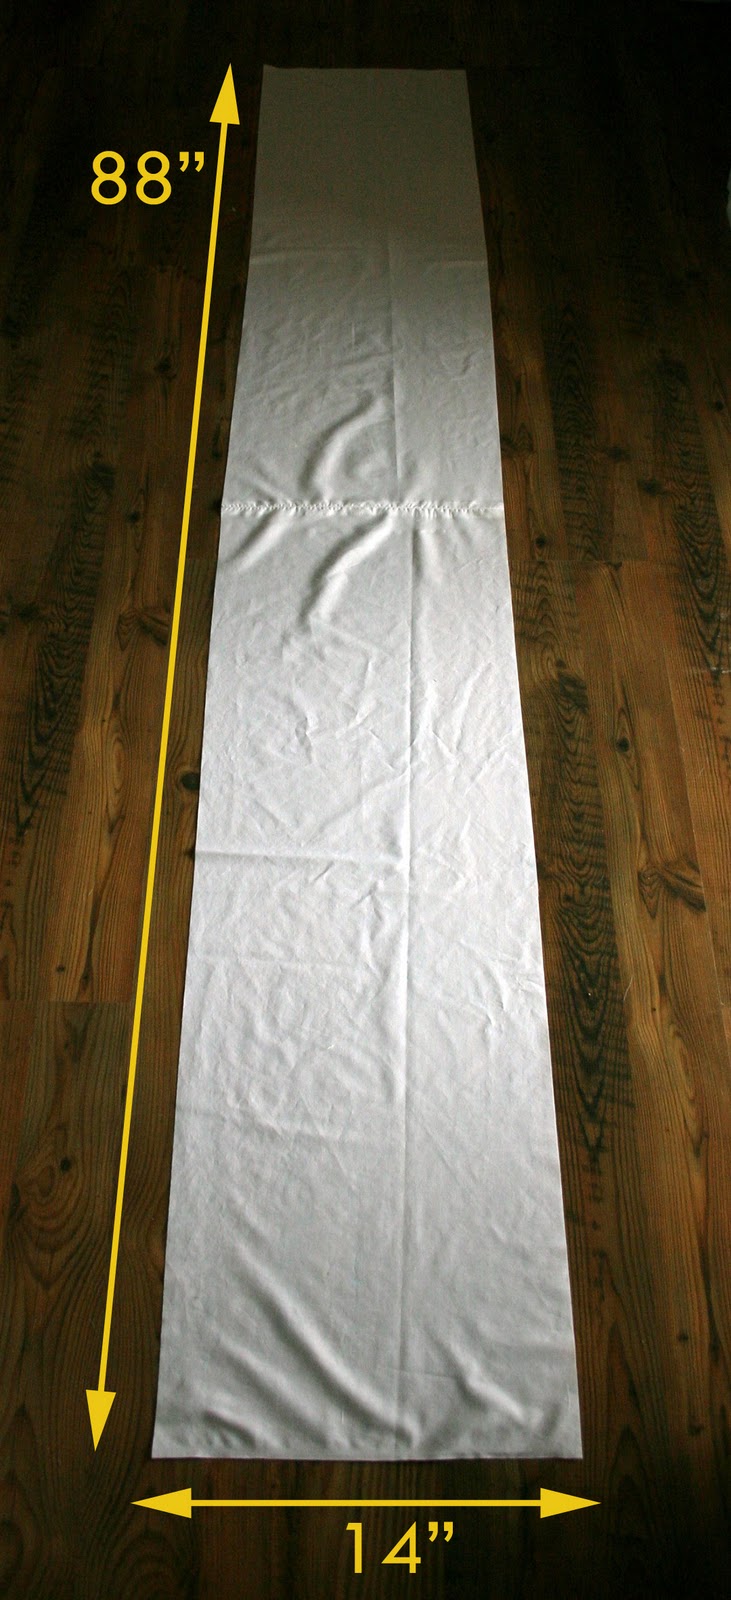
I am going to call each color a “panel”. So, each panel needs to be 88″ x 14″. Most fabric is either 44″ or 60″ wide. I was at Hobby Lobby and I found broadcloth in a bunch of colors that were 44″ wide. So that is why the panels are 88″ long. Cut your yards in half with the selvages on the short ends. Do this to all of the panels. (This is the longest & most boring part)
Now each panel has two sides, a top and a bottom. Serge the bottom of every panel.
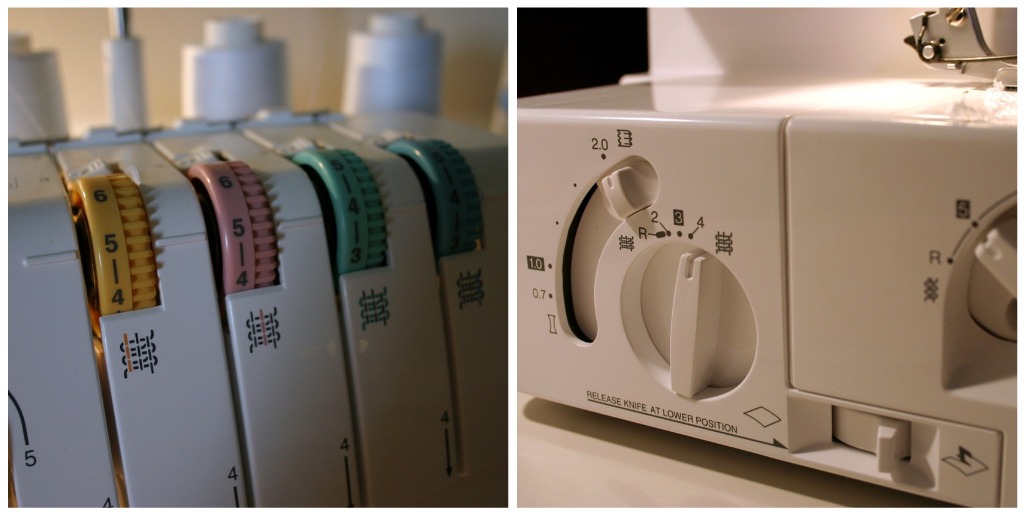
Now it is time for ruffles and who doesn’t love a good ruffle? I used my serger to make them, and here were my settings, (click to make it larger). Do this to every panel. You will have to play around with your settings. The panels should now measure 71″ wide. If they are too long that is ok, you can “ruffle” them more when you sew them on to the shower curtain. If they are too short, you will have to pull the ruffle out a little.
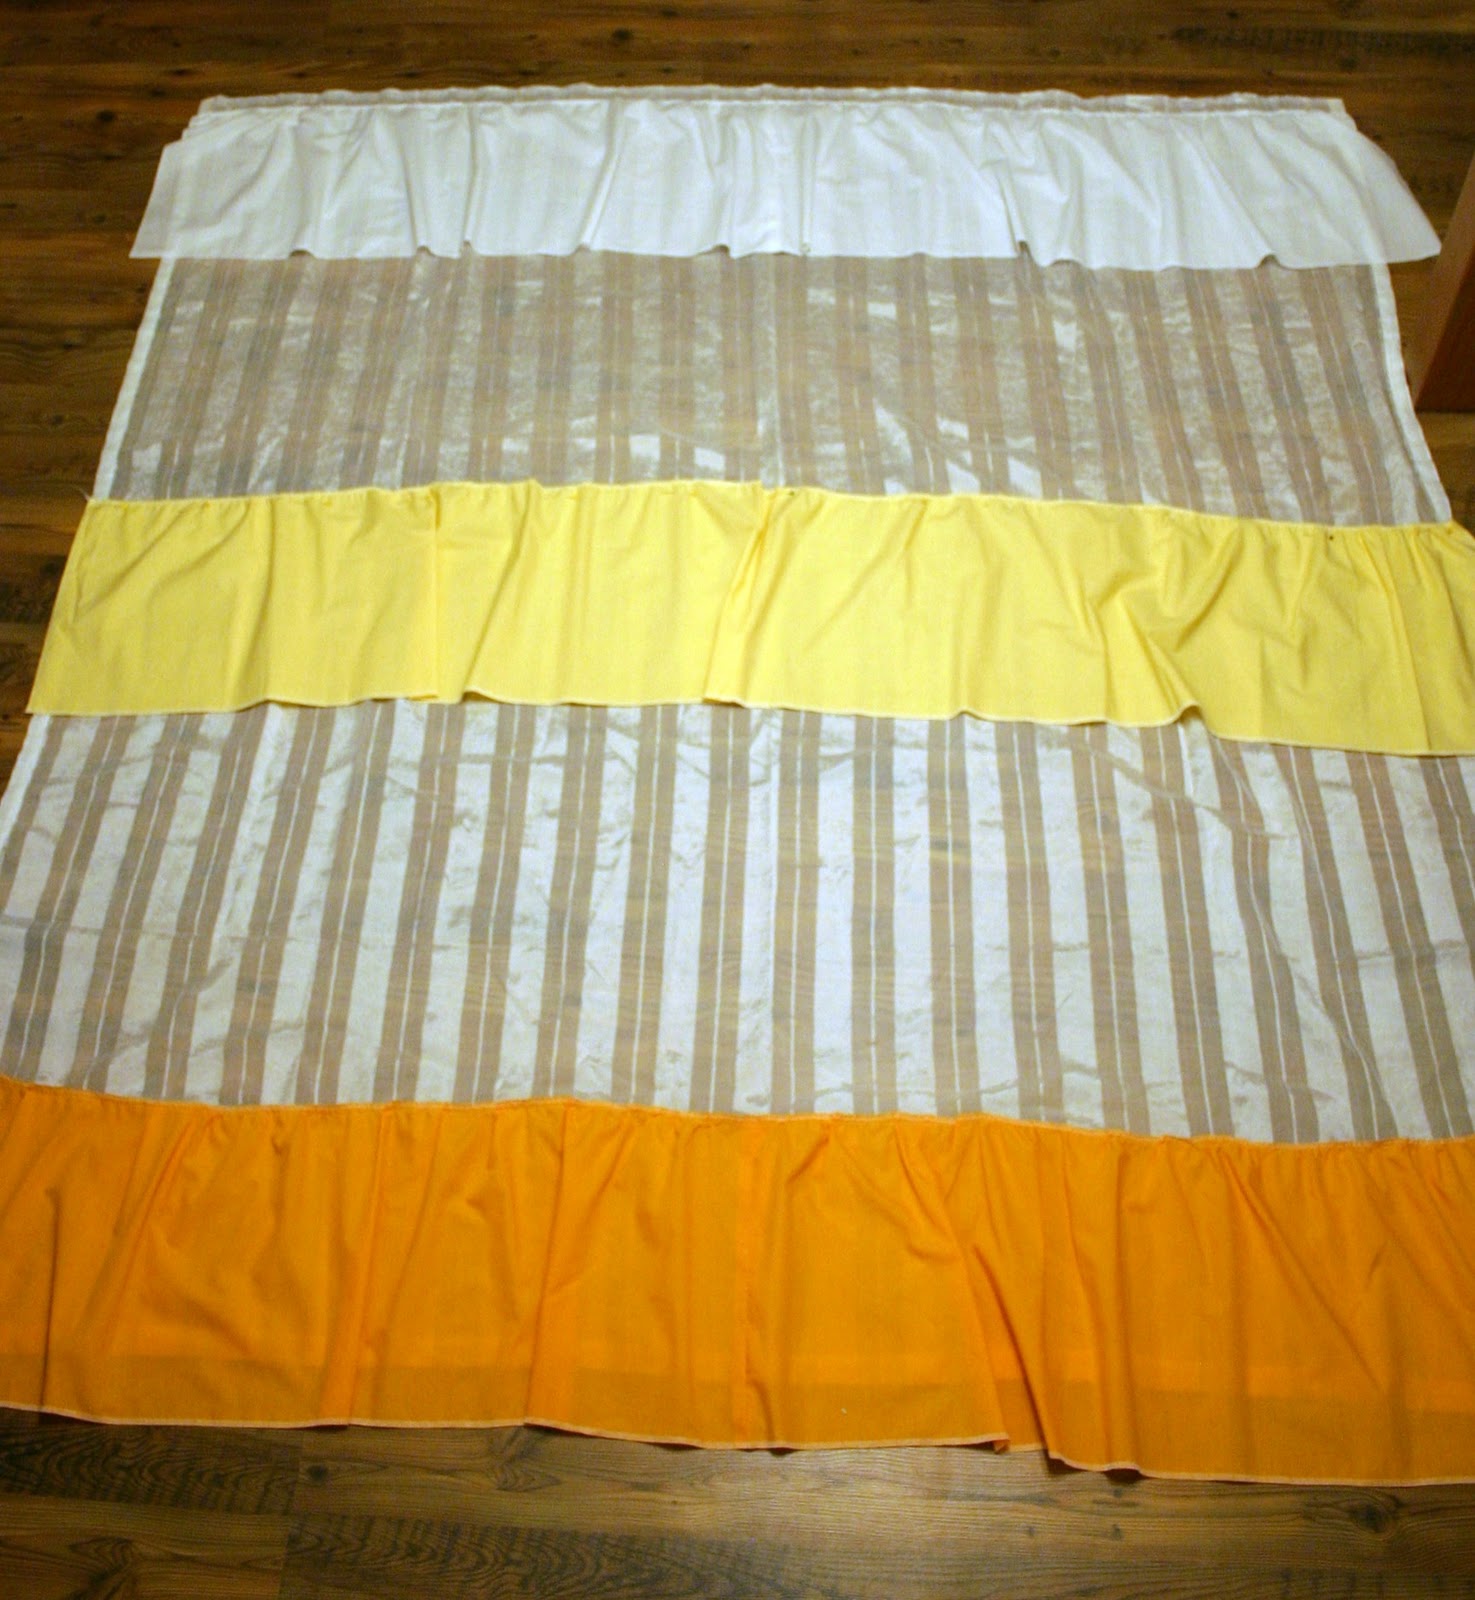
Now we will sew the panels on to the shower curtain. You could just make one yourself out of solid fabric. The dimensions of a regular shower curtain are 71″ x 71″. Start with the very bottom panel and lay it down so that the bottom of the ruffle comes about an inch past the bottom of the shower curtain and pin it down. Sew this panel on. (These pictures make me cringe)
Now do the same with the top panel. Start the ruffle just under the holes in the shower curtain.
Now here are my lovely math skills… I’m sure there is a better way to do this but I like to eyeball. I measured from the “sew line” of the top panel to the “sew line” of the bottom panel and cut that number in half.
For example: The distance between my two sew lines was 60″. So half of that is 30″ so I marked 30″ with a pencil on the edge of the shower curtain and that was the middle. That is where I sewed my middle panel. Be sure NOT to measure from the bottom of the ruffle and measure from the actual sew line. Also maybe number your panels in order so to not confuse them.
You will continue with this method until you have added all of the panels. So again, measure from the middle panel’s sew line to the bottom’s sew line and mark halfway then sew that panel there.
Pin It
Related Posts Plugin for WordPress, Blogger...

Filed Under: fabric, home goods, serger, sewing, tutorial Tagged With: home goods

  • « Previous Page
  • 1
  • 2
  • 3
  • 4
  • 5
  • Next Page »

Welcome to Taylor Made

http://www.taylormadecreatesblog.com/about-me Hi Yall! I'm Taylor... an artsy mom of three from Houston, TX. I love sewing, collecting floral fabric, eating Mexican Food, photography, brights colors, rearranging, and rolling clay. Taylor Made Creates is all about creating a fun, colorful home, sewing cute things and eating good food. Check out my SHOP HERE HERE! Thanks for stopping by!

Search

Pin with me!

Like Me :)

Facebook Pagelike Widget

More Recent Posts

  • Kid's Animal Room
  • Kids Camping Shirts
  • Mermaid Birthday Party
  • Conversation Heart Cold Packs
  • Holiday Apple Tea Punch
  • Purple Princess Costume
  • Letterboard Costume
  • La Croix Costume

FAVORITES

  • Casserole Carrier
  • Playroom Reveal
  • a Happy Birthday Quilt Block
  • More Casserole Carriers
  • Winged Peasant Dress
  • How to Shorten a Shirt
  • Love Sign with a Fence Frame
  • Triangle Baby Quilt
  • Foodie Napkin Rings

Copyright © 2026 · Web Hosting By RFE Hosting