TaylorMade

DIY, Home Decor & Sewing

  • Home
  • SHOP
  • DIY & Sewing
    • For the Home
    • Sewing
    • Costumes and Holidays
    • Cricut Projects
    • Crafting
  • Parties
  • Recipes
  • Home Tour
  • Favorites
  • About

The Succulence Lillian Dress

February 2, 2016 By Taylor 12 Comments

Welcome to day two of the Succulence Blog Tour! That’s right… today I have the lucky job of showing off a brand new fabric line by Bonnie Christine! I have been a fan of Bonnie’s work for so long, all of her patterns are so beautiful (I even used some of them in Bee’s Nursery) and I have taken two of her courses. She’s super talented and it’s quite the honor to be taking place in her latest Blog Tour!

Succulence Lillian dress

succulence lillian dress

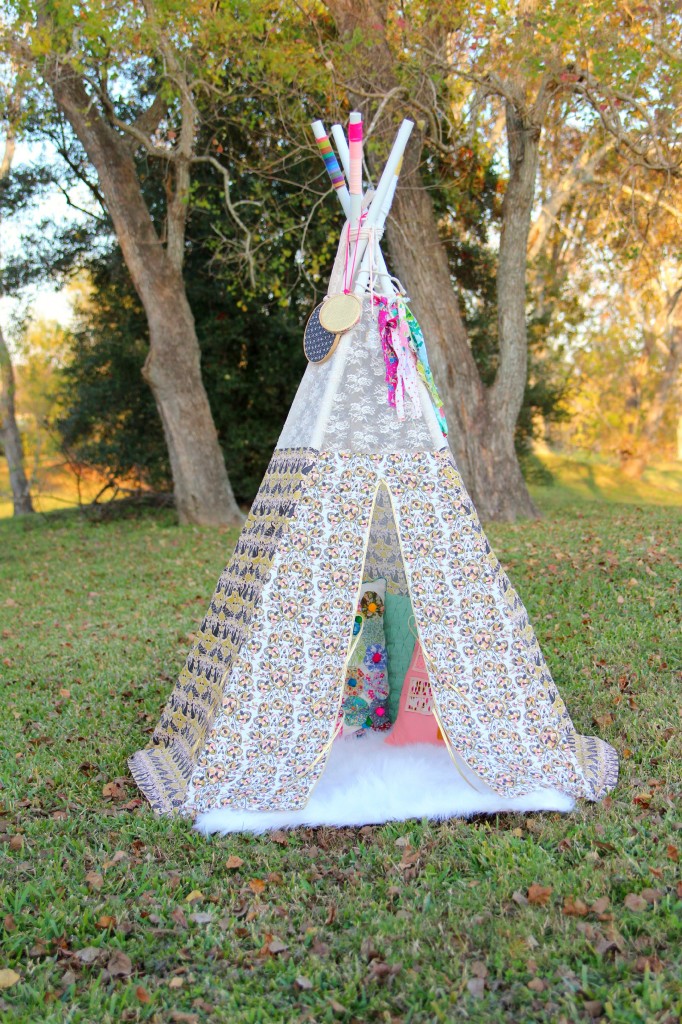
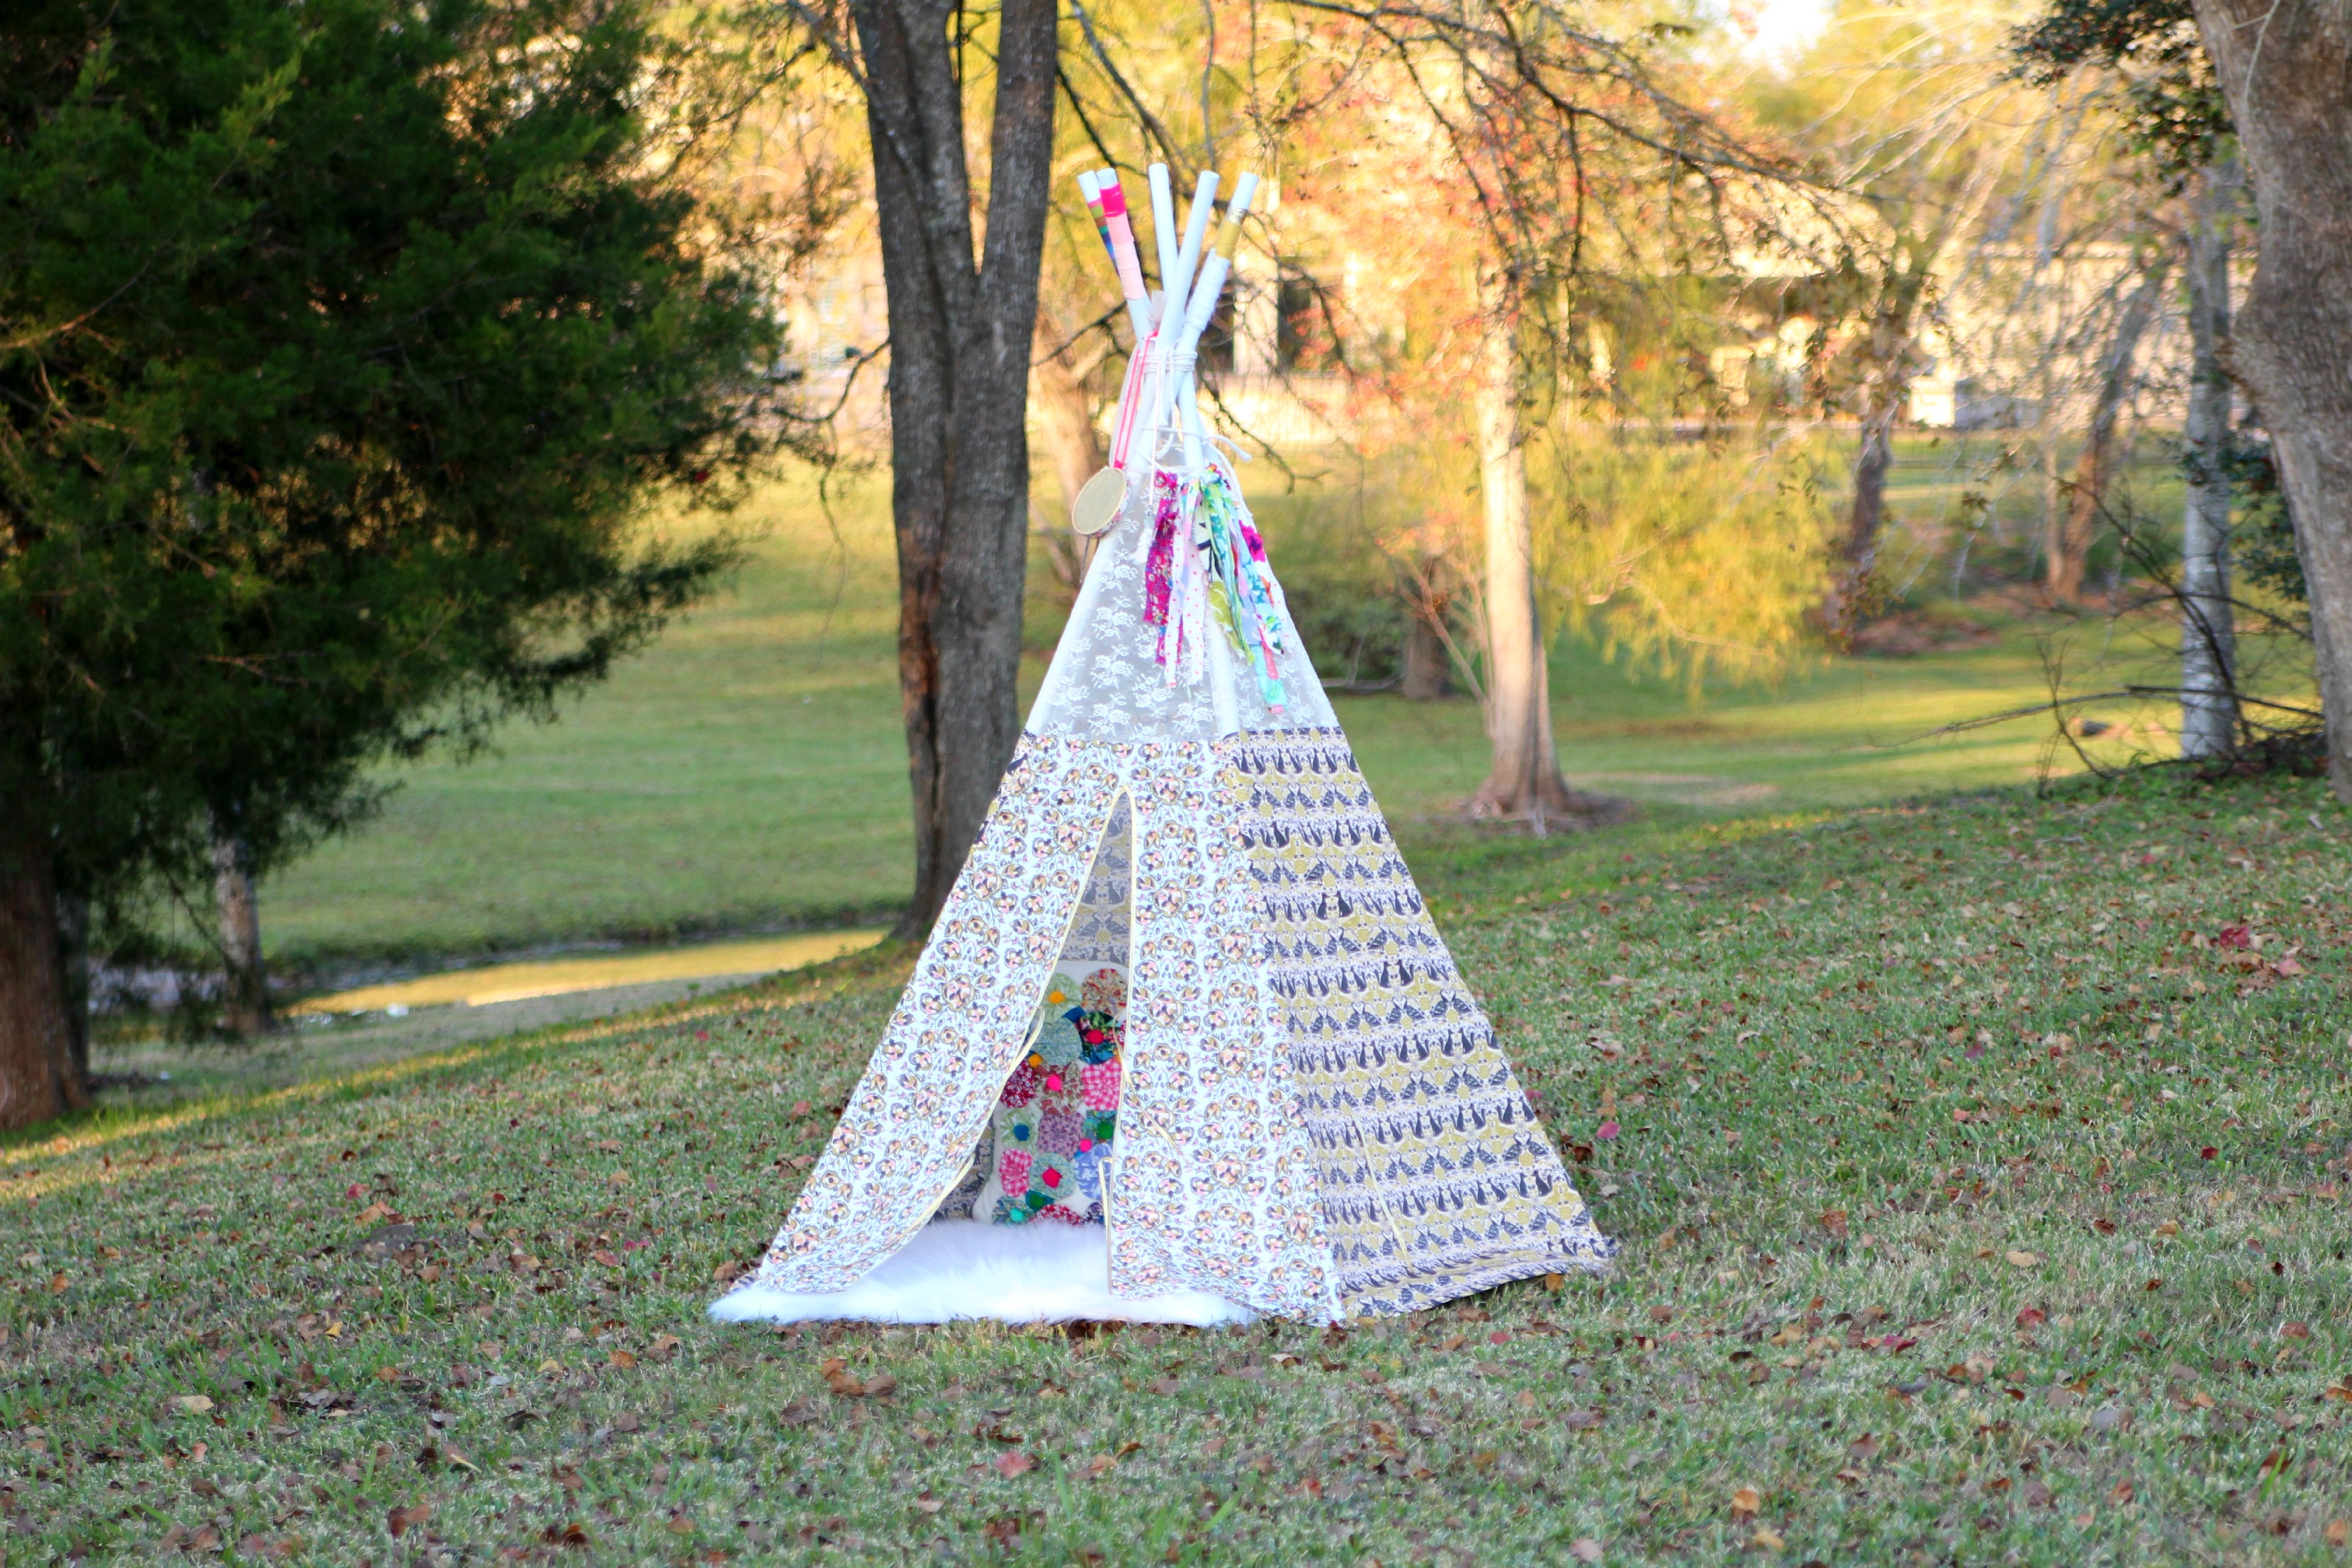
Lets talk about the gorgeous line, Succulence! Succulents represent the ability to thrive and constantly create new growth through absorbing even the tiniest bits of water. Bonnie pays homage to this perseverance through a study of these plants in vibrant hues of earthy plum, sunlit copper and both pristine & opaque greens.

succulence fabric line

succulence lillian dress

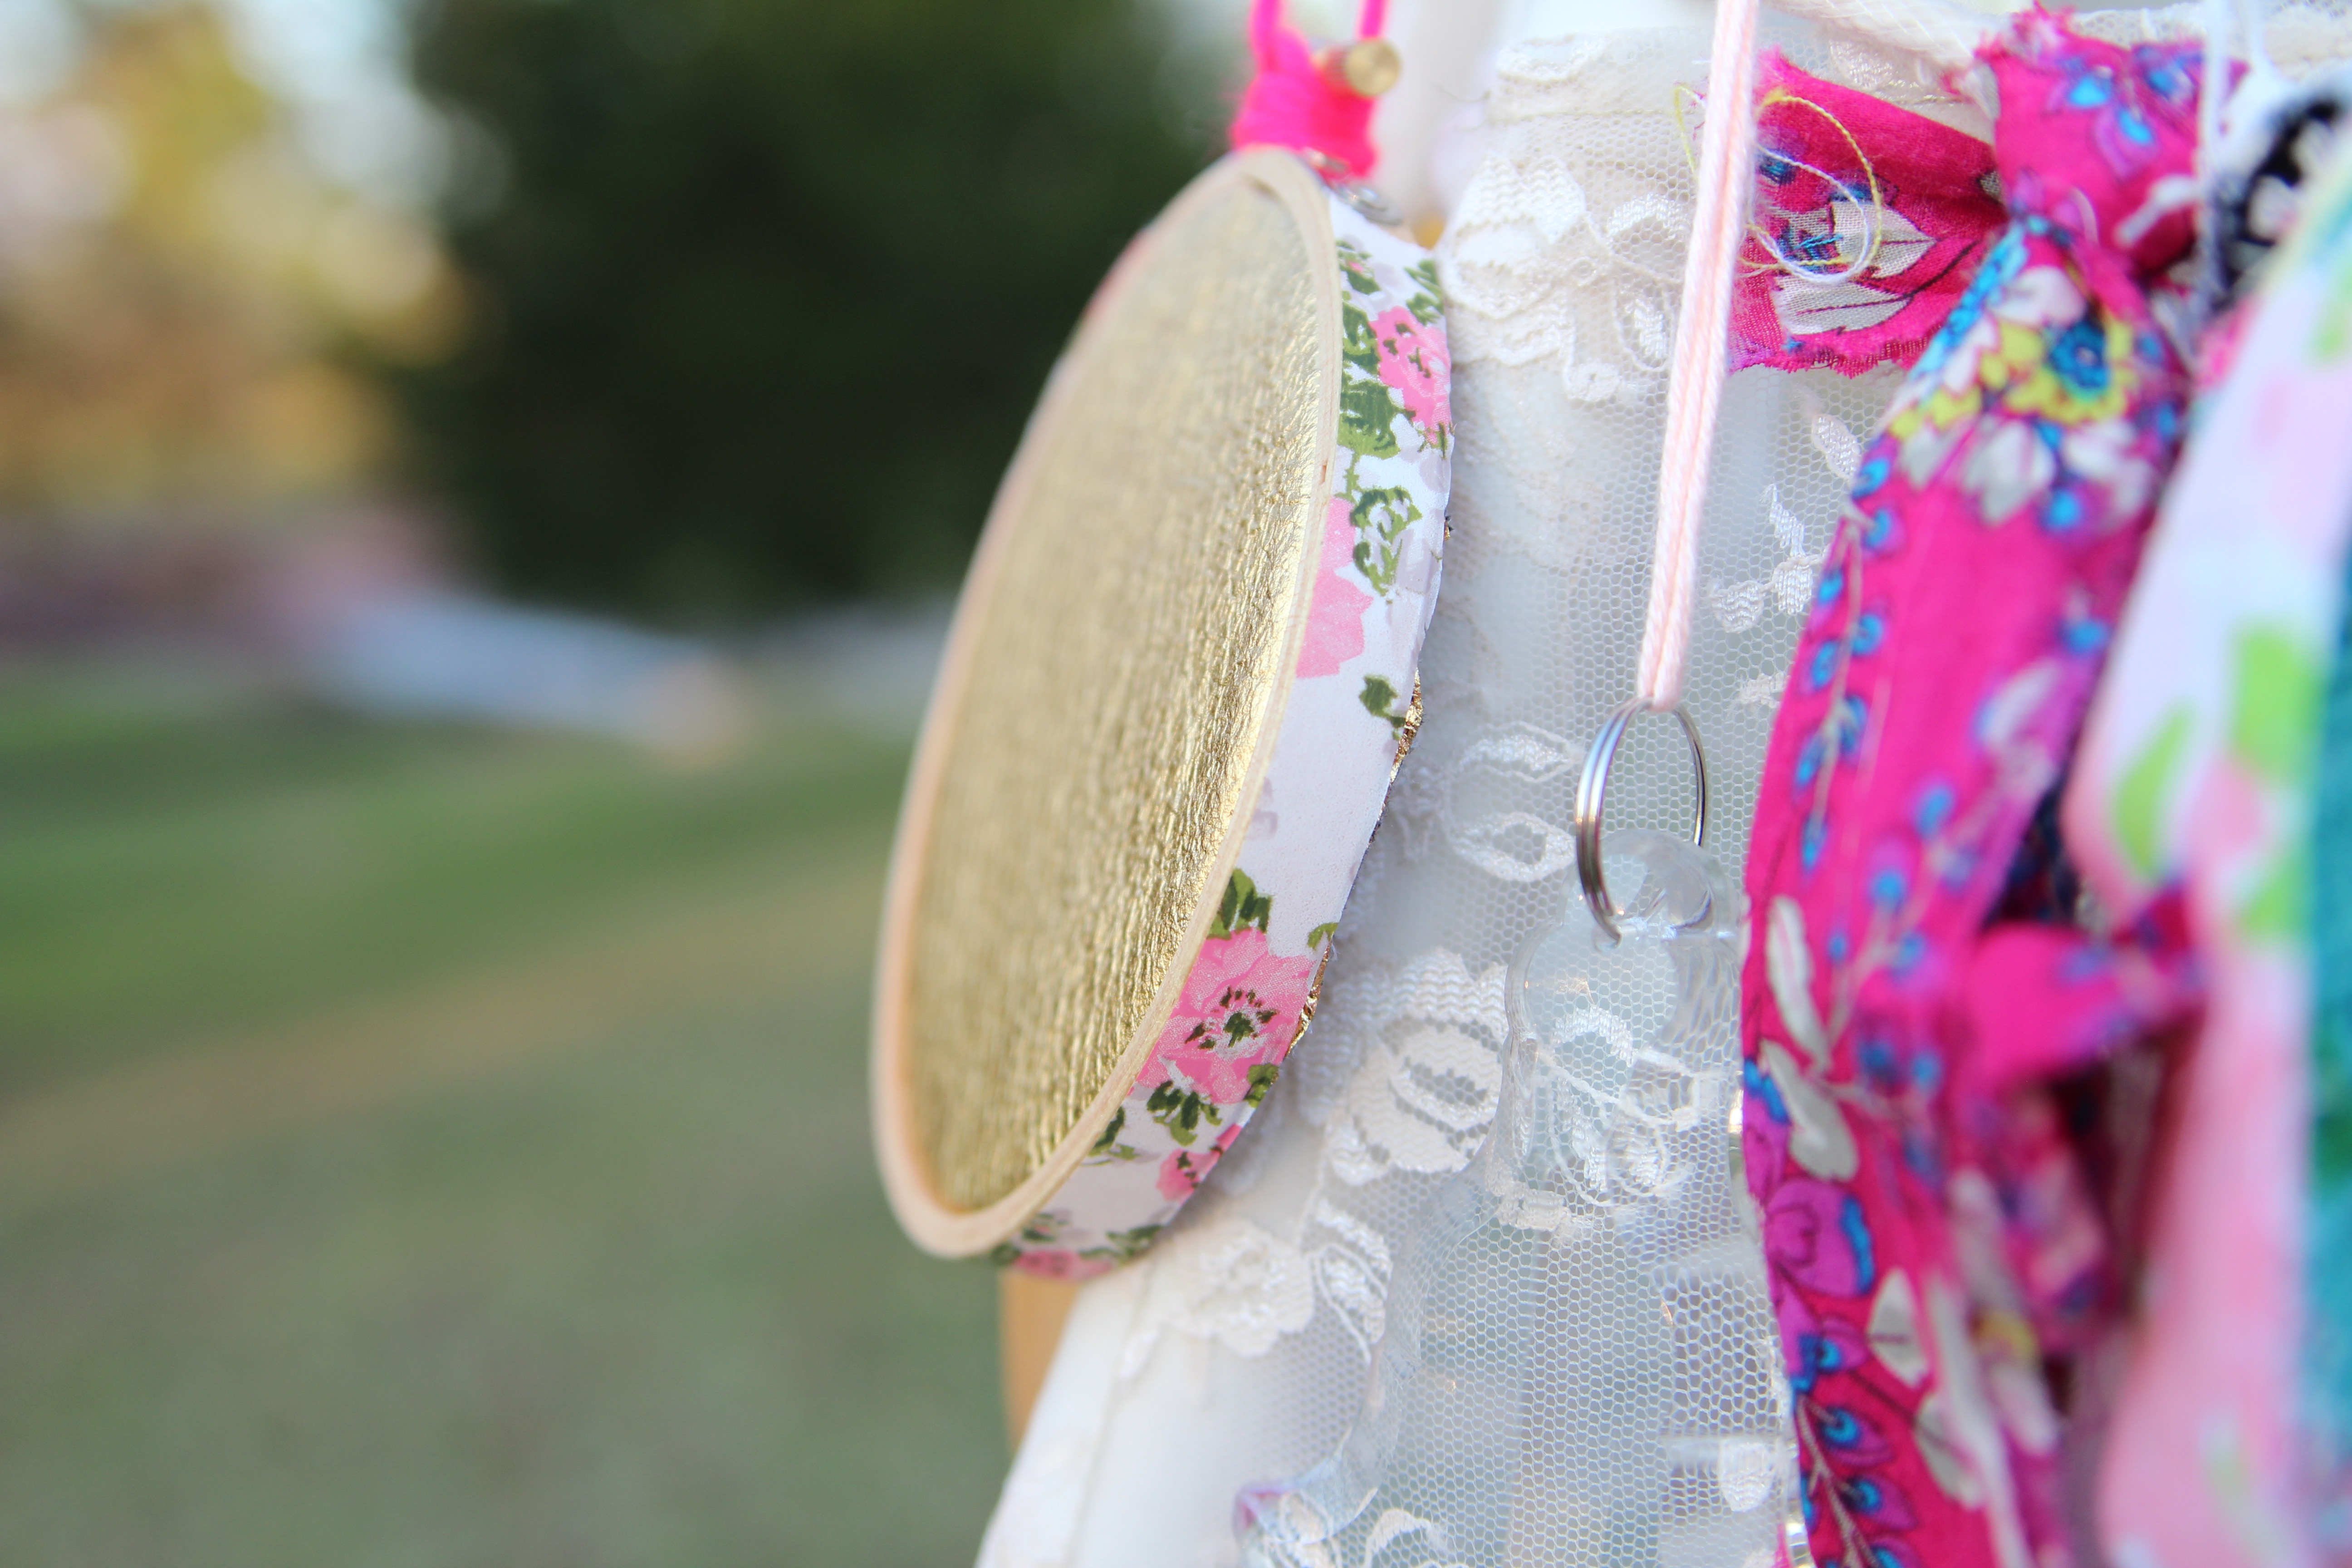
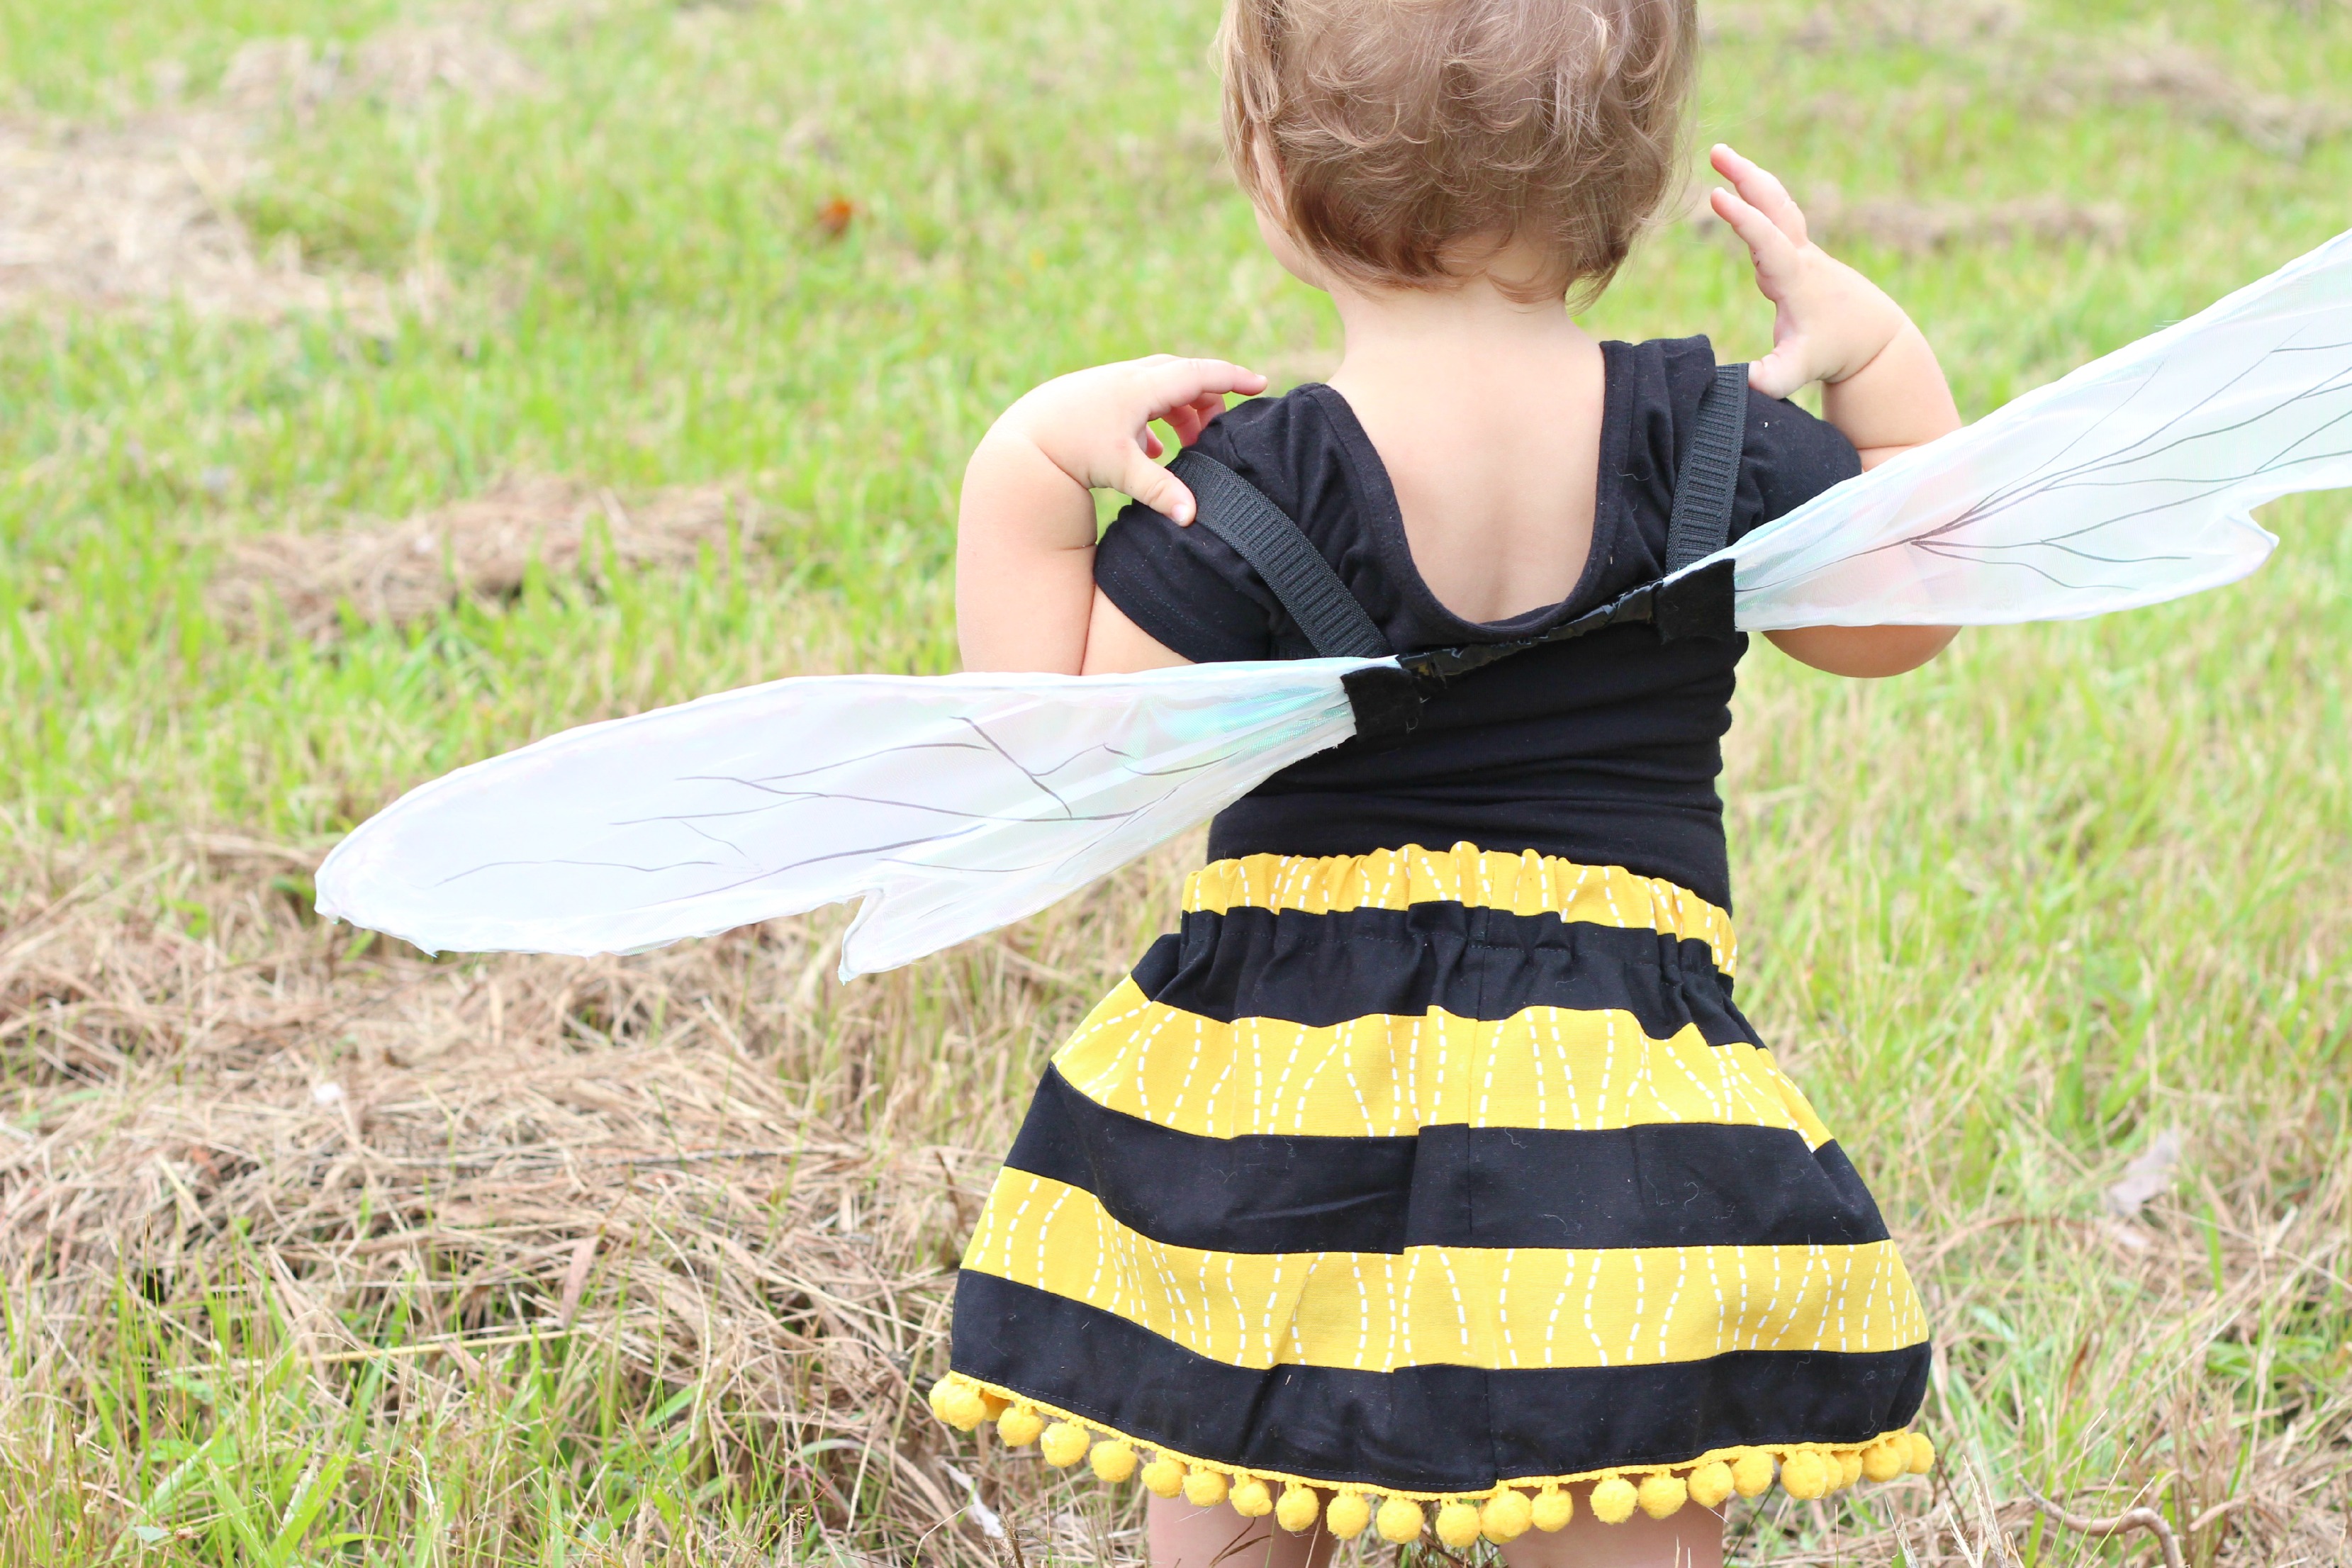
I was drawn to the green floral aka “Rosette Rain” (obvious if you know me) and I knew it would make a perfect Lillian Dress. Both the fabric and pattern have a bit of a 60’s flair to me! I love this pattern by Haley from Welcome to the Mouse House (you can find it HERE) and even though it looks a little advanced it’s a really fun sew! I especially LOVE the way the pintucks look with this fabric!

succulence lillian dress

succulence lillian dress

The Succulence line is now available HERE and at other online retailers… if you have never felt the quality of Art Gallery cotton then you are missing out! PS how adorable is the back?

succulence lillian dress

succulence lillian dress

I had to bribe my model with crackers because 19 month old models can be so particular. She has two older brothers so she loves things like balls and trucks and being outdoors but this girl loves a girly dress!! When I was trying it on her for size she couldn’t stop twirling and was mad when I took it off… I call that at success :)  I love that after years of sewing for her she’s finally starting to love the things I make her!

succulence lillian dress

Unknown2

I can’t wait to get my hands on some more Succulence soon and make a million more baby girl dresses!

succulence lillian dress

succulence lillian dress

succulence lillian dress

Be sure to check out the rest of the talented bloggers on the tour!

dates

Monday February 1st: April and Mickey Zimmer | Sweetwater Cotton Shoppe

Tuesday February 2nd: Taylor Urban | Taylor Made Creates (you’re here!)

Wednesday February 3rd: Bonnie Christine | Going Home to Roost

Thursday February 4th: Daisy Aschehoug | Ants to Sugar

Friday February 5th: Katie Skoog | The Simple Life Company

Monday February 8th: Staci Barrett | A Vintage Fairytale

Tuesday February 9th: Denise Palmer | Denise Anne Studio

Wednesday February 10th: Sahnda Black | Sahnda Marie

Thursday February 11th: Monica De Leon | JourneyDeVida

Friday February 12th: Sarah Bertochi

Monday February 15th: Ali Brorsen | Because of Brenna

Tuesday February 16th: Maxie Ramey | Maxie Makes

Wednesday February 17th: Michelle Cain | From Bolt to Beauty

Thursday February 18th: Katharina Pferdmenges | Der Rabe Im Schlamm

Friday February 19th: Isabel Kelly | Lamb and Wolfie

Friday February 20th: Emi Shimokawa | Just Add Fabric

hashtags

Filed Under: clothes, fabric, girl, kid stuff, pattern, sewing, Uncategorized Tagged With: kids

Master Bedroom Update

January 21, 2016 By Taylor 2 Comments

master bedroom

A few weeks ago I went through my house and took some current pictures of all of our rooms. We have been here for 2.5 years now in this house so things have changed a little in some rooms and a lot in others :) I also wanted some pictures to update the HOME TOUR tab up there for my blog, because I love stalking home tours on other blogs! I really didn’t clean up and I especially didn’t “style” these pictures like I should have but I have decided if I wait for it to be the perfect day then it will never happen, right?

master bedroom

Last time that I posted about my Master Bedroom it was to show off my DIY Headboard… which I still am so in love with! I haven’t changed anything around that much as far as bedding because speaking of love… I also still love my Queen Ann Bedspread, thankfully you can’t go wrong with a classic!

Master Bedroom

We do have engineered hardwood floors in here now because when I was pregnant with Bee I had a “pregnant-woman-freak-out” about having dirty carpet because I’m allergic to cats and the previous owners had cats and it all seemed really logical at the time. So my awesome husband put the floors in a year ago. The floors make the room so much more cozy to me :) I also added some stuff on the wall around the TV so it wouldn’t stand out as much. I want to add a lot more but this is what I had on hand.

master bedroom

master bedroom

master bedroom

They bathroom is still pretty 90’s, complete with shell sinks, but we did remove the wallpaper, paint the walls and add tile flooring (can you believe the bathroom was wall to wall carpet when we moved in.) Also… added some new fantastic wallpaper over the tub that I love! My husband is a saint for letting me having this wallpaper in an area that he has to look at everyday! This is the last room that we haven’t really done much to, maybe this year or next we can tackle it but after a kitchen remodel we are happy to just leave things alone right now :)

master bathroom

master bathroom

That is basically it in a nutshell! Let me know if you have any questions or if I left out any sources :)

Sources:

Wallcolor: Colonnade Gray Sherwin Williams

Bedspread: Amazon

Headboard: DIY 

Rug: Rugs USA

Lamps: JC Penny

Nightstands: World Market

MidCentury Dresser: Overstock

Chair: DIY 

Curtains : IKEA

Bathroom Wallpaper: Fab.com

Filed Under: bedroom, home goods, remodeling, Uncategorized Tagged With: room makeovers

Vintage Sheet Quilt

January 8, 2016 By Taylor 5 Comments

vintage sheet quilt

 The first moment I saw a vintage sheet quilt years ago, I knew I had to make one! The pastel colors mixed with the jewel tones… I can’t even handle it. So a few years ago, I started collecting vintage sheets from sales that I saw on Instagram, Etsy and eBay. I bought some full sheets for the back and binding by mostly just fat quarter cuts of sheets that people had split up.

Once I felt like I had enough, I decided on just doing 4″ squares so I could still see as much of the design as possible. I cut the squares and finished the top back in 2014… here we are in 2016, slowest quilt ever haha.

vintage sheet quilt

Even if it took two years, I’m done and I love it! It’s larger than a twin but smaller than a full. The perfect size in my opinion. I didn’t have any rhyme or reason to where I placed the squares. Then I learned that random is sometimes harder because I didn’t want any two of the same pattern touching… so that took some maneuvering.

vintage sheet quilt

 I used very thin cotton batting because, it’s Texas y’all… it doesn’t get that cold here. Speaking of Texas, I love the way the quilt looks in this field behind our house… there is literally a woman walking a cow in the background if you look really closely haha!

vintage sheet quilt

vintage sheet quilt

I’m a terrible machine quilter because I’m not a big perfectionist and when I start running out of steam or get bored I just hurry through… so don’t look too closely at the top quilting on this. I did every other row right down the center, and I love the way that turned out too. A little different than my stitch in the ditch method. I used a full sheet for the back so I didn’t have to worry about the seams. And speaking of not being a perfectionist, I machine quilted my binding on too. This was actually the only “non-sheet” fabric on the quilt. I found it at Walmart of all places but it has a funky 70’s vibe and dark colors so I thought it would outline it perfectly.

vintage sheet quilt

vintage sheet quilt

vintage sheet quilt

Overall, this quilt was super simple to make and I should have finished it years ago (literally). I barely had the last stitch in it and the boys were dragging it to the couch :) We all fight over THIS ONE so now we have two to argue over haha. Also… big shout out to my husband who stood in a field holding up a pastel quilt while cars drove by during 5:00 traffic, he’s a keeper.

vintage sheet quilt

vintage sheet quilt

vintage sheet quilt

vintage sheet quilt

Filed Under: fabric, quilt, sewing, Uncategorized Tagged With: quilts

Dining Room Update

December 29, 2015 By Taylor Leave a Comment

dining room

When we remdeled our kitchen we did a little rearranging so I thought I would share some house updates, specifically a Dining Room Update. We replaced all of our laminate and carpet flooring with this amazing tile that looks like wood and we love it! My favorite thing about it is the clean-ability. Here is a before picture from when we first moved in. Carpet under a table with toddlers is just never really a good idea haha.

IMG_6370-1024x682

dining room

We moved our other dining room table into the breakfast room so we replaced it with this nice big 10 person table! I love having a huge table so we can host even more people :) I kept our plate wall and green buffet table. You can also read about our curtains HERE. I usually go for loud patterns on rugs but I needed something light to break up all the darkness of the floor and table. dining room IMG_2723 IMG_2716 dining room

Sources:

Table: World Market

Chairs: World Market

Rug: Rugs USA

Curtains: DIY

Buffet: DIY

Filed Under: home goods Tagged With: room makeovers

DIY TeePee with Forest Fables Fabric

December 9, 2015 By Taylor 33 Comments

Bohemian TeePee with Forest Fables Fabric Bohemian TeePee with Forest Fables Fabric

I have had a DIY TeePee on my to-make list for years now! When Meaghan and Lindsay of Hawthorne Threads asked me to participate in a Blog Hop for their new in-house fabric line Forest Fables, of course I said yes. We bounced around a few ideas and then I remembered my TeePee idea and everyone was excited!

Bohemian TeePee with Forest Fables Fabric

DIY TeePee with Forest Fables Fabric

I have followed Hawthorne Threads for years so I knew they sold designer fabric but I really had no idea that they had so many of their own fabric lines that they printed themselves! The best part is they print the fabric to order so they never run out :) When I received the fabric it felt different than usual quilting cotton, they sent a note about washing and about using a finer needle since their thread count is so high. I always prewash when making clothing but this TeePee won’t ever be washed so I worked with it how it was, which was awesome since the fabric is somewhat stiff after printing.

Bohemian TeePee with Forest Fables Fabric

Their newest line, Forest Fables was inspired by the classic tales of “Three Billy Goats Gruff” and “Chicken Little”, as well as handcrafted embroidery and paper cutting. As soon as I read that I was all in haha! I love the blush and mustard colors in the Harvest Palette. I obviously had to go with the Folk Tails for the main body and I accented with Floral Stitch for the door.

DIY TeePee with Forest Fables Fabric

I did a little bit of “DIY TeePee Research” and it seemed like all the ones that I found online that I like originated from this one HERE. The tutorial is great and worked perfectly for me! I love when I don’t have to reinvent the wheel :) I was inspired by a few solid lace TeePees I have seen in blogland so I wanted to incorporate some lace in mine too. I traced out a pattern piece for the panels that I found in the tutorial but I just hacked it on the top part. I cut fabric panels of the bottom pattern piece and lace panels for the top (don’t forget seam allowances on both pieces). Then I sewed them together, ironed the lace toward the fabric side and top stitched. From there I could just follow the original tutorial just the same.

DIY TeePee with Forest Fables Fabric

DIY TeePee with Forest Fables Fabric

DIY TeePee with Forest Fables Fabric

DIY TeePee with Forest Fables Fabric

I was originally going to make my own bias tape but I had been hoarding that gold tape for almost a year and this project seemed perfect!

DIY TeePee with Forest Fables Fabric

DIY TeePee with Forest Fables Fabric

DIY TeePee with Forest Fables Fabric

Lastly, I added some “Bohemian Flair” to the top. I wrapped yarn around the top and attached it with hot glue.

DIY TeePee with Forest Fables Fabric

DIY TeePee with Forest Fables Fabric

I used some more fabric from the line and a scrap of gold that I had to make some hanging embroidery hoops. I also did a little fabric bunting out of long scraps that I had.

DIY TeePee with Forest Fables Fabric

DIY TeePee with Forest Fables Fabric

DIY TeePee with Forest Fables Fabric

We basically all (the kids and I) love it! And the fabric couldn’t be more perfect! Let me know if you have any other questions about the TeePee! But now for the best part…
DIY TeePee with Forest Fables Fabric

DIY TeePee with Forest Fables Fabric

DIY TeePee with Forest Fables Fabric

 A GIVEAWAY!… One lucky reader is going to win a Forest Fables Fat Quarter Bundle in the Harvest color way!

a Rafflecopter giveaway

Bundle Image copy

blog hop logo

Be sure to check out all of the other fabulous blogger on the blog hop!

Monday, December 7th – Brooklyn Pattern Co.
Tuesday, December 8th – Clover and Violet
Wednesday, December 9th – Taylor Made
Thursday, December 10th – Film in the Fridge
Friday, December 11th – Hawthorne Threads

Filed Under: fabric, kid stuff, sewing, tutorial, Uncategorized Tagged With: furniture

Kid Photo Tips… for the Amatuer

December 8, 2015 By Taylor Leave a Comment

Kid Photo Tips

You know how it goes… you have a baby then all of a sudden you have to have a nice big DSLR camera but you have no idea how to use it. It actually happened to me a few years before having kids so I had a tiny bit of practice :) I am by no means anywhere close to a photographer, I just have a few lenses that are “ok” and I practice a lot. I did take one class in person which I highly recommend if you have access to that but the internet is the next best thing. If you are anything like me you think your own kids are the cutest thing on the planet so you have to get everything documented and you have to do it now. Here are a few tips that I’ve learned for the Amateur mom (or dad) so you can be a total Paparazzi and follow your kids everywhere with your big ole camera.

Kid Photo Tips

kids photo tips

1. Lighting – my absolute favorite time of day is the “golden hour” as the fancy photographers call it :) It is the hour after sunrise and the hour before sunset when the sun looks magical… or golden. Trust me, during this time everything looks pretty. My kids are not morning people so waking up at when the sun rises is usually not an option but I do try to take pics in the afternoon if I can. I like to use this website HERE to find out when that time is going to be for my area… it knows when the sun will set and tells you when to go take your photos, couldn’t be easier!

golden hour

You also want to look for areas that have a lot of light around them but aren’t in the direct light. See this clearing, it’s perfect because it’s very warm and sunny but the shadows won’t be harsh on anyones face. Ideally you want to be close to that light line without being in it.

how to take kid photosPicMonkey Collage

2. Location and Background – If you start to look around your area there are plenty of places to take photos that you didn’t notice before! This road is only about 1/2 mile from my house and has a huge open field with tall trees behind it. You want a background that is somewhat neutral or uniform… I usually go for trees or greenery, I live in Houston so our scenery isn’t too exciting ha! As we were driving I saw this open field and right behind it was the prettiest red barn, which was so perfect for Bee and her adorable dress.

Kid Photo TipsKid Photo Tipskids photo tips

3. Cute clothes and accessories!- This dress from Little Skye Kids Boutique from the Paper Wings Clothing line is so perfect for an easy Holiday Photo shoot and how cute would it be on a holiday card?! It’s super soft and flowy… Bee loves anything she can twirl in! Little Skye is a one-of-a-kind children’s boutique that embraces the beauty, joy, innocence, and artful wonder of childhood. Classic but whimsical… It’s the perfect holiday dress for all little girls and all their holiday functions :)  Bee is wearing the Winter Wonderland Bustle Dress in a 2T because with a timeless piece like this I wanted her to be able to wear it for a few years. She is kind of short so it looks long on her but I love the maxi look she is giving it. That’s the great thing about girls dresses, they can keep growing and eventually it’s a tunic haha!

kids photo tipskids photo tipskids photo tips

Lastly, don’t forget to take pictures of all the little details like the ruffles or the shoes! Also, at this age I like to give them something to hold to keep their little hands occupied. And most importantly… let them have fun and run wild! It’s the only way to get the real faces you want!

kids photo tipskids photo tipsIMG_3050 Holiday dresses for girls kids photo tipskids photo tips

And I have an awesome deal for anyone little girls who need some fun and unique Boutique clothing!:  All Paper Wings for Little Skye and Blu Pony Vintage for Little Skye purchases through 12/15/2015 receive a Free Shipping & a $25 gift card valid on future purchases for every $100 spent when you use code BLGLS2015.

This post is part of a social shopper marketing insight campaign with Pollinate Media Group® and Little Skye Boutique, but all my opinions are my own. #pmedia #embracechildhood http://my-disclosur.es/OBsstV

Filed Under: Christmas, clothes, gift, Uncategorized Tagged With: holidays

Floral Avery Dress and a Giveaway!

December 3, 2015 By Taylor 3 Comments

floral avery dress

Who can resist a cute toddler in a floral dress? I can’t thats for sure :) I jump at the chance to “girl” up my girl whenever I can so when ModKid Boutique asked me to participate in the Merry Modkid Blog Hop of course I said yes!

Floral Avery Dress

Floral Avery Dress

Bee was in need of some more long sleeved dresses since were (finally) going into winter over here so I thought the Avery Dress would be perfect! I also love patterns that are girly but still a little bohemian. And don’t get me started on these fringe boots.

floral avery dress

Floral Avery Dress

Floral Avery Dress

The Avery is a drop waist dress and there are actually 3 sleeve lengths and a few extras like a pocket and belt loops. I went with one floral fabric all over (it’s a Voile that I found at Joanns) but the pictures of the contrasting peter pan collar were adorable too! I also am a sucker for anything with a lot of buttons… 7 to be exact.

Floral Avery Dress

Floral Avery Dress

Floral Avery Dress

I wish I would have sized up because I think she will only be able to fit into the dress this season; which only means one thing… she will be wearing it a lot :) But that’s OK because its perfect for playing with dolls, or taking your bow off to play swords with your brothers!

Floral Avery Dress

Floral Avery Dress

Floral Avery Dress

Overall we both love the dress! She might not keep a bow in her hair but sister loves a good twirly dress!

Floral Avery Dress

Floral Avery Dress

Now for a giveaway! Merry Modkid is giving away 2 PDF patterns of the winner’s choice! For any of you who have to get your patterns now, I also have a discount code for you! Also…. Don’t forget to go check out all of the other amazing creations fromthese talented ladies!… Good luck and happy making!

a Rafflecopter giveaway

Discount Code: The coupon code MERRYMODKID25 gets 25% off an entire order on the Modkid Etsy store, valid Monday 11/30 through Friday 12/04 at midnight EST.

Merry-MODKID-logo

Monday, November 30th

Rebel and Malice
Handmade Martini
Falafel and the Bee

Tuesday, December 1st

Handmade Frenzy
Kimmie Sew Crazy
Because of Brenna

Wednesday, December 2nd

Mama Says Sew
Made by Sara
Mabey She Made It

Thursday, December 3rd

Handcrafted by Red
Pear Berry Lane
Taylor Made Creates

Friday, December 4th

Sew Happily Ever After
Sprouting JubeJube
Sweeter Than Cupcakes

Filed Under: clothes, fabric, girl, pattern, sewing, Uncategorized Tagged With: kids

Tips for Catching up on Project Life

December 1, 2015 By Taylor 9 Comments

catching up with project life

If you are anything like me you have thousands and thousands of photos just sitting on your phone/camera/memory stick. What are you doing with them? Guys… print them and get those precious photos into a book!! You can do it! I was super behind when I started so today I have a few tips to share along with a GIVEAWAY so a lucky reader can make it happen too!!

 It’s no secret that I am a huge Project Lifer because it’s the quickest and easiest way for me to save all of our memories but still get to “scrapbook”. I got to try out some Project Life for Stamping’ Up (which was so exciting because you can’t just buy these kits anywhere!). Just like all of the other PL products I have tried the quality and designs of these cards were no exception! I was also super geeked out that I got to try their exclusive plastic page protectors!

catching up with project life

TIP: ORGANIZE! I print my pictures out online a few times a year (I usually wait for a snapfish or shutterfly sale) and then when they come in I organize them by month. I use plastic page protectors and a post it note. We have a drawer where “memorabilia” lives like receipts, to-go menus, programs and artwork. I organize all of that into the same page protector and put those into a box. And honestly that is the hardest and most time consuming part, which after a few months takes me under an hour.

project lifeCatching up on Project Life with Stampin Up!

Catching up on Project Life with Stampin Up!TIP: KEEP THE JOURNALING SIMPLE! I’ve noticed when I look at my books (or when I show them off :) no one really reads the long journaling. To save time, I only jot a few words about each picture if any at all. I’m such a sucker for a weekly card! These are my favorites because I can just slip in seven pics, one for each day of the week and then add a card like this with a few descriptions and there you have a page! I also love number stickers for this reason. These are from the “This Is The Life Project Life Card Collection”.

catching up with project lifeCatching up on Project Life with Stampin Up!

Catching up on Project Life with Stampin Up!

Catching up on Project Life with Stampin Up!

Catching up on Project Life with Stampin Up!

TIP: EASY EMBELLISHMENTS! Spend a few dollars on some good quality stickers, veneer embellishments, stamps and washi tape. These are my go-to for extra “wow” factor. It really takes no time at all to add stuff like this but it makes your album look unique. I love these skinny washi tapes from Stampinn’ Up! I also highly recommend month/days of the week stamps. Trust me, it makes Project Life even easier. Speaking of embellishments I usually go for fun colors that are generic except for one thing… I have so many photos from the Holidays each year I usually get a few packs of Holiday extras! I am LOVING this years “Hello December 2015” from Stampin’ Up.

Catching up on Project Life with Stampin Up!Catching up on Project Life with Stampin Up!Catching up on Project Life with Stampin Up!Catching up on Project Life with Stampin Up!Catching up on Project Life with Stampin Up!Catching up on Project Life with Stampin Up!Catching up on Project Life with Stampin Up!

Catching up on Project Life with Stampin Up! IMG_2438

TIP: DO WHAT YOU CAN WHEN YOU CAN! I leave my stuff out for a few weeks at a time, which is hard for people like me who can’t stand clutter haha! But think of it as a pretty mess. If you leave this stuff out, you can walk by, add a few embellishments, write a sentence for two and before you know it you have finished a few pages.

Catching up on Project Life with Stampin Up!

Catching up on Project Life with Stampin Up!

Catching up on Project Life with Stampin Up!

 TIP: KEEP IT SIMPLE, VERY SIMPLE. While I do love stickers and stamps etc. sometimes, I just slap my photos in and let them speak for themselves. It helps break up the album (and it helps you catch up faster).

Catching up on Project Life with Stampin Up!Catching up on Project Life with Stampin Up!

 If you work on your album when you can and keep it simple, before you know it you have a beautiful family yearbook! I’m working on my 5th one and Im still hooked!

Catching up on Project Life with Stampin Up!

Catching up on Project Life with Stampin Up!

Catching up on Project Life with Stampin Up!Stamping’ Up carries a ton of exclusive Project Life products as well as a ton of other stuff for scrapbooking and paper crafting! Their new catalog comes out on January 5th so be sure to check that out! Now for the best part!! One lucky reader is going to win the “This is the Life” bundle, which includes: the card collection, accessory pack and stamp set. More than enough to get you started on your scrapbook “journey”!! Good Luck guys :)

a Rafflecopter giveaway

Filed Under: project life, Uncategorized Tagged With: crafting

DIY Bee Costume

November 15, 2015 By Taylor 3 Comments

bee costume

For our last trick, we have the Bee costume! We call our daughter Bee so when the boys came up with a “bug theme” it was kind of a given that she would be a Bee!

 bee costume

This costume was also super easy and semi-homemade! I found the cutest little ballet leotard in the dance section at Walmart, which she will be wearing often because I can’t handle how cute it is!! I found the antenna (which she hated and wouldn’t keep on haha) at Joanns, it was so cute but sister would just not keep them on at all! The skirt and the wings were mama made :) bee costume

For the wings, I used a metal hanger, cut it in half and shaped both sides, Then I covered each side in some fabric that I think is iridescent organza? Then I used electrical tape to connect them and sewed elastic straps on the back for her to wear them. I added the veins with a sharpie.

bee costume

For the skirt, I tried to find yellow and black striped fabric, I’m sure I could have found it online if I wouldn’t have procrastinated :) But I did wait till the last minute so I had to make my own. I cut 2.5″ strips of fabric and sewed them all together to make the fabric for the skirt, I made the skirt fullness 2 and a half times the waist so it would be flouncy! I added yellow pompoms and called it a day!

bee costume

bee costume

She loved the shirt and the bodysuit and the wings grew on her, I just couldn’t get her on board with the antenna! She did like to eat it however.

bee costume

bee costume

bee costume

Here are a few pics of the whole “bug” game.

bee costume

IMG_2322

They had so much fun and it was so a mom dream to see all of my little critters trick or treating together!

For more DIY Costume ideas check our our:  LIZARD, ROACH, UNICORN, SKUNK, FOX, POSEIDON, OCTOPUS, BATMAN and ROBIN

Filed Under: costume, gift, halloween Tagged With: costumes, holidays

Easy DIY Lizard Costume

November 7, 2015 By Taylor 3 Comments

lizard costume

OK, so keeping with our “bug” Halloween theme (you can read about the creepy, crawly Roach Costume HERE) I present the Lizard. And yes, I know a lizard isn’t actually a bug. But like I said in my last post, when your four year old finally decides on something and is super excited about it… don’t burst his bubble haha.

lizard costume

lizard costume

This costume is so easy that I can hardy call it a costume! I love sewing and making elaborate clothing but on Halloween I usually go the “semi-handmade” route. It’s only one night right? My kids do love playing dress up so they get plenty of love but usually not outside of the house after Halloween so I try to use what I have.

diy lizard costume

lizard costume

 I have used (and LOVE) the Bimaa Pattern several times. So I knew it would make a perfect Lizard Hoodie! Here is my secret Bimaa hack: Once you have the pattern, you can line the shirt pattern piece up with an existing or store bought shirt and cut the neck hole to match the pattern. I always buy two matching shirts from the boys section and with the extra shirt I make the hood part using the pattern, then sew them together just like in the instructions… this just saves you from having the sew a whole shirt! So in the lizards case, I bought two green boys tees. I used an olive green knit for the interior of the hoodie, the lizard belly and the eyelids. Then I used black and white felt for the eyes and nose holes and sewed them right on the hoodie exterior before adding the lining. I added a tail to the back of the lizard (using the scraps from the second boys t-shirt).

lizard costume

Then he just wore some green shorts he already had, ideally I wanted to make green leggings but again… I ran out of time haha. Story of my life!

lizard costume

lizard costume

He was super happy with it so thats all that matters :) Here is his best “lizard face”. Stay tuned for the Bee later this week!

lizard costume

lizard costume

Related Posts Plugin for WordPress, Blogger...

Filed Under: costume, fabric, halloween, Uncategorized Tagged With: costumes, holidays

  • « Previous Page
  • 1
  • …
  • 4
  • 5
  • 6
  • 7
  • 8
  • …
  • 27
  • Next Page »

Welcome to Taylor Made

http://www.taylormadecreatesblog.com/about-me Hi Yall! I'm Taylor... an artsy mom of three from Houston, TX. I love sewing, collecting floral fabric, eating Mexican Food, photography, brights colors, rearranging, and rolling clay. Taylor Made Creates is all about creating a fun, colorful home, sewing cute things and eating good food. Check out my SHOP HERE HERE! Thanks for stopping by!

Search

Pin with me!

Like Me :)

Facebook Pagelike Widget

More Recent Posts

  • Kid's Animal Room
  • Kids Camping Shirts
  • Mermaid Birthday Party
  • Conversation Heart Cold Packs
  • Holiday Apple Tea Punch
  • Purple Princess Costume
  • Letterboard Costume
  • La Croix Costume

FAVORITES

  • Casserole Carrier
  • Triangle Baby Quilt
  • Happy Rocks
  • Cider Beetles: A Teacher Gift
  • Stethoscope Covers
  • Briar Rose Strip Quilt
  • Handmade Mother’s Day: Recipe Oven Mitt
  • Brobee Shirt
  • Fiesta Birthday Party!

Copyright © 2026 · Web Hosting By RFE Hosting