TaylorMade

DIY, Home Decor & Sewing

  • Home
  • SHOP
  • DIY & Sewing
    • For the Home
    • Sewing
    • Costumes and Holidays
    • Cricut Projects
    • Crafting
  • Parties
  • Recipes
  • Home Tour
  • Favorites
  • About

It’s Rodeo Y’all – Texas Onesie

March 14, 2011 By Taylor 11 Comments

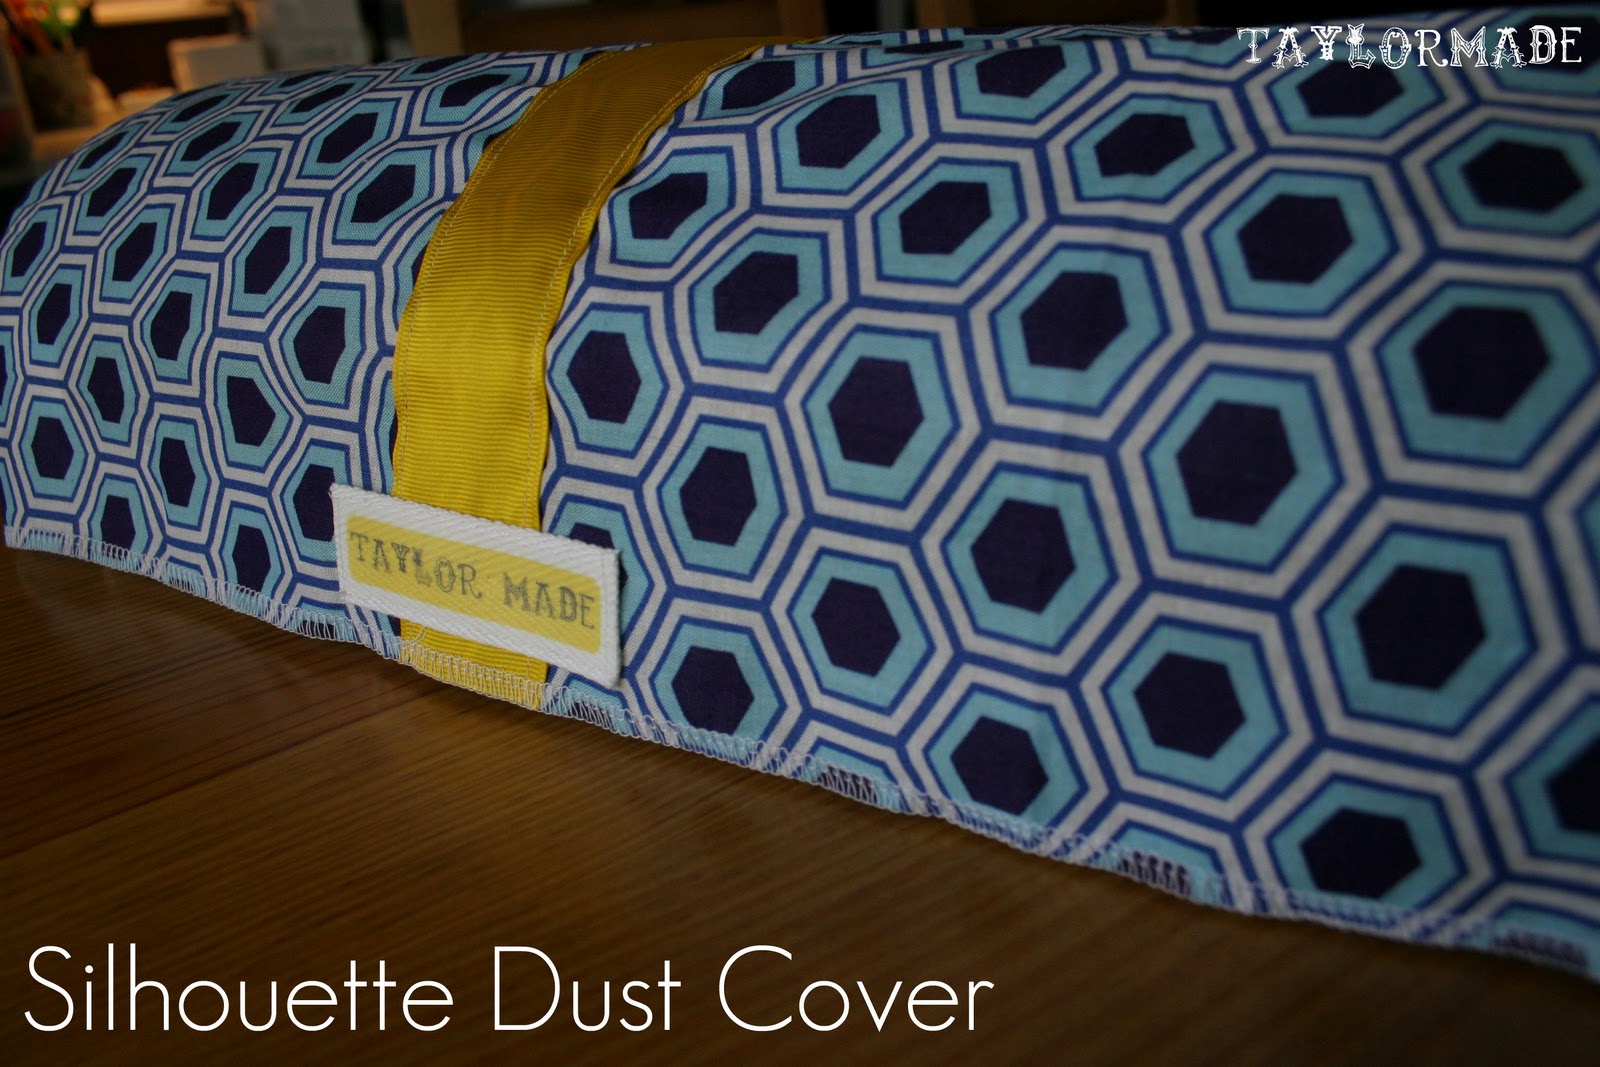
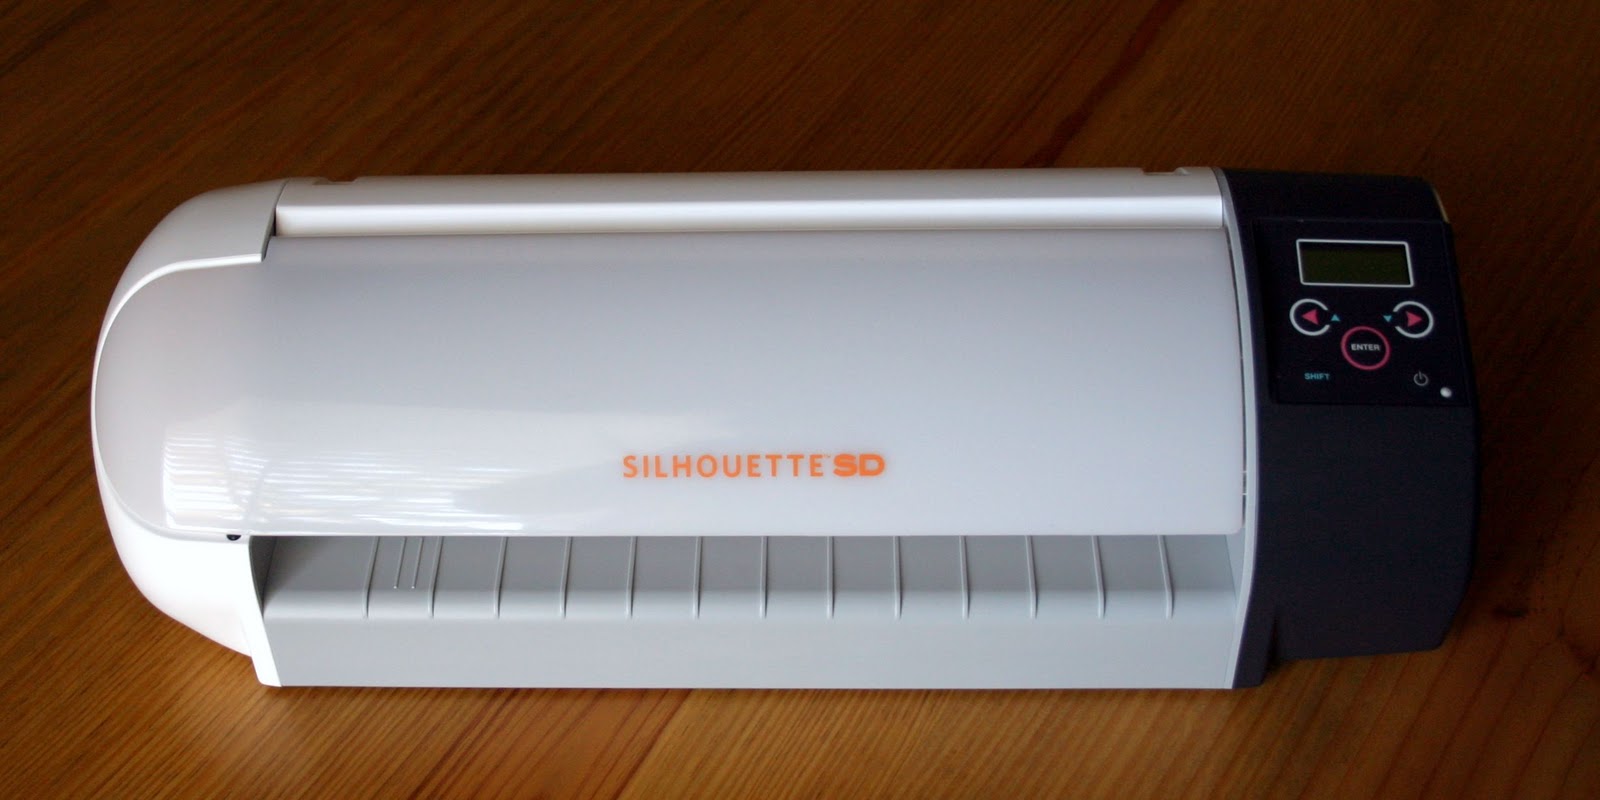
It’s spring break here in Houston and you know what that means…. Rodeo Time! Although Clyde has no idea what that means, I think it means I should break out the ole’ Silhouette for her first project! So I did!

I have seen shirts like this before with the capital as a heart in the state but Houston isn’t the capital of Texas so that wasn’t going to work. I also found a picture of Texas in the Silhouette Online Store, but again it had a star over Austin, not what I was looking for. So I had to get clever…
I googled “Texas Outline” under images and when I found one that look clear, I saved it to my computer. Then in the Silhouette Studio, I opened up the Texas picture. I played around and I found this awesome feature; The Tracing Tool. It allows you to trace around a picture that you already have on your computer. So I added the little heart and selected “Trace around Outer Edge”.
Here is what my picture looked like:
Next, I cut a piece of Freezer Paper and loaded it onto my carrier page.

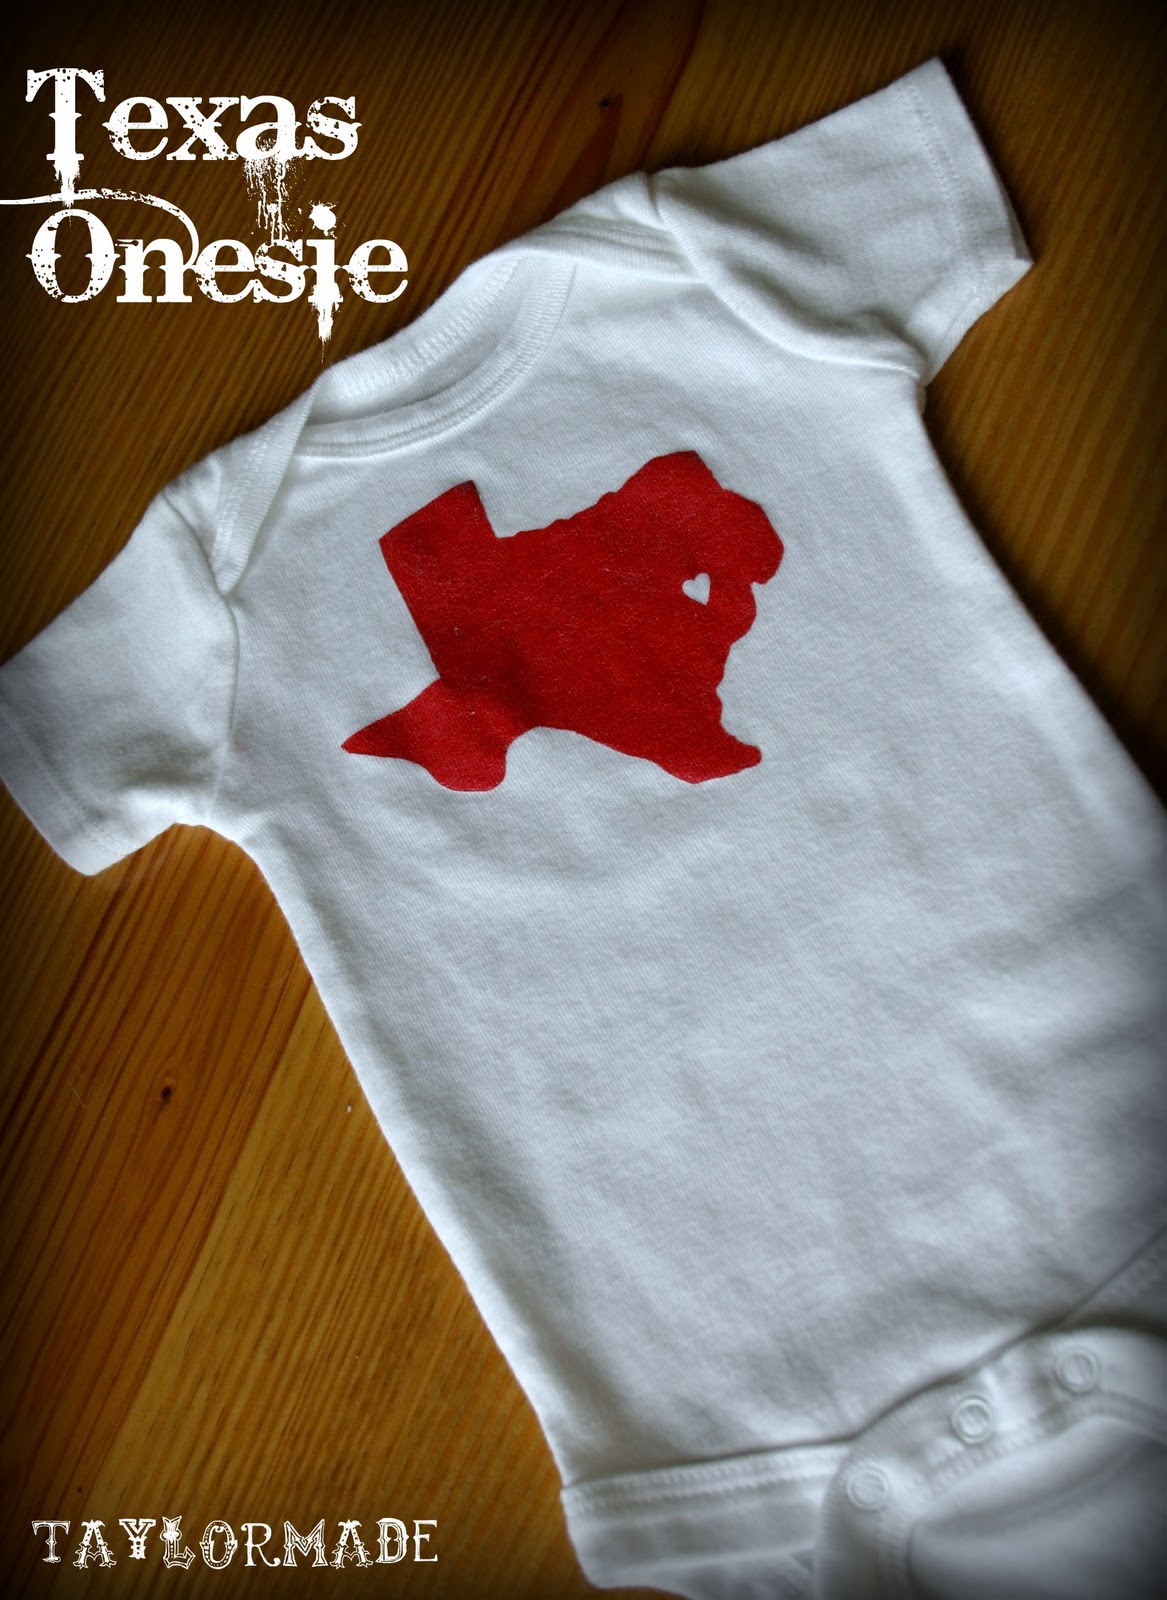
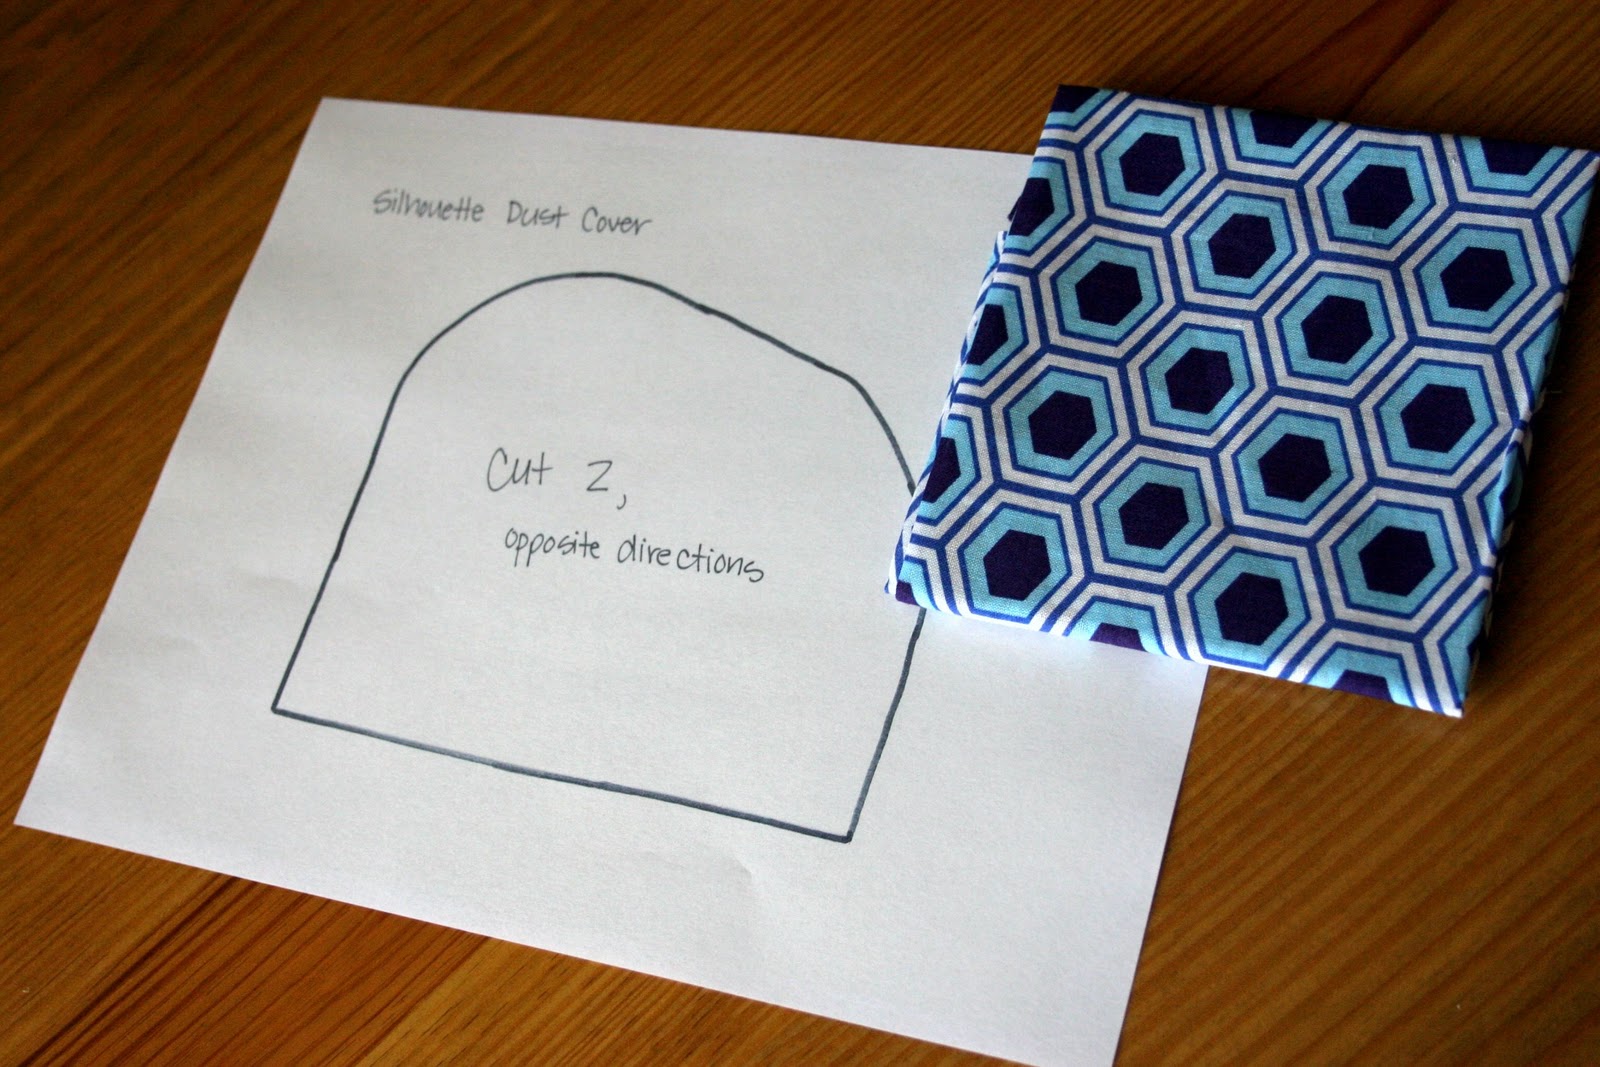
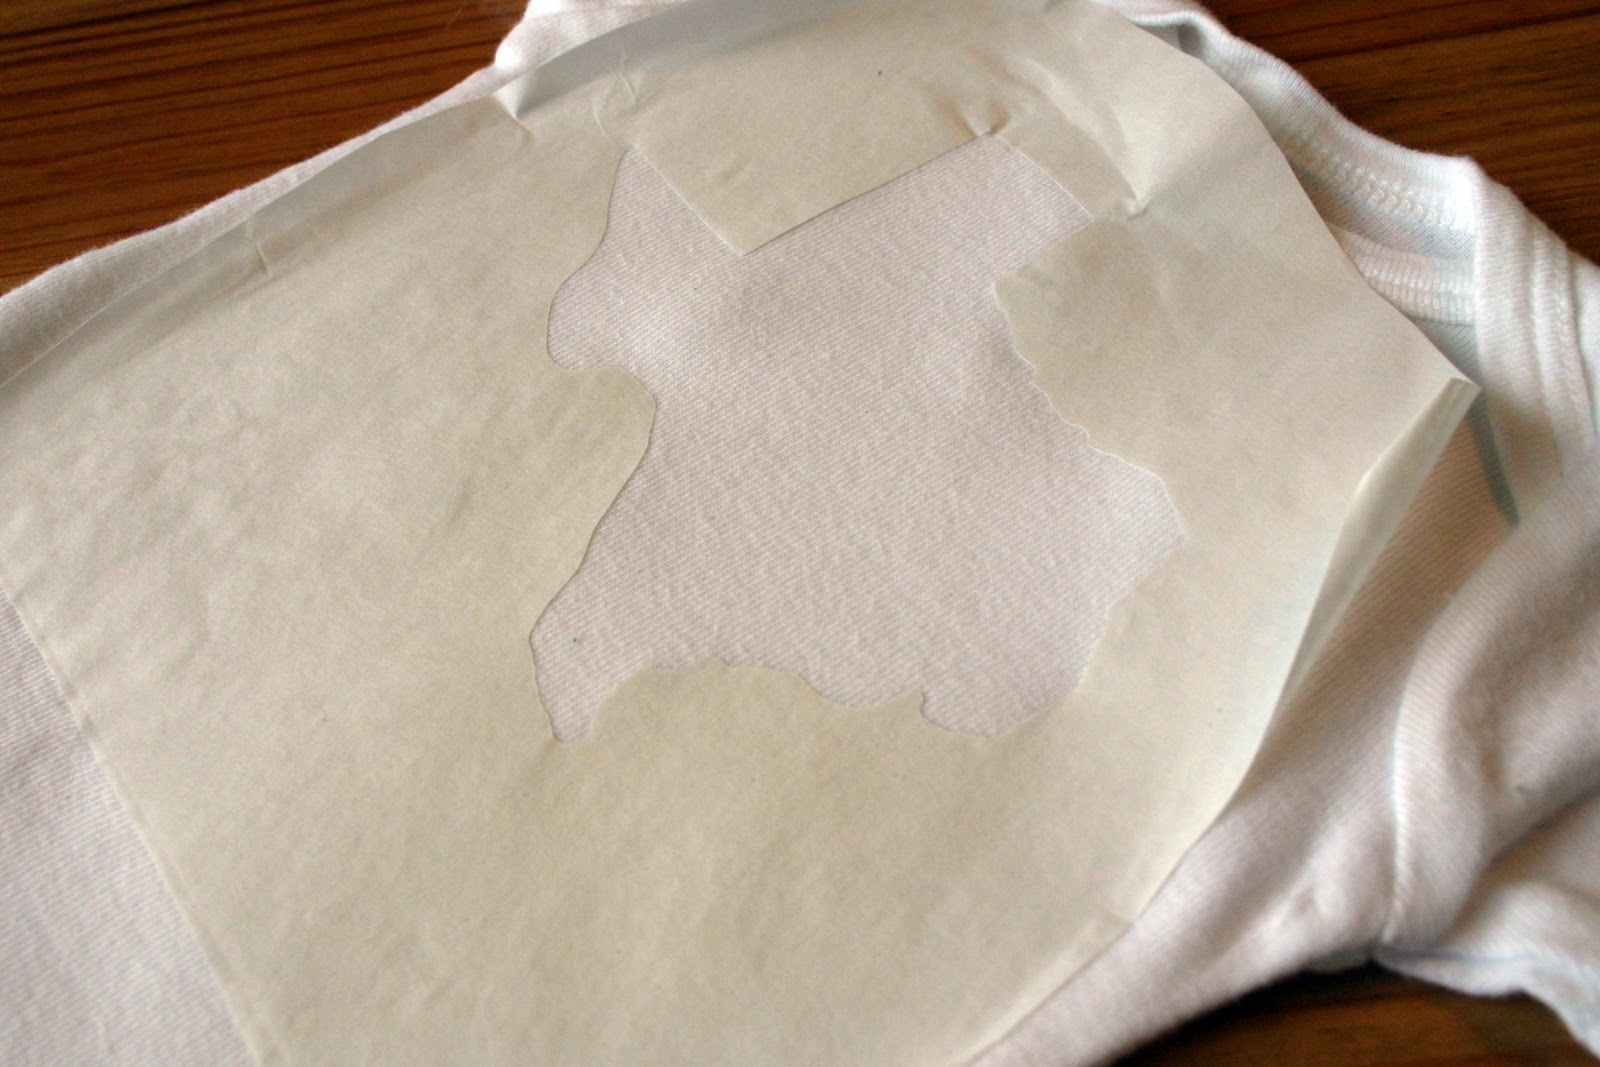
Then I hit cut! It was so exciting… Now if you don’t have a Silhouette, you can just cut this shape out with scissors or an Exacto knife. Next, you need to iron down the shape’s outline to the onesie. Don’t hold the iron down too long, I have made that mistake and the freezer paper gets rumply. Make sure to iron around all of the detailed edges to form a nice seal. Don’t forget to iron down you little heart on the inside of your state.

Now its time for the fabric paint. I meant to buy “matte” red paint but as you can see I must have grabbed the “metallic” so it had kind of a shimmery look to it. Clyde it too little to be mad at me for that :)

(oops)
I did two coats and waited about 20 mins between. Don’t forget to put some newspaper or a paper bag inside the onesie so it wont bleed.

The next step is my favorite part, for some reason there is something SOOO satisfying about pulling the freezer paper off to me! Of course wait until it is completely dry.

Lastly, you have to heat set the fabric paint. There might be some instructions on your fabric paint about how to do this. I looked online and found some. You have to use something between the paint and the iron like a hand towel or something. I ironed mine for about a minute total moving the iron around the whole time. Some people said to do it for 4-5 minutes but that seemed really long to me.

I love my Silhouette! Now on another note, don’t try to stage a photo shoot with a hungry baby…. (I promise he likes his Texas Onesie, the boy just loves to eat!)

Filed Under: baby stuff, clothes, paint, Silhouette, tutorial Tagged With: crafting

Silhouette Dust Cover

March 10, 2011 By Taylor 7 Comments

I got a new toy!!!!!!!!! And obviously, I’m really excited about it- the Silhouette SD!! So, because I love it so much, I clearly needed to make it pretty protect it from the dust. I was really excited when I saw that Char from “Crap I’ve Made” posted a tutorial for the Silhouette Dust Cover. I love her blog, thanks Char for the tutorial!

All you need is a fat quarter and Char’s template (and the amazing Silhouette, of course)
Cut your main piece to 18″ by 14″ with the 18″ side on the bottom. Then cut out the sides from the template, make sure to cut them in opposite directions.
Next place the small sides on the large piece with right sides together and the shorter side facing out.
Pin all the way around.
Next I added the yellow ribbon and my little fabric tag. Then I serged all the way around.
 I am excited that I won’t have smudgy little boy fingerprints on the beauty! Look at the happy home!

Filed Under: sewing, Silhouette, tutorial Tagged With: accessories

Bulls-eye Pillow

January 12, 2011 By Taylor 6 Comments

My house is feeling the effects of the “nesting phase”. I had a productive weekend and almost have the “babies” rooms switched out (Yes, I am still calling Finn an baby!). With all the baby preparedness I have been doing, I thought I would take a little break and do a quick craft for my own room. I whipped out this super easy pillow in 40 minutes! I saw something yesterday that reminded me of my Mom’s old bedding from when she was little (because she still has the pillowcases to prove it). So here is the 60’s inspired Bulls-eye Pillow.

 
This is the most unscientific tutorial ever!
 
Supplies:
– 4 pieces of felt
– stuffing
– 1/2 yd of solid fabric
 
Directions:
-Cut 2 14″ squares from your solid fabric
 
 
-Pick out 4 pieces of felt (in a monochromatic family and sort lightest to darkest)
 
 
– Use a template of some sort (even a bowl) to trace your smallest circle. Mine is about 5″ in diameter. Sew that circle onto your next color. Use a very small seam allowance. Then carefully cut around it about 1/2″ all the way around. (I told you this is not scientific)


-Keep doing this with all of the “layers”. Then pin the bulls-eye to the front of the pillow and sew into it the same way you were sewing onto the felt.
 
 
– Finish just like you would any pillow, pin and sew right sides together leaving room for flipping. Stuff and hand-sew the opening. Voila!


Look at it’s new happy home :)


Filed Under: bedroom, fabric, felt, home goods, sewing, tutorial Tagged With: home goods

Foodie Napkin Rings

January 6, 2011 By Taylor 4 Comments

First tutorial of 2011! These napkin rings have been on my to-do list for over 6 months but I was a little busy with Christmas so I am finally getting around to them. Poor Finn is loosing a craft room toy. They have been cut and on my shelf forever and he loves to play with them. Maybe I will make him some more?


Supplies:
– one 2′ x 1 1/2″ section of PVC pipe (cut into 2″ sections)
– an old magazine
– Mod Podge and brush

Directions:

1. Cut your PVC pipe into 2″ sections. My PVC pipe was 1 1/2″ in diameter. My husband controls the power tools over here so mine magically showed up in my craft room, cut perfectly! I asked him to cut 10 for me.


2. I wanted my napkin rings to look “foodish” so I used a Martha Stewart Whole Living magazine, they have really clean, pretty pictures. You can use whatever magazine or paper you like; newspaper, a book, fashion mag, an old map, scrapbook paper… get creative.


3. Go through and rip about 10-12 pages that are interesting to you. I looked for bright colors, cool bold words, and recipes.


4. Cut them into 2″ x 7″ strips. Cut them from the middle of the paper so you get interesting parts of the  pictures. Pick out your favorite strips and set them aside.


5. Apply a thin layer of Mod Podge (I’m using matte finish) to a napkin ring. Carefully place the strip of magazine into the ring. Gently smooth out the paper as you go. There will be a little excess paper just add a little Mod Podge underneath so it sticks. Do this to all the rings.


6. Once all 10 strips and rings have become one, we are going to apply the 1st topcoat of Mod Podge. There will be some air bubbles so just smooth them out with your fingers first. This layer should also be thin. Wait about 15-30 minutes for this coat to dry.


7. Apply your second coat of Mod Podge, a little thicker this time but not too thick. Let this coat dry for several hours. If you live in Houston like me, you should probably just wait overnight because it is January and a muggy 80 degrees :(


8. This step is optional: I am going to add a little pop to my napkin rings with a sequin ribbon. You can embellish with any ribbon or buttons or whatever you have. I cut my ribbon into 7″ sections. Glue them on with Elmer’s Glue and wait a few more hours to dry.


These babies will really add some pop to your table! If you are like me this makes you want to host a dinner party now. Happy Hosting!


Also, Don’t forget to enter the Taylor Made giveaway this week, you can read all about it HERE 


Related Posts Plugin for WordPress, Blogger...

Filed Under: craft, Martha Stewart, Mod Podge, paper, tutorial Tagged With: crafting

  • « Previous Page
  • 1
  • …
  • 5
  • 6
  • 7
  • 8
  • Next Page »

Welcome to Taylor Made

http://www.taylormadecreatesblog.com/about-me Hi Yall! I'm Taylor... an artsy mom of three from Houston, TX. I love sewing, collecting floral fabric, eating Mexican Food, photography, brights colors, rearranging, and rolling clay. Taylor Made Creates is all about creating a fun, colorful home, sewing cute things and eating good food. Check out my SHOP HERE HERE! Thanks for stopping by!

Search

Pin with me!

Like Me :)

Facebook Pagelike Widget

More Recent Posts

  • Kid's Animal Room
  • Kids Camping Shirts
  • Mermaid Birthday Party
  • Conversation Heart Cold Packs
  • Holiday Apple Tea Punch
  • Purple Princess Costume
  • Letterboard Costume
  • La Croix Costume

FAVORITES

  • Casserole Carrier
  • How to do a Patterned Dot Wall
  • DIY Roach Costume
  • Cobb Salad with Red Wine Vinaigrette
  • Cute Little Girl Clothing… found on Amazon!
  • Embroidery Hoop Art
  • Envelope Clutch
  • Spool of Thread Wall Art
  • Etched Mommy Tree Plate

Copyright © 2026 · Web Hosting By RFE Hosting