When Clyde was born and I realized I had another boy in the house I thought to myself, perfect! I have a closet full of boy clothes. Well… Finn was born on August 6th and Clyde was born on February 6th. Their dates are exactly six months apart to the day.
So, we got home from the hospital with Clyde, I opened the closet and BAM a closet full of sleeveless and short sleeved shirts on the only day that Houston ever had a “hard freeze”. Why didn’t I realize that all of these clothes were for the opposite season? Now once again all of Finn’s old 9 month onesies are for winter and I am about to die of a heat stroke. My poor little poopsie is hot natured just like his Mommy. Solution… Baby Cutoffs!
I did this to some pants a few weeks ago too. I am now on a Baby Cutoff Spree at my house and nothing is safe. Watch out old baby jeans… its over 100 degrees and mama’s hot.
These make me hot just looking at them… (I really can’t describe my hatred for the heat enough)
I really wanted Clyde to be able to wear this shirt because it has a special meaning. When I first found out I was pregnant with Finn this was the first thing I bought, so really the first “baby thing” I ever bought in my life :)
Use a short-sleeved onesie as your pattern and mark 1/2″ past the edge of the sleeve. (Yes I use a sharpie, I don’t like tailor’s chalk)
Serge around the edge and then pin and sew two parallel lines for the seam.
Ahhh…. relief!
How cute is this little model of mine? What a Happy Boy! So, what sort of summer refashioning have you done lately? And are you now going to run through your house with scissors looking for clothes to cutoff?
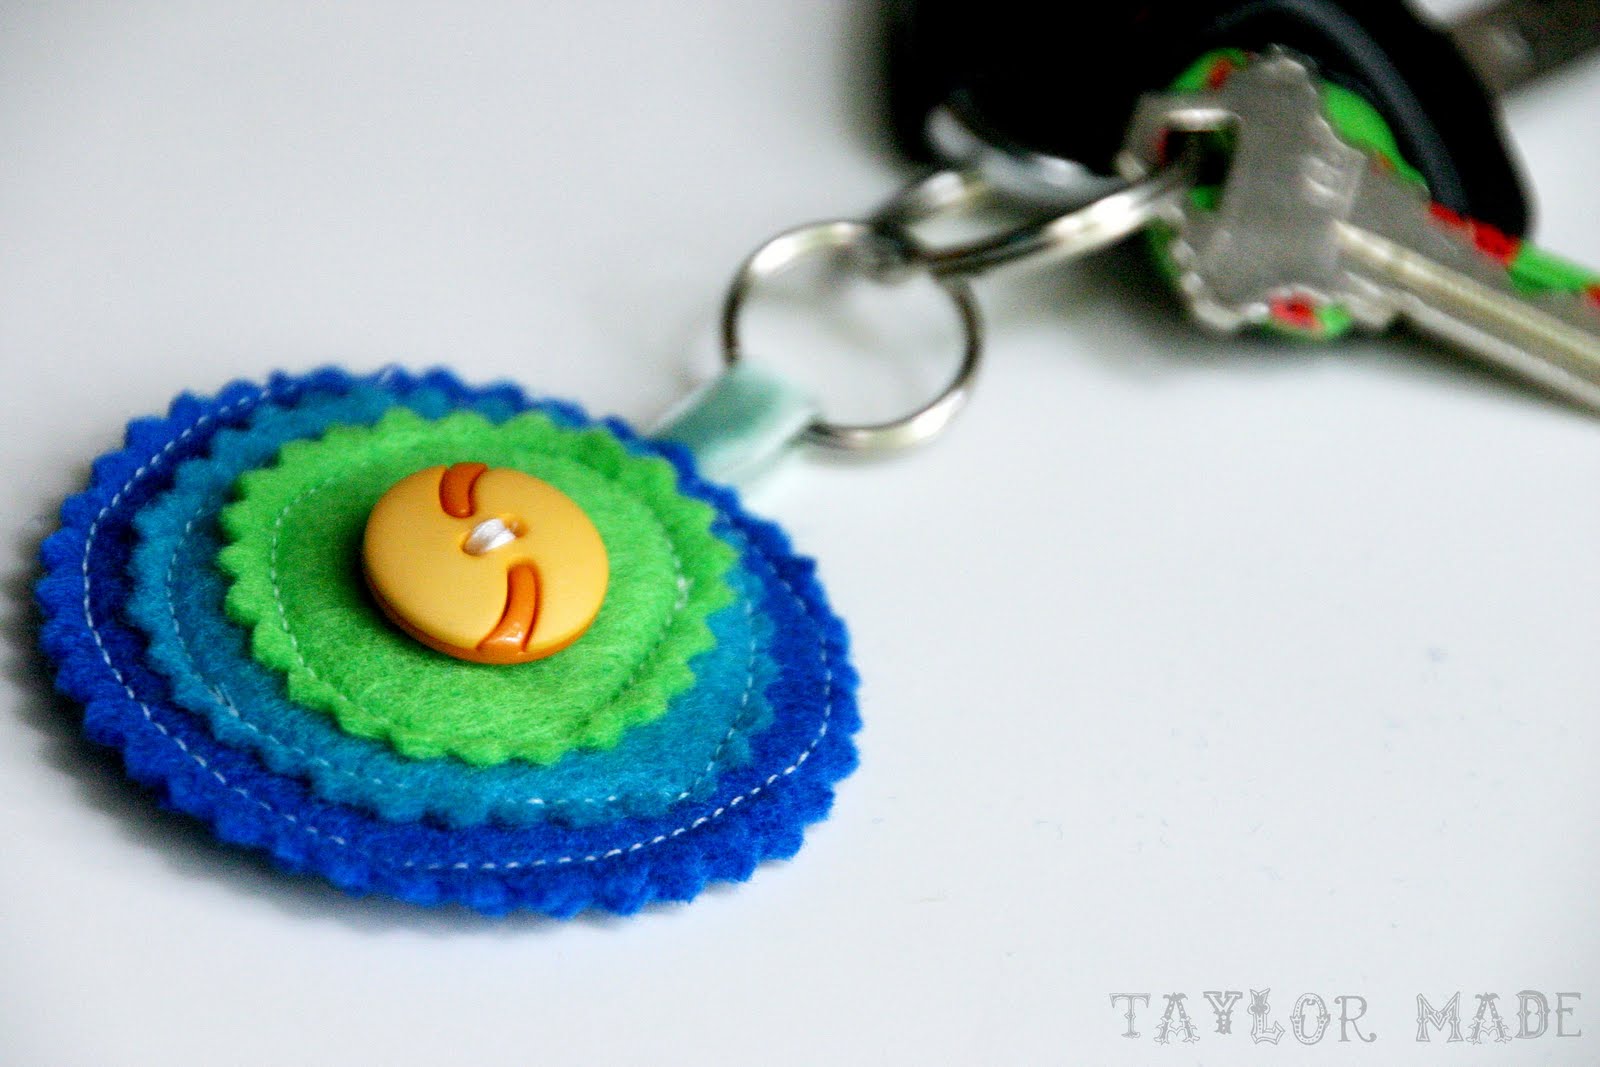
Do you have a whole box of felt scraps?… Oh that’s just me? I can’t let go of them for some reason even though an entire sheet is .25 cents. Well, I found a way to use all of those precious scraps.
All you need is a keyring from the Hardware Store or Walmart. Use pinking shears (p.s. love my pinking shears) and cut two pieces for the front and back. I used a piece of cardboard as a template and a scrap piece of ribbon to attach the fab to the ring.
Cut out three layers; each a little smaller than the last. I started by making perfect circles then I tried to go for a more abstract/messy look.
Work backwards… sew the button on the smallest circle, then sew that circle on the middle and so on…
Do you use your button foot as much as I do? I can’t live without it. I mean, call me a lazy sewer but it sews a button on in literally about 4 seconds. Continue sewing the other layers on in reverse order.
Sandwich the ribbon (with the key ring on it) between your two layers of felt.
Do you see how I tried to make it look “messy” but I didn’t follow through… might be a minor craft fail? No, not for me, I slapped this baby on my key ring!
I am going to have to perfect the look, I might even put some extras in the Taylor Made Shop. My keys are happy and that is all that matters :)
This year I thought the boys could help me make Bryan’s Fathers Day gift. That thought might have been a little premature considering my boys are 4 months and almost 2 years old. This project didn’t turn out exactly as I had planned in my head, but they boys were actually involved so that’s even better right :) Aren’t the little hand prints so cute?
I saw this cute picture on Pinterest a few weeks ago. Then, I drilled down to where it came from and it was an Etsy Shop called Personalized Prints. She has some really cute stuff (love the wedding fingerprint tree). Her example was for a bare tree and you add your kids hand prints for the leaves. She must not have a two year old boy because this is not what happened to me. I couldn’t even take a picture of it because the picture’s life was on the line and I had to act quickly to save it.
I cut the tree and letters out from my Silhouette. Use tweezers for the thin paper branches and tiny letters.
I placed everything backward on a piece of scrap paper and used spray adhesive to stick the letters and tree to the paper.
Stick the tree and letters to the page. Love those pudgy little hands! He even helped me with the letters.
Six very messy hands (mine included) and a few hours later, here is what we came up with…
My “2001” had a little fight with Clyde and Clyde won, so I added a thumbprint heart and wrote the year in the corner.
I used a 13″x10″ frame and used white paper behind our painting.
Happy Father’s Day to all of the daddy’s out there.
Do you have an obsession a healthy love for aprons like I do (seriously, I have too many)? Well here is the easiest apron you will ever make. I made this for a craft competition and the theme was “Under $5″… I made this for $4.97. Easy and cheap; what’s not to like?
All you need is:
2 cloth Napkins (I found these on sale at World Market)
2-3 yards of cotton twill tape
One napkin will be left alone for the bottom half of the apron. The other napkin will make up the top of the apron and the ruffles.
To make the top, serge and sew (or just sew) two of the sides so that your dimensions are 10″x10″. The best part of this apron is that the napkins are almost totally sewn for you!
Now you need to sew the top square to the bottom square. Center the top square on the bottom square with right sides together and sew.
Sew down the seam that you just made all the way across the bottom square.
Add the twill tape to the top of the square, hold it up to your body to determine the length. Then do the same for the side straps, make sure to tie it in a bow because it will need to be longer than you think. Remember you can always cut more later but you cant add on to it.
Now, you will have over half of the top square left over and that will be used for our ruffle. Sew it into one large rectangle and ruffle it however you like. You will need to piece two long pieces together but you wont see the seam because of the ruffleyness (new word of the day?). I like to use my serger because I don’t have a ruffle foot…whomp whomp whomp. Make sure you make two different ruffles, one for the bottom of the apron and one for the top. With the serger, I have to kind of “pleat” as I sew because it doesn’t do a very tight ruffle. Sew the ruffle to the bottom and the top of the apron.
So simple right? It is my new painting apron because I already have too many cooking ones and I don’t garden.