TaylorMade

DIY, Home Decor & Sewing

  • Home
  • SHOP
  • DIY & Sewing
    • For the Home
    • Sewing
    • Costumes and Holidays
    • Cricut Projects
    • Crafting
  • Parties
  • Recipes
  • Home Tour
  • Favorites
  • About

Padded Camera Strap

May 22, 2012 By Taylor 20 Comments

 
Hi my name is Taylor and I have a problem… I am addicted to making camera straps…. I need a support group. If you have been around a while, you might remember one of my very first posts HERE. Then remember when I made a Christmas gift HERE. In my defense one is old and one was a gift so it was just time :) And I love my new strap, so I guess its justified right? Want to make one and feeling destructive?…
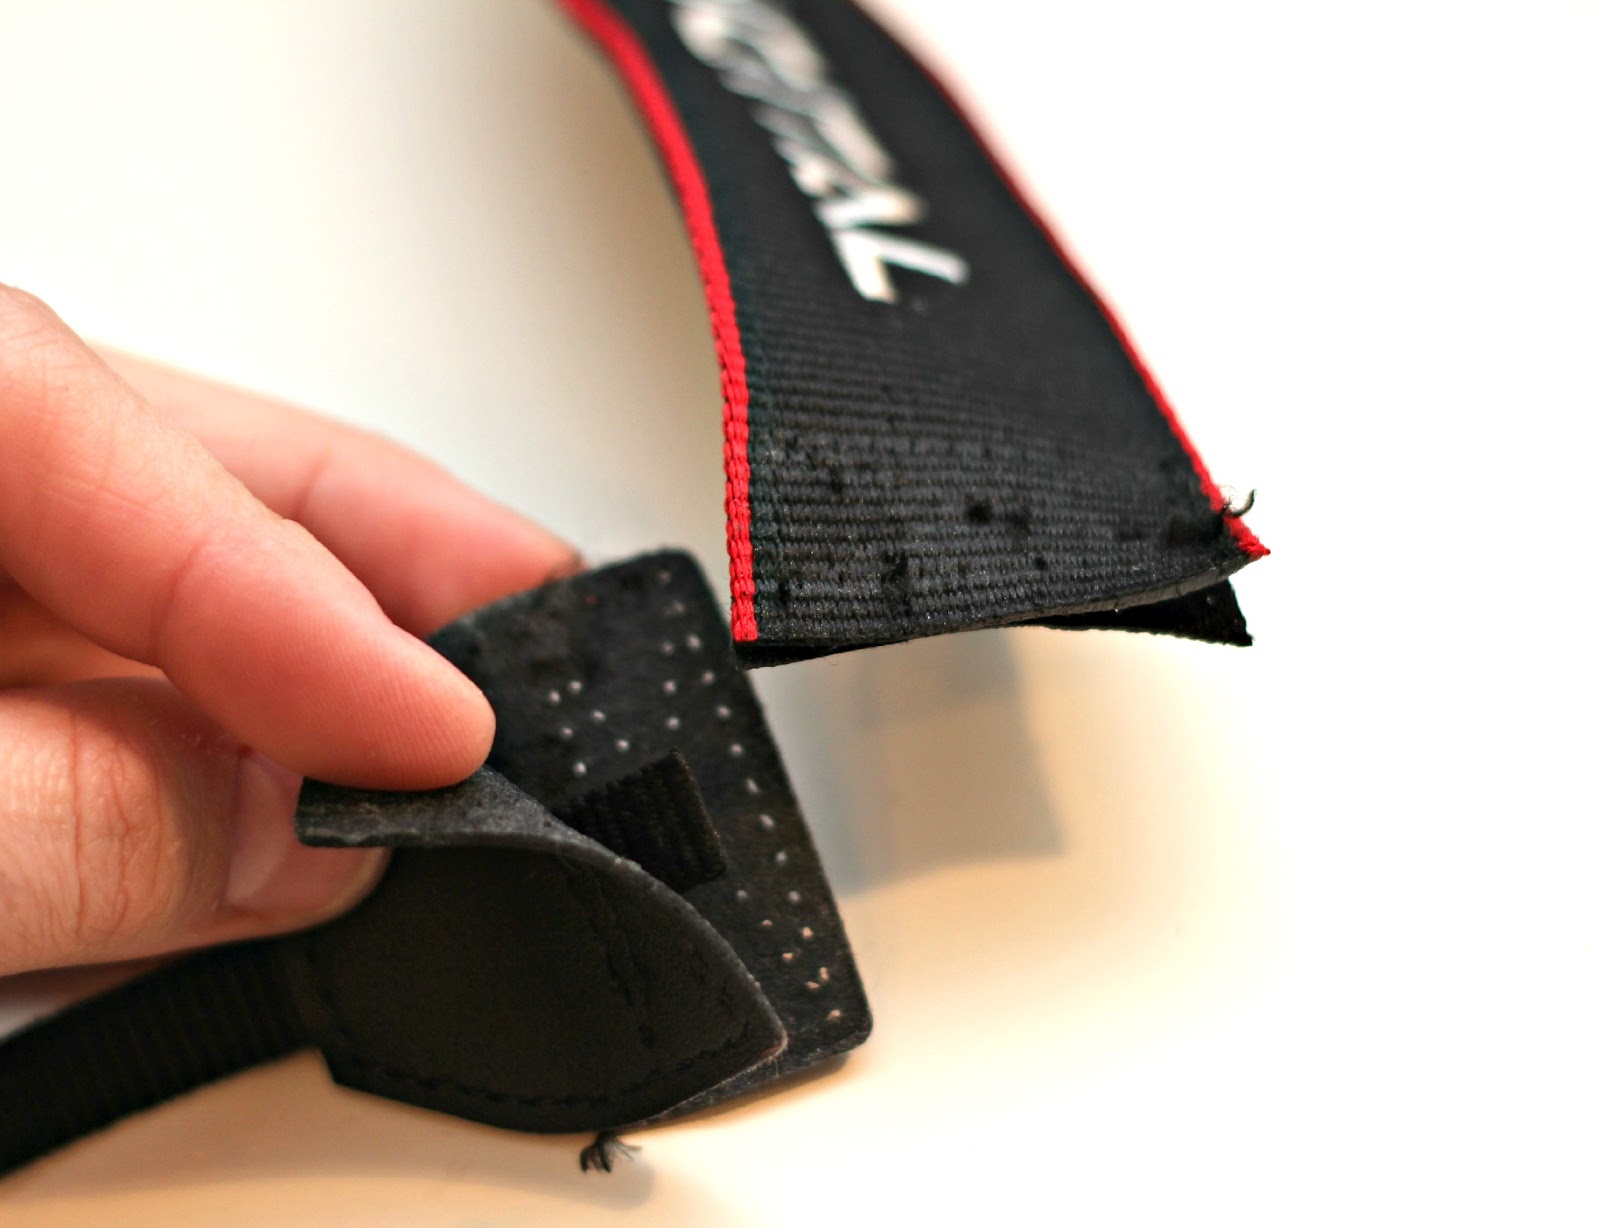
See the end of the existing strap here, tear it apart, yay!
Does anyone else kind of like seam ripping?
Keep the bottom together; only seam-rip the part holding the strap to it.
Wrap the strap in batting, I doubled it around the strap. Poor night crafting lighting.
Cut your fabric 2.5x as wide and an inch or so longer than your strap.
Serge the ends, fold over, press and sew. Serging adds a professional looking touch but as usual its not necessary. Then fold the strap together longways with right sides touching. Sew and flip right ride out.
Fabric label :)
I serged the ends of the padded strap then put it into the fabric tube.
Last step is sewing the faux-leather part back to the strap. It should be easy because the holes are already there as a guide. I asked my Father in Law to do this part for me because my sewing machine is old and kind of wimpy when it comes to thickness. He works for NASA in the fabrication department, he says he has machines that can sew quarters together, cool huh?
Do you have a craft that you make over and over again? Apparently I like making camera straps and pillows. Also how great is this fabric?

Pin It


Filed Under: fabric, serger, sewing, tutorial Tagged With: accessories

How to Shorten a Shirt

May 16, 2012 By Taylor 3 Comments

I found this shirt/dress a few weeks ago and I like to print but it was a weird length for me. It also came with a waist tie but it seemed way too long for a shirt on me but way too short for a dress. DIY to the rescue :) And thankfully because of the stripes, the hard part was already done for me, yay! (I also did this on the way out to a party with the boys waiting on me so excuse my quick photos :)
How to Shorten a Long Shirt:
First, cut your shirt a little longer than you want it.

A serger really helps with this project but it isn’t necessary, you could just press and sew. But thankfully I do have a serger, total time saver. Serge/sew, fold over and press.

Sew the hem under, so lucky to follow the lines! 

Here is the first line I did, I really think it looks much more professional if you use the double needle. I love using it but to be honest I think the setup takes too long and like I said I was literally leaving, I like to live on the edge, ha. So this time I just sewed another line but I do highly recommend the double needle for a professional looking hem. 

Next line…

All done :) 

I even had time for a cell phone pic as I ran out the door. This length is much better for me! Has anyone refashioned lately, and if so did you do it as you were walking out the door leaving no room for error :/ 

Pin It


Filed Under: clothes, serger, sewing Tagged With: clothing

Ruffled Lace Headwrap

May 8, 2012 By Taylor 1 Comment

In case you missed this post, here it is… I was lucky enough to get to be a part of See Kate Sew‘s Ruffles Series. I’m sure I’ve mentioned it a few times, but Kate is truly one of my all time favorite bloggers, she has a unique vintage style and she is always original. I have also told her I think she used to be a clothing model :) Her Ruffles 2012 Series was amazing! Here is my ruffly contribution:

I’m so honored to be a part of the very famous “Ruffles 2012 Series”! I have to admit, I’m not a super frilly girl and I have two sons so I was stumped for a bit when Kate asked me to work with ruffles. Then I realized, I can make ruffles work with my style. So I came up with this Ruffled Lace Headwrap. I love headbands and headwraps, so why not have some ruffles?
You need two strips for fabric – both about 58″ x 3″. I used solid yellow for the back and scraps for the front that I pieced together. 

Then you need to taper the ends. Pencil it as a cutting guide then cut and pin right sides together.
Then sew leaving one end open and flip right side out.
Cut lace 2″ wide.
My favorite… the RUFFLE FOOT :)
Pin the ruffled lace to the center of the headwrap and sew. Only add the lace to about 8″-10″ or you won’t be able to tie your headwrap in the back.
And now you have your ruffly, fun headwrap.
Thanks so much Kate for all the ruffly inspiration :)

Filed Under: fabric, girl, sewing Tagged With: accessories

Burlap Pennant Banner and Bias Tape

February 1, 2012 By Taylor 12 Comments

Happy February! Don’t you just love February, its so festive and fun and for me it means Baby Boy’s Birthday, Rodeo, the beginning of Spring and of course the obvious – Valentine’s Day. I wanted to make a Valentine Banner for my mantle but then I realized how long the word “V-A-L-E-N-T-I-N-E” really is. And “LOVE” and “BE MINE” are a little overplayed (which I don’t really even mind ha :) So I came up with the word “HEART”, it fits right?

The “burlap pennant” craze has taken over and it really is such an easy craft, so if you are new at crafting its a great simple little project. Not to mention burlap is super cheap. 
Simple Steps:
Cut your burlap into the flags. If you plan on keeping this decoration then I recommend doing a zig-zag stitch around each flag to keep from fraying. 

Then use a stencil to spell out your word. You can just use regular cheap acrylic craft paint and a sponge brush.

Once the flags dry, you can attach them a number of ways… you could just hot glue them to some twine or yarn, but I sewed mine onto bias tape. 

Let’s talk about bias tape… there are options. You can get most solid colors at the fabric store in various sizes. For projects where the bias tape is going to add a lot, like a quilt or this tablecloth, I like to make my own.

It speed things up if you have a bias tape maker. They even make bias tape maker machines. Fancy Pants.

Once you have made/bought your bias tape, just sandwich your flags between and sew directly over the bias tape.


I’m not getting crazy with the V-day decor cause little man’s Bday is next week. If you know me at all you know that I don’t think it’s festive unless we have streamers and balloons. I hope he likes red.

So how do you feel about bias tape, do you make your own? I think it is much cuter than store bought, and does anyone have that machine? I eyeball it all the time and wonder if anyone has one.

Pin It


Related Posts Plugin for WordPress, Blogger...

Filed Under: craft, fabric, holidays, home goods, sewing, tutorial Tagged With: decor

  • « Previous Page
  • 1
  • …
  • 13
  • 14
  • 15
  • 16
  • 17
  • …
  • 24
  • Next Page »

Welcome to Taylor Made

http://www.taylormadecreatesblog.com/about-me Hi Yall! I'm Taylor... an artsy mom of three from Houston, TX. I love sewing, collecting floral fabric, eating Mexican Food, photography, brights colors, rearranging, and rolling clay. Taylor Made Creates is all about creating a fun, colorful home, sewing cute things and eating good food. Check out my SHOP HERE HERE! Thanks for stopping by!

Search

Pin with me!

Like Me :)

Facebook Pagelike Widget

More Recent Posts

  • Kid's Animal Room
  • Kids Camping Shirts
  • Mermaid Birthday Party
  • Conversation Heart Cold Packs
  • Holiday Apple Tea Punch
  • Purple Princess Costume
  • Letterboard Costume
  • La Croix Costume

FAVORITES

  • Swan Wings + Hello Ollie Fabrics
  • Vintage Sheet Quilt
  • Color Wheel Clock
  • How to Glaze Furniture
  • Siberian Husky Costume
  • Adorable Girl Clothing (found on Amazon)
  • Mini Casserole Carriers
  • Winged Peasant Dress
  • Manhattan Valentine Dress

Copyright © 2026 · Web Hosting By RFE Hosting