TaylorMade

DIY, Home Decor & Sewing

  • Home
  • SHOP
  • DIY & Sewing
    • For the Home
    • Sewing
    • Costumes and Holidays
    • Cricut Projects
    • Crafting
  • Parties
  • Recipes
  • Home Tour
  • Favorites
  • About

Briar Rose Strip Quilt

May 26, 2014 By Taylor 18 Comments

Briar Rose Strip Quilt
9 times out of 10 I don’t buy fabric with a project in mind. I see fabric I really like, I buy it and I take it home. Then months later when I want to make something I “shop” in my own craft room and find the perfect fabric for the job. This quilt was no exception. Last year when I spotted the Heather Ross Briar Rose line I knew I had to have it, and I had to have all of it :) I bought the fat quarter pack and there it sat on my shelf for almost a year. Then in February I found out I was having a girl (yay) and I started putting her room together knowing she would have a mama-made quilt.

Briar rose strip quilt

At first I had these same strips in mind but I was thinking solid colors… black, white and coral. Then it seemed too matchy-matchy with the room and I wanted a pattern. Here is a baby name secret… we have been calling her Baby Bee for months because her name starts with a “B” so I really wanted to add some bees somewhere. Then I remembered this Briar Rose fat quarter pack!! Bright colors, fun patterns, and bees… too good to be true right? That’s why I buy fabric I like right when I see it :)

I didn’t follow a pattern I just googled the standard size for a baby quilt and did the math. I started by cutting 2-3 strips of each pattern that were 4″ by the width of the fat quarter.

Briar rose strip quilt

When I had enough I scrambled them up to “randomize”. Then I sewed them into one big continuous strip.

Briar rose strip quilt

Briar rose strip quilt

Briar rose strip quilt

After I pressed all my seams down, I cut the big strip into smaller strips that were all the same width and started laying them out. I’m so thankful  to have this big work table with my pregnant belly:)

Briar rose strip quilt

I worked really hard at making sure none of the same patterns or colors were touching… see the two pink strawberry fabrics touching, I don’t like that haha #fabricgirlprobs.

Briar rose strip quilt

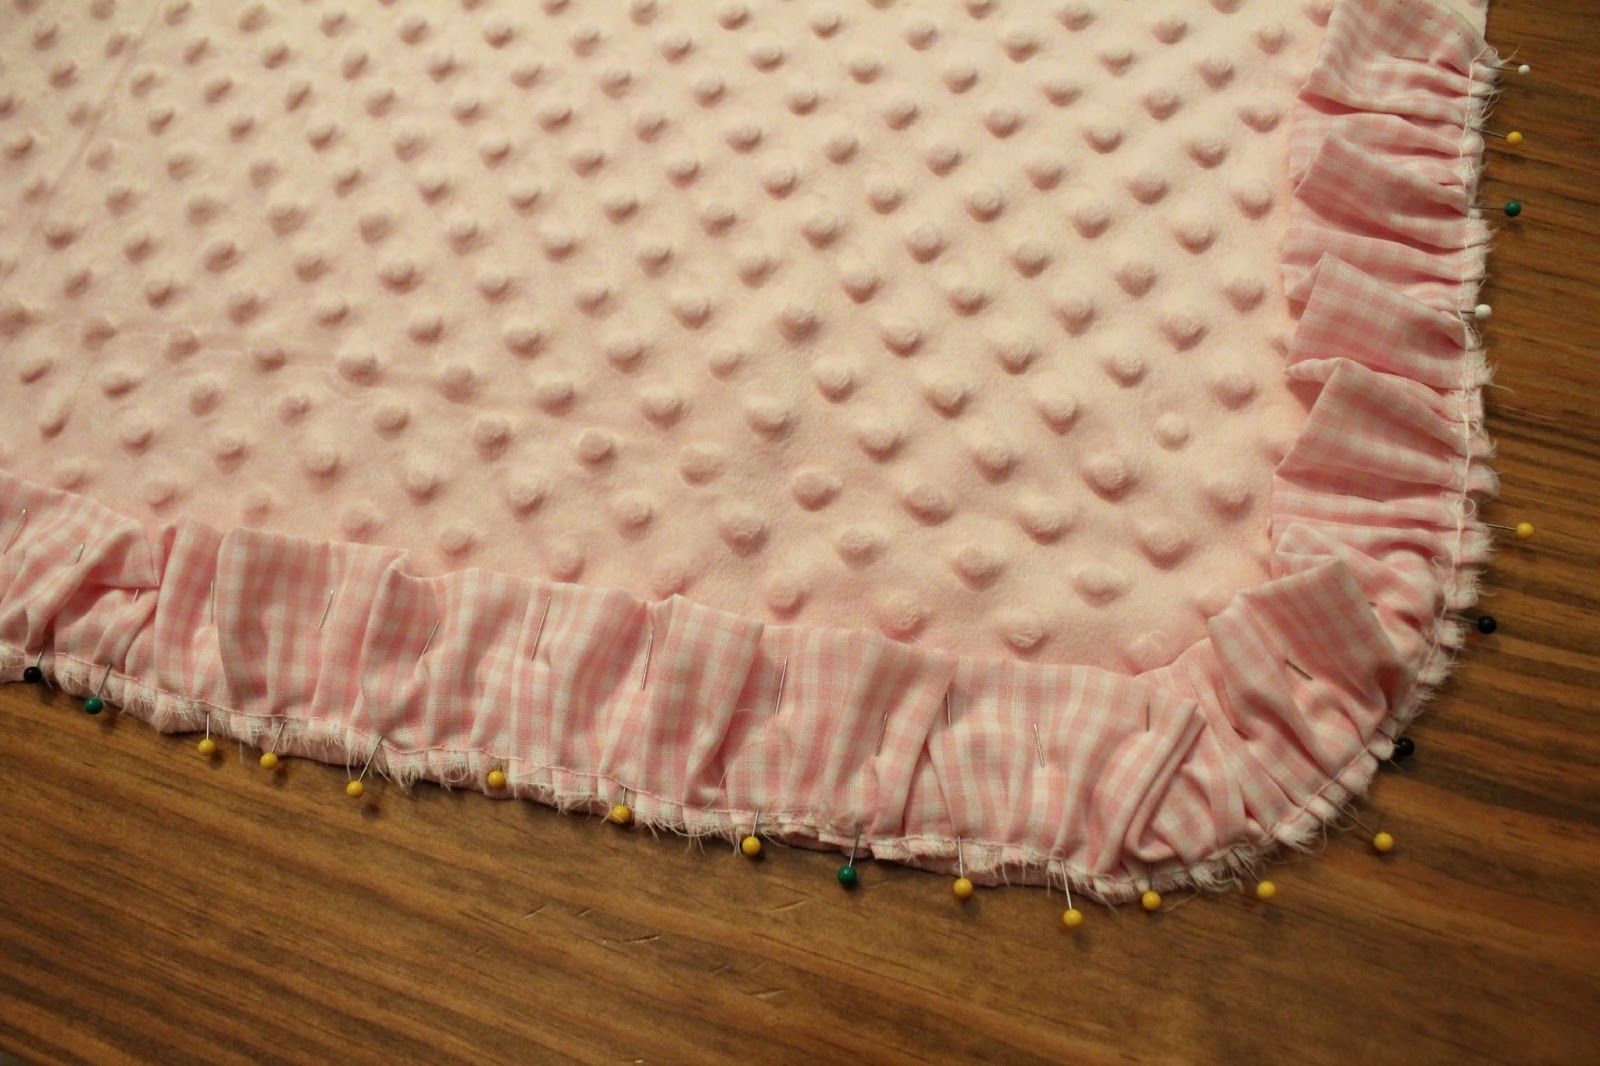
After I got it how I liked it, I went row by row… pinning then sewing. I used a 1/2′ seam allowance for everything.

Briar rose strip quilt

Here I am pressing my seams like a good tailor.

Briar rose strip quilt

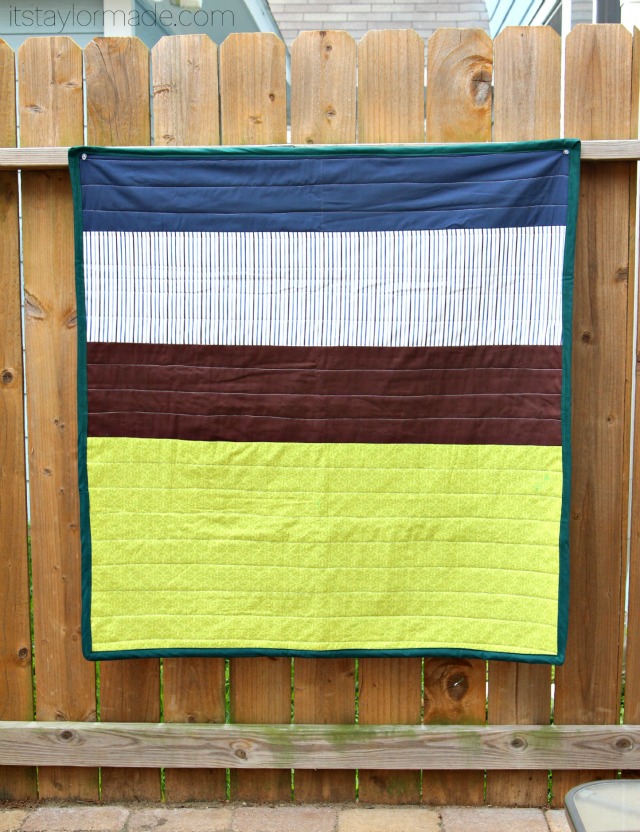
I added a border that was also 4″ wide all the way around but then when I opened my batting it was shorter than what was listed on the package. So, I had to shorten the top and bottom of the border. I found this grey floral fabric at Joann’s. I obviously like to do my basting late at night when the lighting is bad :) Then, I quilted above and below the seam of each strip.

Briar rose strip quilt

Briar rose strip quilt

I made some binding out of this cute green Christmas striped fabric I found. Quilting confession, I am a cheater when it comes to binding… I have never tried it by hand, machine binding works for me! I still use clover clips however.

Briar rose strip quilt

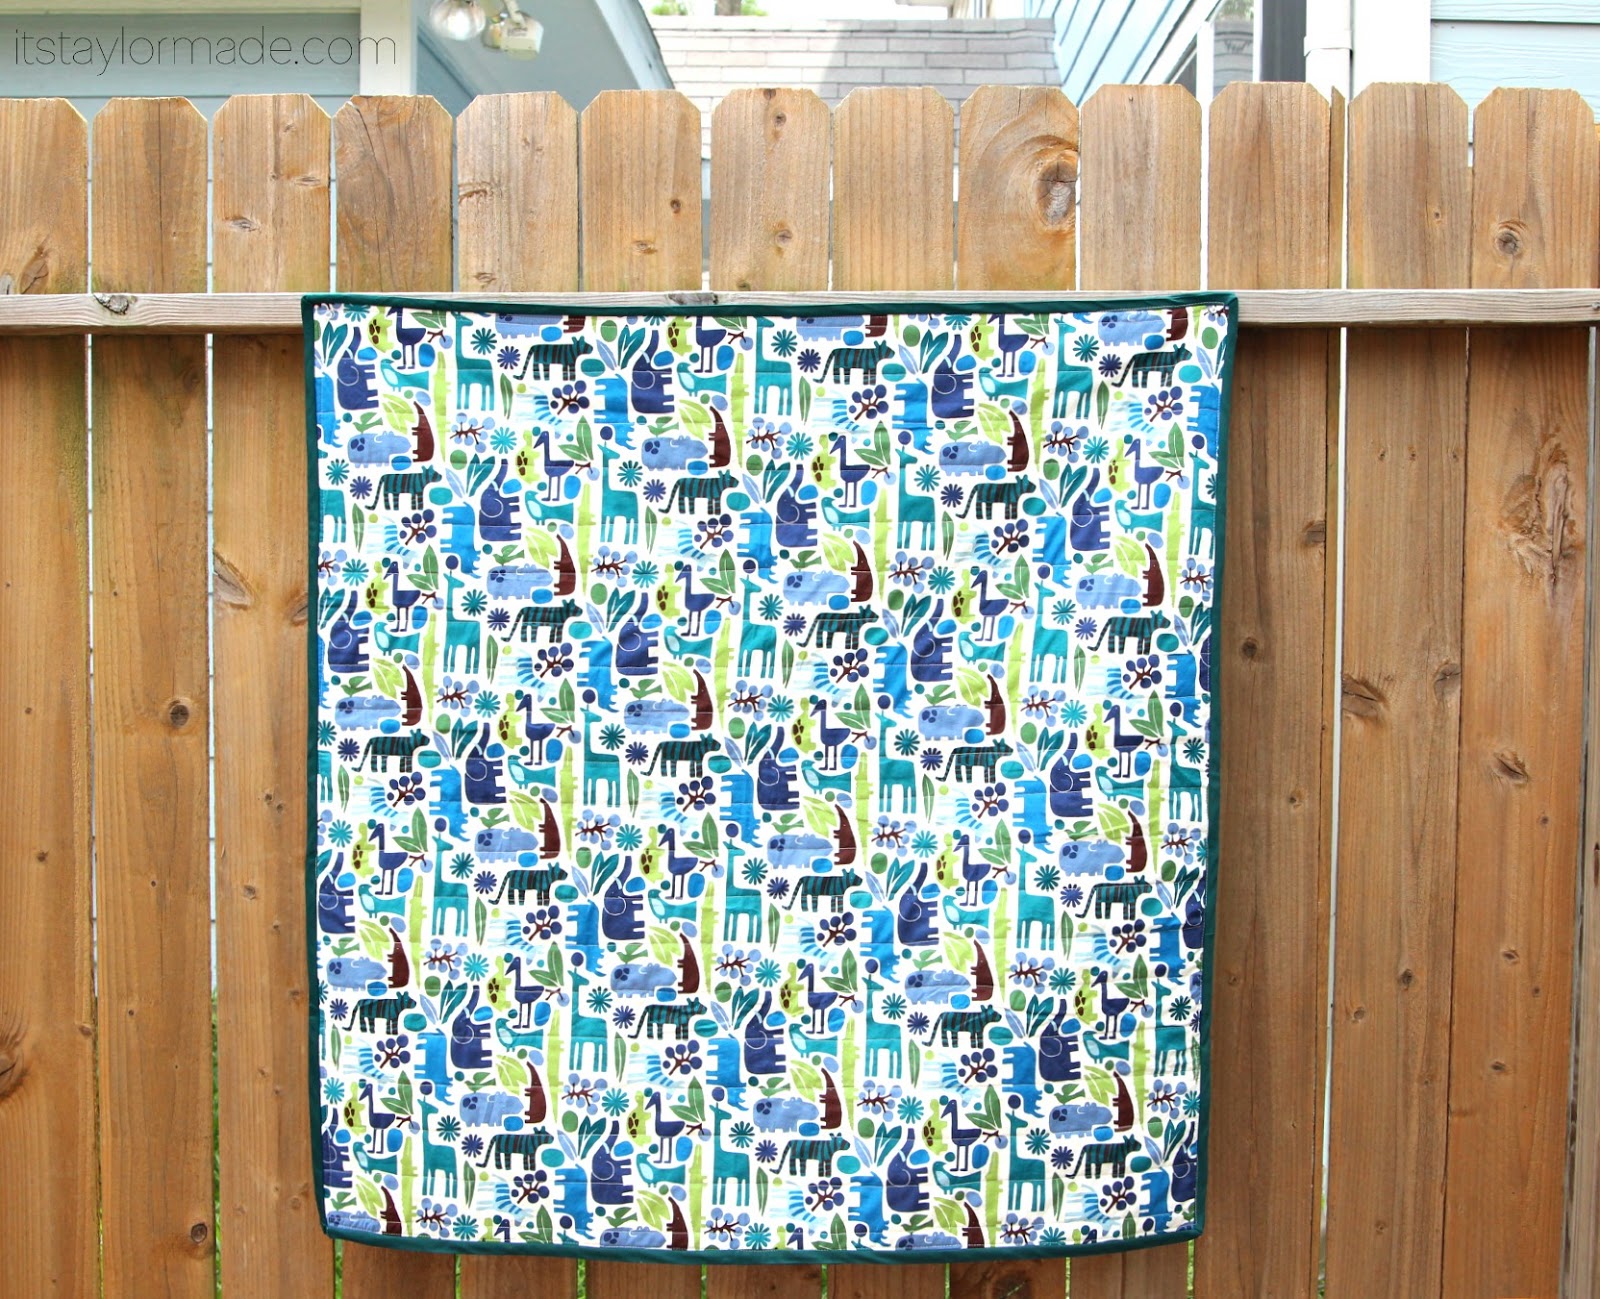
For the back I used a black polka dot print and the little black dots are flocked… so cute!

Briar rose strip quilt

I love how it turned out! I hope Baby Bee loves it too!

Briar rose strip quilt

Briar rose strip quilt

Briar rose strip quilt

Briar rose strip quilt

Speaking of that girl…. 35 days to go!!!

Briar rose strip quilt

Filed Under: baby stuff, fabric, girl, quilt, sewing Tagged With: quilts

Triangle Baby Quilt

November 20, 2013 By Taylor 21 Comments

triangle baby quilt

Triangle quilts are all the rage this year so I knew I had to make one for my friend. She isn’t finding out the sex of her baby which I am a big fan of, I was surprised both times too. It adds so much excitement but it can be hard to pick out a gift. I love making baby gifts and I feel like a quilt is the perfect unisex present. I went with a range of colors and even though I added two pinks I made sure to add more blues just in case. But either way- it’s a baby and a little pink on a quilt is OK for a boy in my opinion :)

baby triangle quilt

For the front I used 11 different solid cottons, 1/4 yard of each color. Then I used 1 1/2 yards for both the batting and the back. I made a quilted triangle pillow a few months ago and I cut out all the triangles by measuring. So this time bought a handy little triangle ruler. The template I was using was about 7 1/2″ on every side. I didn’t realize that the flat top on the template was for another quilt pattern and all of my triangles were cut incorrectly. Bummer but since they were all consistently wrong I just went with it.

After I cut all of the triangles out I placed them in stacks. I laid the quilt out in a random pattern and I made sure no color was touching the same color. Then I sewed the triangles together horizontally making rows. I ended up cutting about 115 triangles but only used 8 rows of 12 triangles… so 96 total.

triangle baby quilt

Then I sewed each row together vertically. Because of the flat tops on the triangles it made them more of a trapezoid shape, which turned out OK it just made the quilting part a little different. I placed the back fabric right side down, then the batting then the top. I used very thick and fluffy batting because I thought it would make a perfect “play-on-the-floor-tummy-time-quilt”. Then I placed the quilt on top, right side up. Here is a very rough diagram of how I quilted the whole thing.

triangle baby quilt

I started with 1 and sewed horizontally all the way across each line. The diagram just shows 4 lines but I actually did all the the horizontal lines down the full length of the quilt. After I was done with that I started the zig-zag quilting. Because of the trapezoid shape I wasn’t able to just make diagonal lines. I actually started in the middle and did that zig-zag pattern down each “line”. This made it look like every “triangle” was separate, which I loved!

baby triangle quilt

baby triangle quilt

I just used some white cotton that I already had lying around for the binding so I’m not really sure how much I used. The quilt ended up to be 42″ x 52″ so that will give you an idea for the length of the binding.  Also, The day I went out and took pictures I got some awesome sun-flares… Baby Quilt Magic :)

baby triangle quilt

IMG_7302

Before I quilted everything I added this little TaylorMade tag to one of the triangles. triangle baby quilt

triangle baby quilt

I honestly thought about keeping it for myself because I loved it so much. I guess that makes a good gift, if you want to keep it! Now I just need to make one in my size.

triangle baby quilt

triangle baby quilt

Filed Under: baby stuff, quilt, sewing, Uncategorized Tagged With: quilts

a Modern Baby Boy Quilt

May 1, 2013 By Taylor 28 Comments

With all of my baby girl crafting did you even know I could make something for a boy? I was surprised I still had it in me. I have also been surprised by how many new baby girls there have been around here. But this post isn’t about girls, its about a baby boy. My only girl cousin is due with her first baby this summer and I am so happy for her little family. They will make awesome parents and I can’t wait for the boys to have another “young” relative :)

My mom, sister and I hosted a small family baby shower for Jamie and Baby “E” a few weeks ago. I will share all the shower deets here next week. I wanted to make him something he could keep for a long time so I settled on a quilt. It is modern and bright. The nursery is actually much more neutral but I figured this could be an on-the-go quilt. 

I still love this print on the back- I knew I was hoarding it for a good reason.

This is my 4th quilt to actually finish. I also have about 6 unfinished quilt tops. I have not yet worked up the courage to hand quilt the binding… for those of you that do that – Bravo! Anyone else a machine binding cheater like me?

Follow on Bloglovin

Filed Under: boy, fabric, quilt, sewing Tagged With: quilts

Baby Blanket with Name Applique

January 28, 2013 By Taylor 4 Comments


A new mom can never have too many baby blankets, right? Especially ones with names on them. You want every excuse to see your new baby’s name in action. And a handmade baby blanket is something you keep forever. Here is Gabby’s baby blanket I made for her Shower last week. (Shower details HERE)

I started by making the ruffled edges. I found pretty pink gingham and tore it into strips.

Then I used my ruffle foot. And ruffled, and ruffled and ruffled.

I used a yard of minky for the back and a yard of the floral print cotton for the front.
I rounded the corners with a bowl. Then, put the minky aside because its time for the appliqued name :)

For the applique, I ironed wonder-under to the back of the fabric. I printed out the name and traced the letters (BACKWARDS) on the back of the wonder-under.

Then I cut out the letters (and took the back of the WO off) and placed them on the fabric. Next, Iron.

Then I used a very sloooow zig zag stitch around each letter. Voila, easy applique done.

To put the quilt together, I actually sewed my ruffle to the minky first. The minky can get slippery and I tend to get messy so this made it nice and neat.

Then, put right sides together with the ruffle in between. The line from the ruffle serves as a guide, I used a 1/4″ seam allowance from that seam. Don’t forget to leave an opening to flip.

Once you have flipped, Press the seams down and top stitch all the way around.

What baby girl doesn’t love pink minky?

Pretty pink package :)

Stay tuned later this week for more shower details, including flag bunting that I may or may not have wanted to keep, a baby bag tag and some cute stamped gift tags!

Pin It


Related Posts Plugin for WordPress, Blogger...

Filed Under: fabric, girl, quilt, sewing Tagged With: kids

  • « Previous Page
  • 1
  • 2
  • 3
  • Next Page »

Welcome to Taylor Made

http://www.taylormadecreatesblog.com/about-me Hi Yall! I'm Taylor... an artsy mom of three from Houston, TX. I love sewing, collecting floral fabric, eating Mexican Food, photography, brights colors, rearranging, and rolling clay. Taylor Made Creates is all about creating a fun, colorful home, sewing cute things and eating good food. Check out my SHOP HERE HERE! Thanks for stopping by!

Search

Pin with me!

Like Me :)

Facebook Pagelike Widget

More Recent Posts

  • Kid's Animal Room
  • Kids Camping Shirts
  • Mermaid Birthday Party
  • Conversation Heart Cold Packs
  • Holiday Apple Tea Punch
  • Purple Princess Costume
  • Letterboard Costume
  • La Croix Costume

FAVORITES

  • Briar Rose Strip Quilt
  • Mini Fabric Lamps
  • Barrel Chair Makeover
  • How to Shorten a Shirt
  • Happy Rocks
  • The Frozen Fox
  • Skunk Costume
  • More Casserole Carriers
  • DIY Leather Tote

Copyright © 2026 · Web Hosting By RFE Hosting