TaylorMade

DIY, Home Decor & Sewing

  • Home
  • SHOP
  • DIY & Sewing
    • For the Home
    • Sewing
    • Costumes and Holidays
    • Cricut Projects
    • Crafting
  • Parties
  • Recipes
  • Home Tour
  • Favorites
  • About

Baby Bunny Plushie

April 23, 2013 By Taylor 21 Comments

Last month my friend gave birth to precious little Madi Lou. Of course I had to make her something handmade, as you know I use any excuse to make something girly :) I wanted to make a little plushie and because it was around Easter, I guess I had bunnies on the brain.
I searched for the perfect pattern but didn’t find exactly what I was looking for. I did find the “Stuffed Menswear Bunny” from my friend Martha Stewart HERE. It’s a free pattern, so I printed it out then hacked it (sorry martha). I added quite a few inches to the legs and arms.
My favorite part?… the ears. I wish I would have added interfacing so they would stick up better on their own.
I also love the little felt bow. I glued it on and sewed it on too. I wanted to make sure it would stay put if little Madi tugged at it. I also added a little taylormade tag to the butt.

I threw in a few of my favorite Burp Cloths. I posted all about those HERE. 


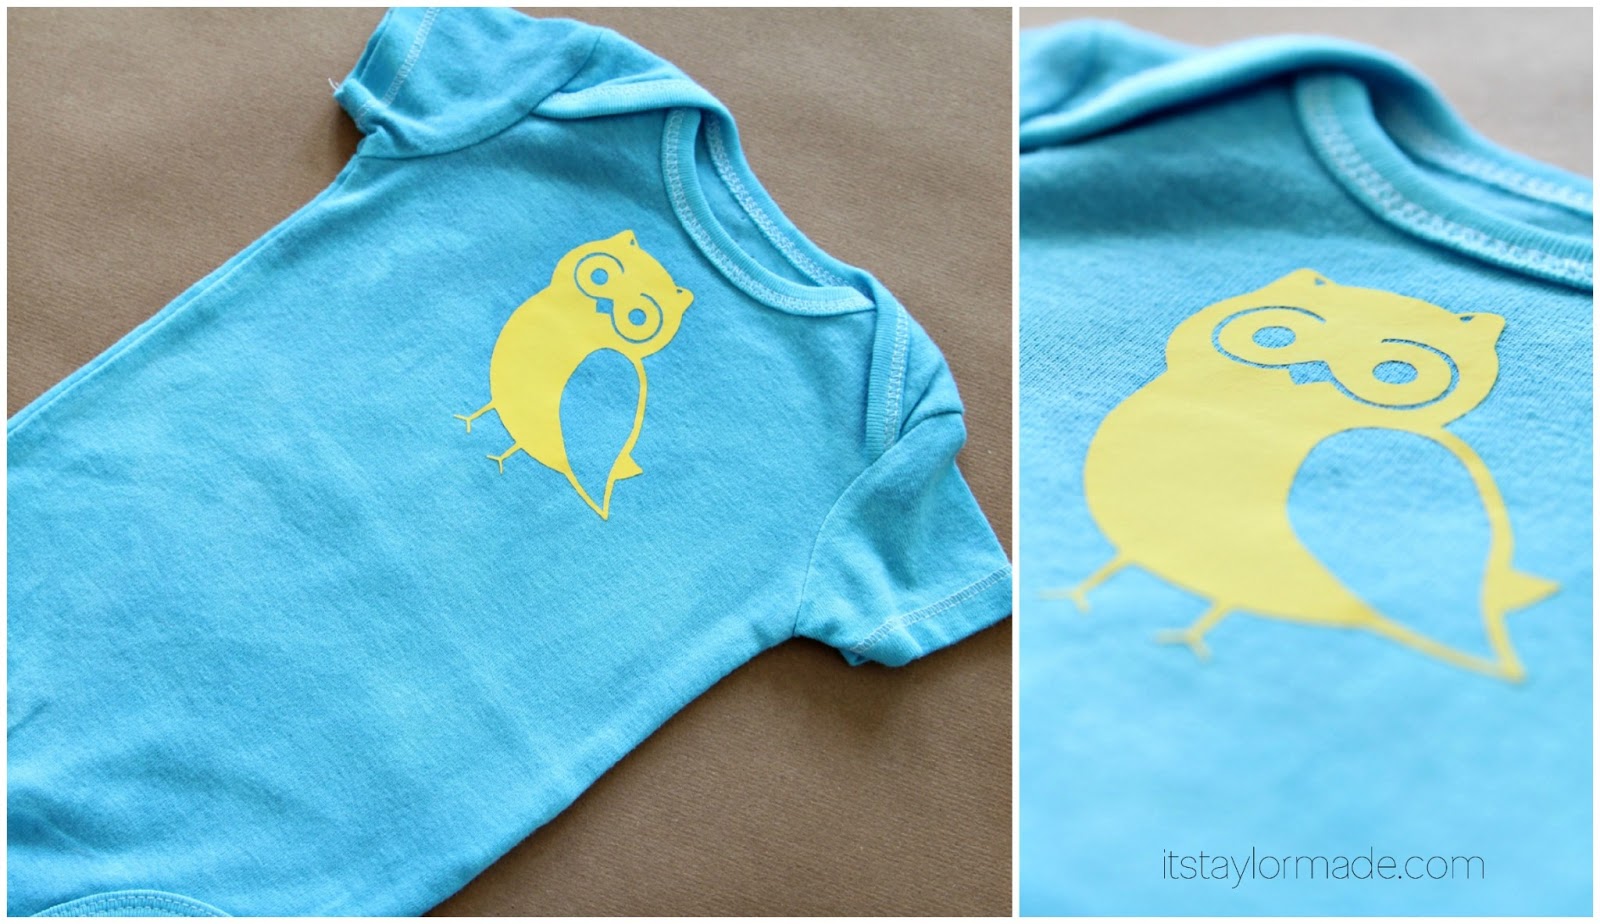
Madi Lou also got a hand-dyed TaylorMade Onesie. You can find those in the shop HERE. 

All girly and all handmade. What is better than that?


Follow on Bloglovin

Filed Under: baby stuff, fabric, girl Tagged With: kids

Fabric Storage and a Craft Room Update

April 16, 2013 By Taylor 12 Comments

Two of my favorite words: Fabric and Storage. If you are new around here, a few years ago I did a little series called “Craft Spaces” here on TaylorMade. I shared MY ROOM and also asked some of my favorite bloggers to share theirs. ( HERE is the link to those rooms) I am kind of obsessed with craft spaces/rooms/studios. I think it’s so fun to see where creative people work and how they organize their tools because these spaces are always so inspiring.


Well, that was over a year ago and a lot has changed about my room. But my favorite part is how I store my fabric :) Nerd alert. I heard about Comic Book Boards for storing fabric a while back so I thought I would give them a try. 

I ordered THESE. (amazon affiliate link)
After organizing my first 200 boards I was in love. I highly recommend them. I use these for anything from 1/4 yd to 4 yds. Anything less I put in a scrap box and anything more I fold for a shelf. An OCD dream!

I also divided my room up with a better “flow”. I have one half for sewing and the other half of the room is for paper crafts. Here is the sewing side behind the sewing machine and serger:

1. fabric on comic book boards – yay
2. my vintage sheet shelf
3. sewing “tools” like scissors, rotary cutter, machine accessories, pins, bobbins, etc.
4. tools I use more often, buttons, elastic and a bobbin winder (which I also recommend)
5. felt
6. small unfinished projects
7. ribbon
8. big stuff – batting and burlap bags
The other half of this shelf houses painting supplies, spray paint, stencils and other silhouette tools, craft books and kids art supplies. I keep my big scrap bin and my big unfinished projects on top of the shelf 

Here is a better look at my vintage sheet pieces I have been collecting for an upcoming quilt.

The other side of the room is for “paper crafting”. I don’t know why I didn’t always have it set up like this – it makes so much sense. I still stick with my mantra that if it is out and it front of you, you will do it. So I keep my Project Life stuff out on the table at all times because you never know when you can sneak in for 45 minutes. I wrote a little about my process on “lazy scrapbooking” HERE. 

fake flowers in a Patron bottle = a craft room must


I bought this Shoe Cubby from Target originally to organize my fabric but I outgrew it and now I love it even more. It holds stationary, blank cards, stickers, washi tape, tags, bakers twine, embellishments… etc

And there you have it. A little craft room update, my love for comic book boards and my love for Patron Bottles as decoration. 
 
An update: I took these pictures about two weeks ago and currently my craft room is no more :( We are listing our house this week and sadly, not everyone wants a dining room turned craft space. I will have to wait a few weeks until we move and I will get it all back (and hug it all). Then I can post all about my new plans. Also, in my next house I would like to refer to it as a “Studio”. Doesn’t that sounds so much more grown up??
Follow on Bloglovin

Filed Under: organize Tagged With: room makeovers

Zipper Pouch Love

April 7, 2013 By Taylor 4 Comments

For Valentine’s Day I always try to make my mom a little handmade something. Mainly because I love making little gifts and sewing for your husband is never as exciting :) And yes I am posting something from Valentines Day in April. 
I used Anna’s Pattern from Noodlehead. It’s the Open Wide Zippered Pouch found HERE. 
I added a little heart by using a reverse applique. 

My favorite part is the little zipper pull with polka dots.

Really easy little gift to whip up. Also, you can never have enough little bags, am I right?

Follow on Bloglovin

Filed Under: fabric, gift, sewing Tagged With: accessories

The Story of my Juice Cleanse

April 5, 2013 By Taylor 12 Comments

I have had a ton of requests for this post. But I didn’t want to write it. 
I posted at the end of February that I was going to do a 10 day juice fast… (You can read all the details about why and how HERE) I got super pumped up and I was very prepared. Let me just spoil the ending of this for you – I didn’t make it 10 days. I couldn’t even make it 5! 
I explained in my first post that the reason I wanted to do this juice cleanse was because I felt like my family wasn’t eating enough vegetables, plain and simple. I don’t even like many vegetables. So, I thought this would give me a boost and a little cleanse so I could start bringing more juice into our regular diet. I make juice weekly but only about a gallon- which the kids and I drink in about 2 days. We love our juice but I am no expert! I honesty thought it would be easier. Isn’t that always how it works? When you are all full and happy you think, “Oh I can totally do that!”.

Here are some things I learned, what I did that worked and what I did that didn’t work…
Cost:
A big complaint I hear about juicing is the cost. I get it… produce is expensive but if you think about what you are getting it really isn’t the bad part for me. We buy stuff to make good healthy dinners 3-4 nights a week. I don’t buy frozen or canned vegetables on these nights. The other nights we make something easy and cheap like hot dogs, pizza or spaghetti. And we eat out about twice a week. So the week that I bought the produce it was a lot cheaper than my regular grocery bill. I bought ALL THIS for $38. This made enough juice for about 3-4 days, but that was just for me.


Prep:
I think this is two fold. One part is physically prepping, cleaning and cutting the fruit. I scored a 100 on that. The other part is getting your body ready for this cleanse. I scored a 0 on that one. I went out with some girls the night before and ate a ton of carbs and wine :/ Don’t do that! 
I have heard from some that they make juice as they go. My mom and sister actually do that. Juice is “good” for 72 hours so I like to make enough for those 3 days then make more when I’m out. I think if you have the juicer out and dirty then use it. But then there is some that believe that the juice starts to breakdown and looses some of the essential vitamins. I think hey, I’m drinking broccoli- I’m calling this a win.
Next step- washing, cutting and peeling as needed. To go from this…

to this… took a little over an hour. Juicing is kind of a labor of love.


Juicing:
Now to the best part. My kids love the juicing. A lot of people asked me about recipes. I don’t really follow any. I just throw stuff in that I think would be a good combo. Again I am not an expert but here are some tips I have learned…
-If you are juicing the peel (apples, carrots, peaches etc) then wash it very well. You don’t want to juice pesticides
-If it has leaves like carrots, beets or celery then juice with the leaves on
-You can juice citrus with the peel on but it’s very bitter, I peel but leave the white part on for juicing
-Leafy greens are so good for you (parsley, kale, spinach, lettuce) but they don’t produce much juice- I still always include at least 2 in each juice
– I try to have more vegetables than fruit so that I don’t get all sugared up
-Sweet potatoes are really chalky, so I let the starch settle to the bottom. It sits in the fridge for a day then I don’t stir it up as much so it stays down there
-Pineapple and Mango make anything super creamy, almost like a smoothie :) 
-You can juice any fruit and veg except white potatoes, avocado, bananas and mushrooms (I read that on my juicer and choose to believe it)
Storing:
I labeled as I went, it’s not necessary but I thought it might help in case I came across something I loved or hated (ex: I learned I don’t like cabbage in juice and love pineapple, ginger and lemon). I used Mason Jars and wrapped post its around with a rubber band. 

I used the Mason Jars because I read it is better if the juice is air tight. I don’t know if that is true but it was convenient to have it all separated and just grab one when I needed it.


The Hard Part:
When I did my research on this juice fast, I heard the first 5 days are brutal. I knew that going in. But preparing for hard vs. being really hard are two different things. The first day I was actually OK. I thought this is great, I can do this. Day 2 I woke up and had juice around 9:00. About an hour later I got pretty hungry. I had 4 juices the first day. I think that might have been my first problem.  I read somewhere you should have 65-95oz of juice daily. I don’t think I was having enough. But here was another problem we had… in the famous words of my sister on day 2 “This cleanse makes you hate juice”. Seriously no one likes juice more than me and I just got so burnt out on it. After 4 huge glasses they last thing I said was mmmm, toss me a cold juice, again. So back to day 2.. I was hungry and it was only 10 so around 11:30 I had another one but again, an hour later I was really hungry. This continued all day and I was grouchy and starving that night. Day 3… repeat of day two but more grouchy. Day 4 I woke up and was almost in tears, I drank another juice which of course held me over for an hour. Then it was lunch time and I cracked…. I posted this to instagram:
I only had about 3 tablespoons of kale salad (all raw) and 4 cashews but I felt like a new person.


I also felt like I had failed. My mom lasted almost 6 days and my sister and I lasted 3. It was much harder than I thought. My friend Melissa posted on this picture that when she did her juice fast she had to have the “nut juice” (worst name ever). But it’s basically a cashew or almond milk with stevia and cinnamon. Next time I would definitely do this in the evenings so I don’t wake up so hungry. Also, looking back and reading more I think 10 days was a little ambitious. I should have started with 3 which is ironically how long I made it. 
My Juicing Future:
I really am glad I juiced for a few days. I even want to go it again! This time for 3 days and with some nut milk included :) I also want to try a prepackaged cleanse one day. I love making my own juice but I would like to compare and see how much you really get. We have started having juice more regularly which is what I wanted. My kids ask for “homemade juice” all the time. I think of it as a permanent part of out diet now.

Do you have any tips to add? Any thoughts or comments? Or questions… not like I’m the expert on juice but maybe I came across something… ask away 

Follow on Bloglovin

Related Posts Plugin for WordPress, Blogger...

Filed Under: Uncategorized Tagged With: drinks

  • « Previous Page
  • 1
  • …
  • 29
  • 30
  • 31
  • 32
  • 33
  • …
  • 66
  • Next Page »

Welcome to Taylor Made

http://www.taylormadecreatesblog.com/about-me Hi Yall! I'm Taylor... an artsy mom of three from Houston, TX. I love sewing, collecting floral fabric, eating Mexican Food, photography, brights colors, rearranging, and rolling clay. Taylor Made Creates is all about creating a fun, colorful home, sewing cute things and eating good food. Check out my SHOP HERE HERE! Thanks for stopping by!

Search

Pin with me!

Like Me :)

Facebook Pagelike Widget

More Recent Posts

  • Kid's Animal Room
  • Kids Camping Shirts
  • Mermaid Birthday Party
  • Conversation Heart Cold Packs
  • Holiday Apple Tea Punch
  • Purple Princess Costume
  • Letterboard Costume
  • La Croix Costume

FAVORITES

  • Vintage Sheet Quilt
  • Union Jack End Table
  • Winged Peasant Dress
  • Siberian Husky Costume
  • DIY Leather Tote
  • Handmade Mother’s Day: Recipe Oven Mitt
  • Octopus Costume
  • Adorable Girl Clothing (found on Amazon)
  • Sweet Dreams Puppy Pillow

Copyright © 2026 · Web Hosting By RFE Hosting