TaylorMade

DIY, Home Decor & Sewing

  • Home
  • SHOP
  • DIY & Sewing
    • For the Home
    • Sewing
    • Costumes and Holidays
    • Cricut Projects
    • Crafting
  • Parties
  • Recipes
  • Home Tour
  • Favorites
  • About

an “April Showers” Baby Shower

May 22, 2013 By Taylor 5 Comments

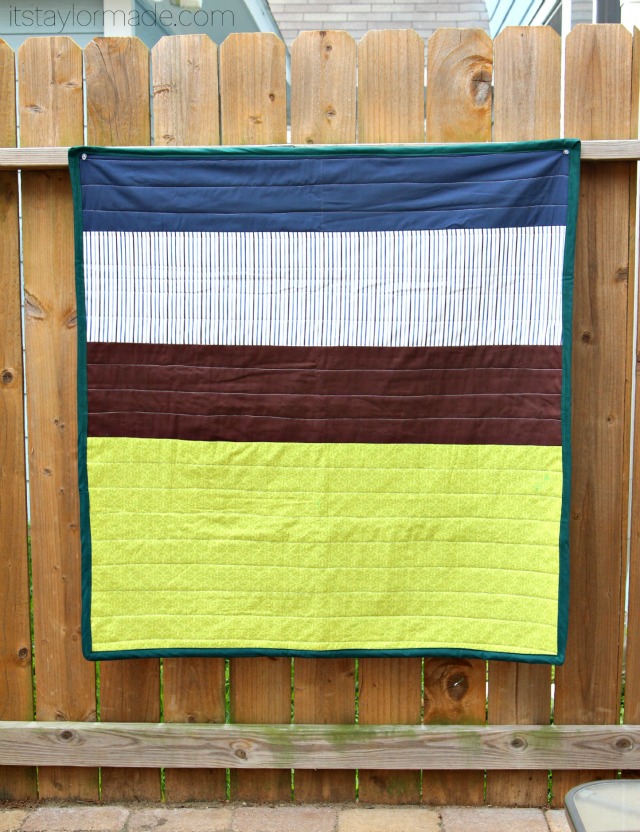
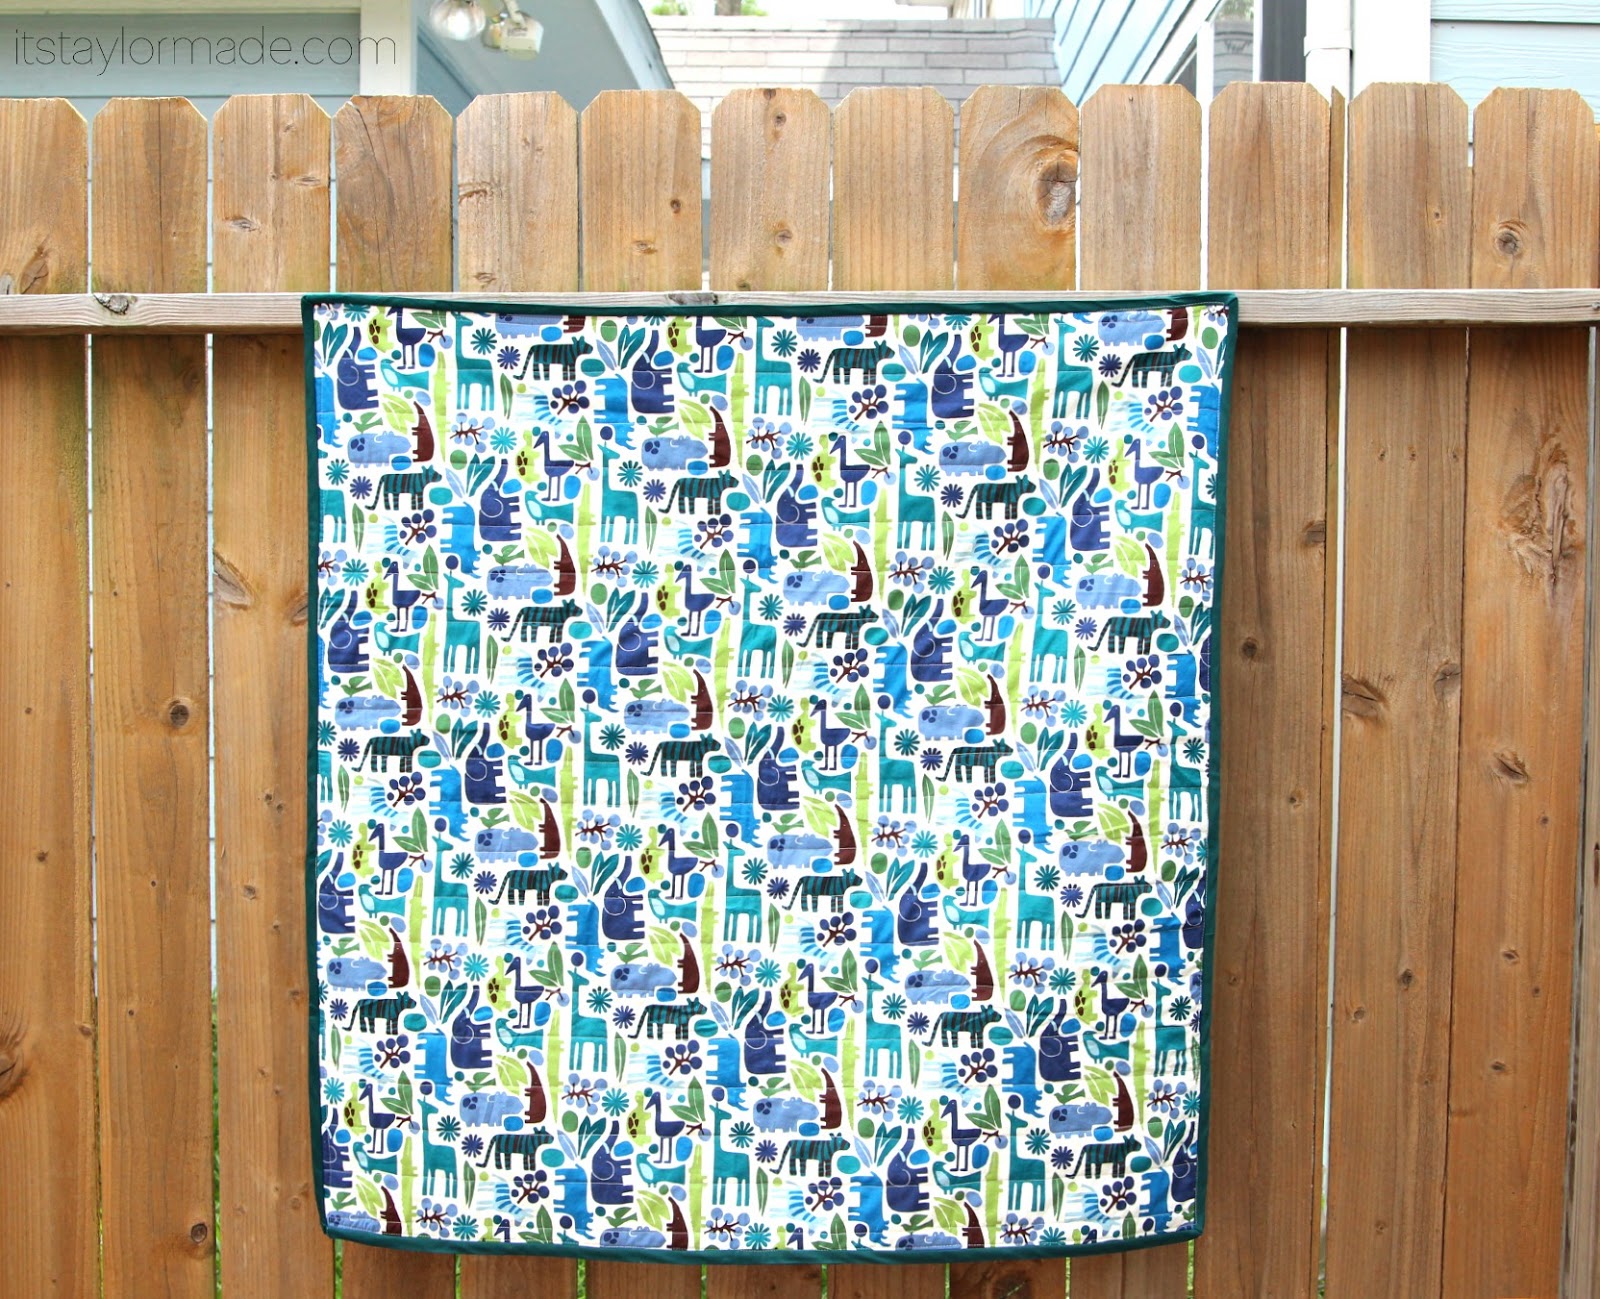
Remember this quilt I made my cousin last month? My mom, sister and I also hosted a little family shower for the new Mommy-to-be. Jamie is our only girl cousin and even though she lives 3 hours away, she has a lot of family here in Houston. My sister hosted at her condo in the Heights because it is centrally located.


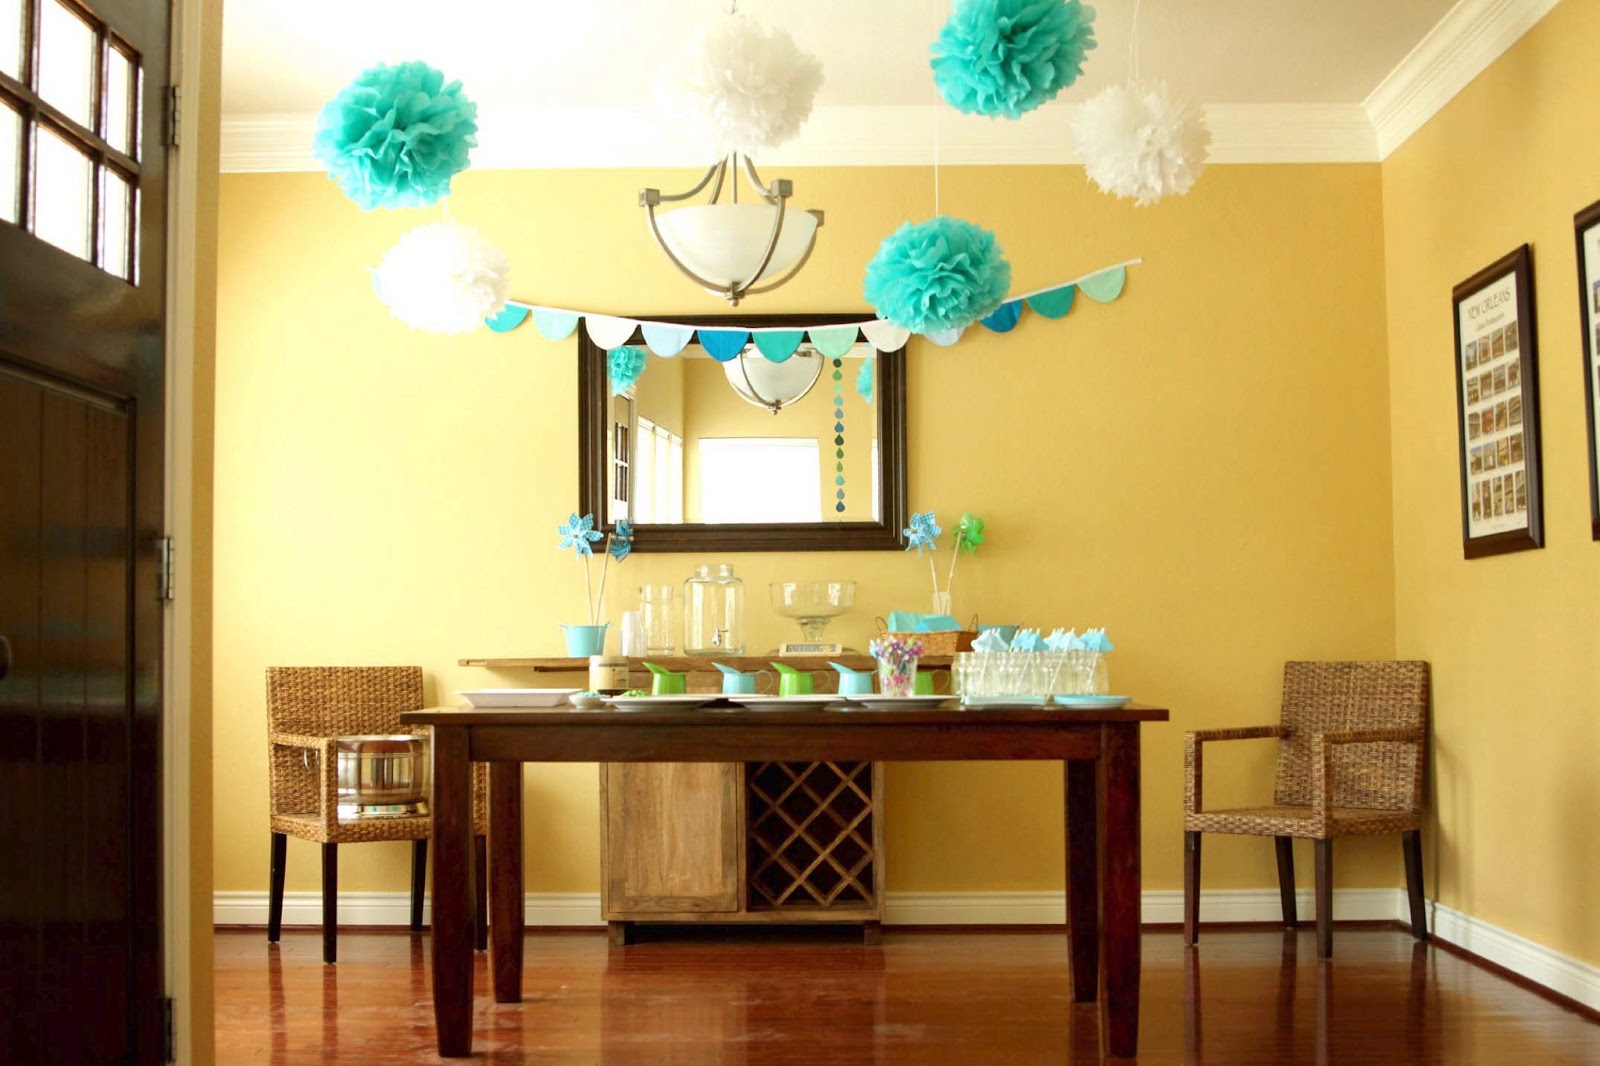
We decided on an “April Shower” theme. We kept it casual with our decor and food. I made a cute scalloped bunting and some rain garland. My mom and sister did a lot of the decor too (and mom thought of the cute poufs) and we all pitched in on the food. My sister also made the best punch!

I loved the invitations too- I found them online and they were so perfect for the theme. The invitation shop emailed a PDF in our custom colors and I had them printed at a local copy center.  

I used my Cameo to cut out pages and pages of raindrops from cardstock, then I sewed them together.

We hung them over the gift table in my sisters sitting room. Also, isn’t her map chair the cutest!?
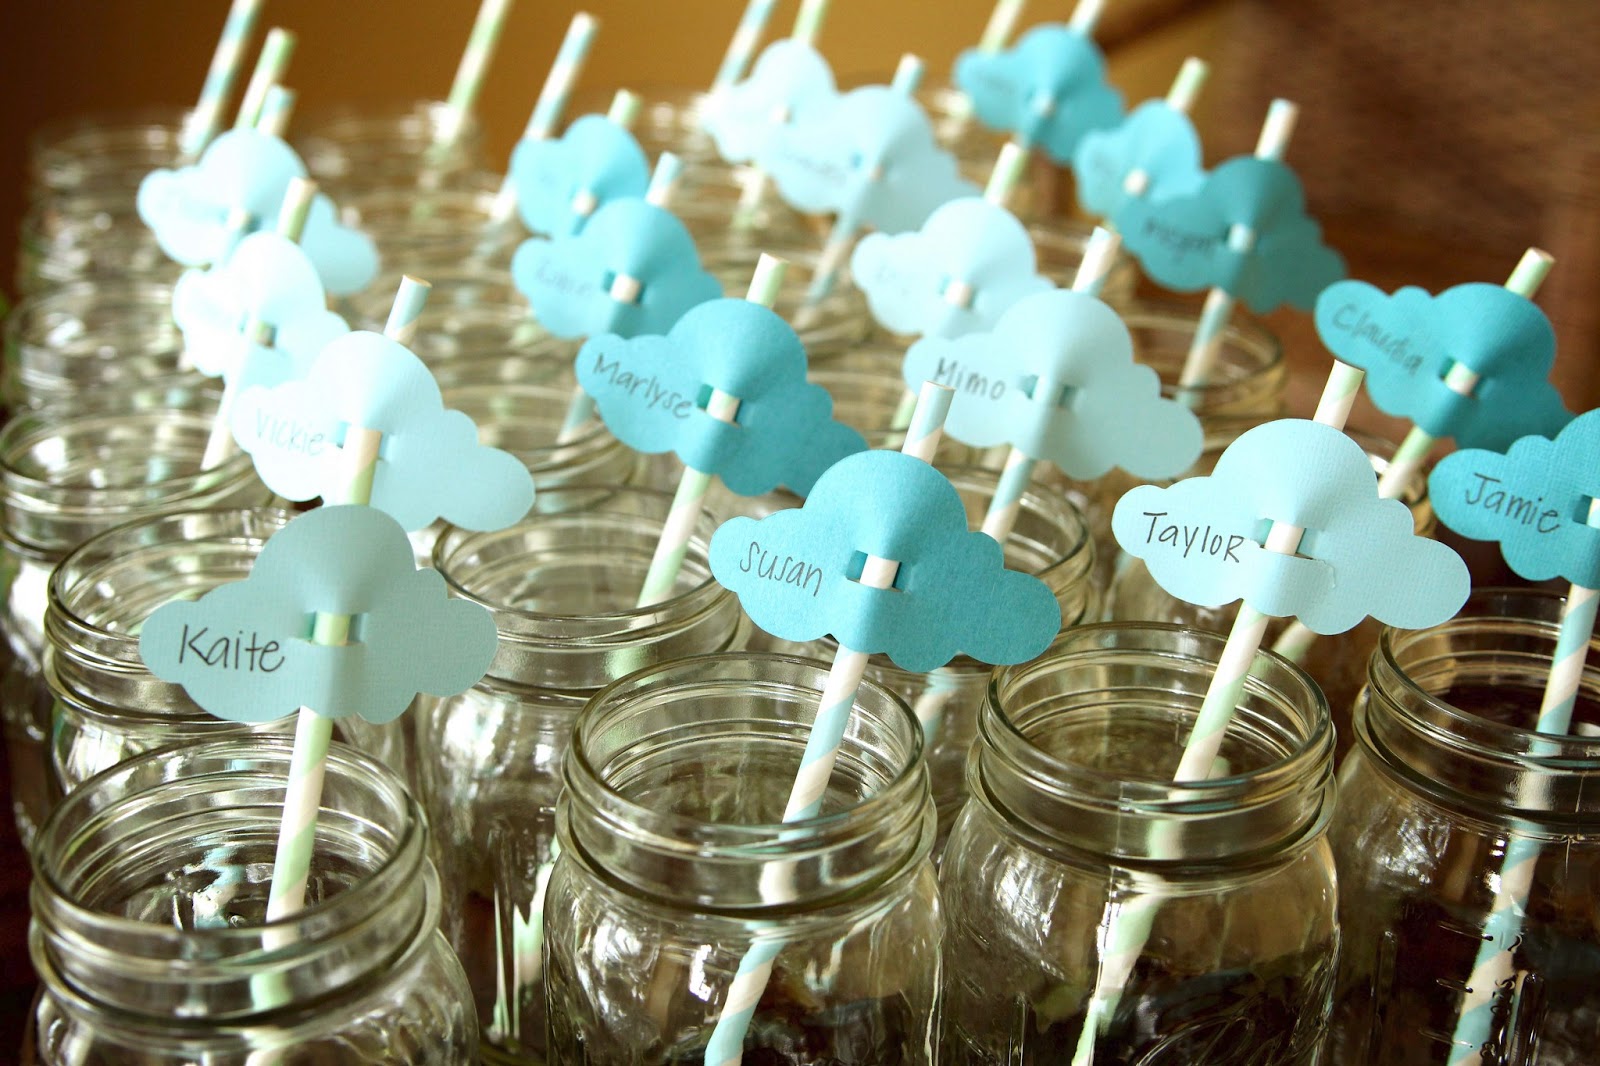
I also used my Cameo to cut out the clouds for the “straw name tags” – which might have been the cutest things ever. We hit every trend possible with punch in mason jars and paper striped straws :)

My mom found pretty M&M’s and pinwheel toothpicks at the party store. We served Crave Cupcakes, in chocolate and red velvet. We also had tea sandwiches, fruit kabobs, cheese and pigs in a blanket. My sisters punch was another big hit! She juiced fresh oranges and lemons in her juicer, added grenadine and ginger ale then floated pineapples and strawberries on top.

I’m so glad we got to celebrate “baby E” before he gets here this summer :) 

Follow on Bloglovin

Filed Under: party Tagged With: parties

How to Save Your Leaves – Leaf Art

May 15, 2013 By Taylor 7 Comments

Last fall my Mom, Sister and I took a girls trip to the East Coast. It was on my Mom’s bucket list to see the leaves change and we came along for the ride :) Here in Texas we have no seasons… we have warm, hot, hotter, warm again then a series of cool fronts for a winter with mild days between. We were in awe with all of the colors and the history of the cities. The locals there told us we “were a week late” to see the really good colors- Of course we didn’t know that! To anyone who lives on the east coast and sees this every year- I think you take this for granted.


I wanted a way to “save” some leaves so I placed them away in a notebook and brought them home. My mom is going to start a gallery wall for her office so I though some leaf art from New England might be the perfect touch. 
I measured the frame and used craft paper cut the the right dimensions and taped it down.

Then I mod podged the back of the leaves and placed them on the craft paper where I wanted. 

I pressed them down a little and then mod-podged the tops. Careful not to get it too thick outside of the leaf or it will dry darker. 

Then I added a little trip reminder.

The Mod Podge makes the paper a little “rumply” so I stacked book on top after it dried. 

Then frame it. The Mod Podge has sealed in the colors so far so hopefully they don’t fade too much. 

So who all is from the East Coast and gets to live in this beauty… and who is with me on no seasons?
Follow on Bloglovin

Filed Under: craft, home goods, Mod Podge Tagged With: crafting

Handmade Mother’s Day: Recipe Oven Mitt

May 3, 2013 By Taylor 12 Comments

I’m so excited to be a part of the Mother’s Day Handmade {Love} Series!
 photo mothersday_horizontal_zpsf7ed046c.jpg
Kelly, from live.laugh.rowe organized the series. I met Kelly at Blissdom and she is an amazing person; she put together a great group of bloggers who are each sharing a different Handmade Mother’s Day Gift. Yesterday, Kristi from I Should Be Mopping the Floor shared her Printable Coupon Book. I also became friends with Kristi at Blissdom last month :) Check out her project HERE. 
I knew I wanted to do a sewing project and I’ve actually had this idea in my head for a while. A recipe on an oven mitt… cute and functional right? 
Here’s what you need:
-two large fabric scraps
-insul-bright
-insulbright oven mitt pattern
-a printable fabric sheet

When you buy the Insulbright, It comes with this oven mitt pattern. The directions are actually printed right on the pattern too. I followed those directions exactly and they are really simple.
For the printable fabric sheet you need to design your recipe. Make sure it fits within the size of the mitt pattern. You will also want to get the washable fabric sheets. My instructions told me to print and wait 10 mins, then iron for 1-2 minutes. Then I had to spray with cool water and iron again- now its machine washable! Then just trim with an inch or so around the recipe.
To sew the recipe fabric and mitt fabric together this is what I did:

Place the two fabrics right side together and line up the edges. Then sew the right side. Press seams toward the outside fabric. Do the same steps for the left side. 

Then you need to trim the fabric on the sides. Draw a straight line through both side fabrics and the recipe fabric. Do this for the top and bottom and trim. You will have a rectangular strip now. Then repeat first steps with top and bottom fabric. Be sure to press seams out. Then you will have something that looks like this…

This is now your fabric to trace your mitt pattern onto. Follow the instructions on the pattern. 

Cut out all pieces. 2 of each- inside fabric, outside fabric and insulbright. Be sure to flip the pattern for the 2 different sides, I forgot for one fabric and had to redo it :( 

Then you will make 2 “insulbright sandwiches” with the two other fabrics right side out. Zig Zag stitch around the edge and trim. 

Then you will make a bias tape edge on both sides of the mitt and add a 4″ ribbon into one side for hanging.

You will have 2 sides. Then put the two outside fabrics together and sew around the edge (not the bottom edge) and flip.

I found this lemon bar recipe online because this fabric looked “lemon-y” to me. But it would be fun to print out a family recipe that has been passed down from generations of women!

Be sure to stop by Capturing Joy tomorrow and see what Kristen shares :) 

Follow on Bloglovin

Filed Under: fabric, gift, sewing, tutorial Tagged With: home goods

a Modern Baby Boy Quilt

May 1, 2013 By Taylor 28 Comments

With all of my baby girl crafting did you even know I could make something for a boy? I was surprised I still had it in me. I have also been surprised by how many new baby girls there have been around here. But this post isn’t about girls, its about a baby boy. My only girl cousin is due with her first baby this summer and I am so happy for her little family. They will make awesome parents and I can’t wait for the boys to have another “young” relative :)

My mom, sister and I hosted a small family baby shower for Jamie and Baby “E” a few weeks ago. I will share all the shower deets here next week. I wanted to make him something he could keep for a long time so I settled on a quilt. It is modern and bright. The nursery is actually much more neutral but I figured this could be an on-the-go quilt. 

I still love this print on the back- I knew I was hoarding it for a good reason.

This is my 4th quilt to actually finish. I also have about 6 unfinished quilt tops. I have not yet worked up the courage to hand quilt the binding… for those of you that do that – Bravo! Anyone else a machine binding cheater like me?

Follow on Bloglovin

Related Posts Plugin for WordPress, Blogger...

Filed Under: boy, fabric, quilt, sewing Tagged With: quilts

  • « Previous Page
  • 1
  • …
  • 28
  • 29
  • 30
  • 31
  • 32
  • …
  • 66
  • Next Page »

Welcome to Taylor Made

http://www.taylormadecreatesblog.com/about-me Hi Yall! I'm Taylor... an artsy mom of three from Houston, TX. I love sewing, collecting floral fabric, eating Mexican Food, photography, brights colors, rearranging, and rolling clay. Taylor Made Creates is all about creating a fun, colorful home, sewing cute things and eating good food. Check out my SHOP HERE HERE! Thanks for stopping by!

Search

Pin with me!

Like Me :)

Facebook Pagelike Widget

More Recent Posts

  • Kid's Animal Room
  • Kids Camping Shirts
  • Mermaid Birthday Party
  • Conversation Heart Cold Packs
  • Holiday Apple Tea Punch
  • Purple Princess Costume
  • Letterboard Costume
  • La Croix Costume

FAVORITES

  • Swan Wings + Hello Ollie Fabrics
  • Vintage Sheet Quilt
  • How to Glaze Furniture
  • Siberian Husky Costume
  • Adorable Girl Clothing (found on Amazon)
  • Color Wheel Clock
  • DIY Chalkboard
  • Easy Light Switch Covers
  • DIY Roach Costume

Copyright © 2026 · Web Hosting By RFE Hosting